
Download the 3D files here and print each of the files using supports and 3 top and bottom layers for light tightness. You can also send the an STL file with all the pieces to any print service (try Craftcloud3d for a pretty good quote in your area),, or you can order them from PCBWAY which quotes around $38US for this project.
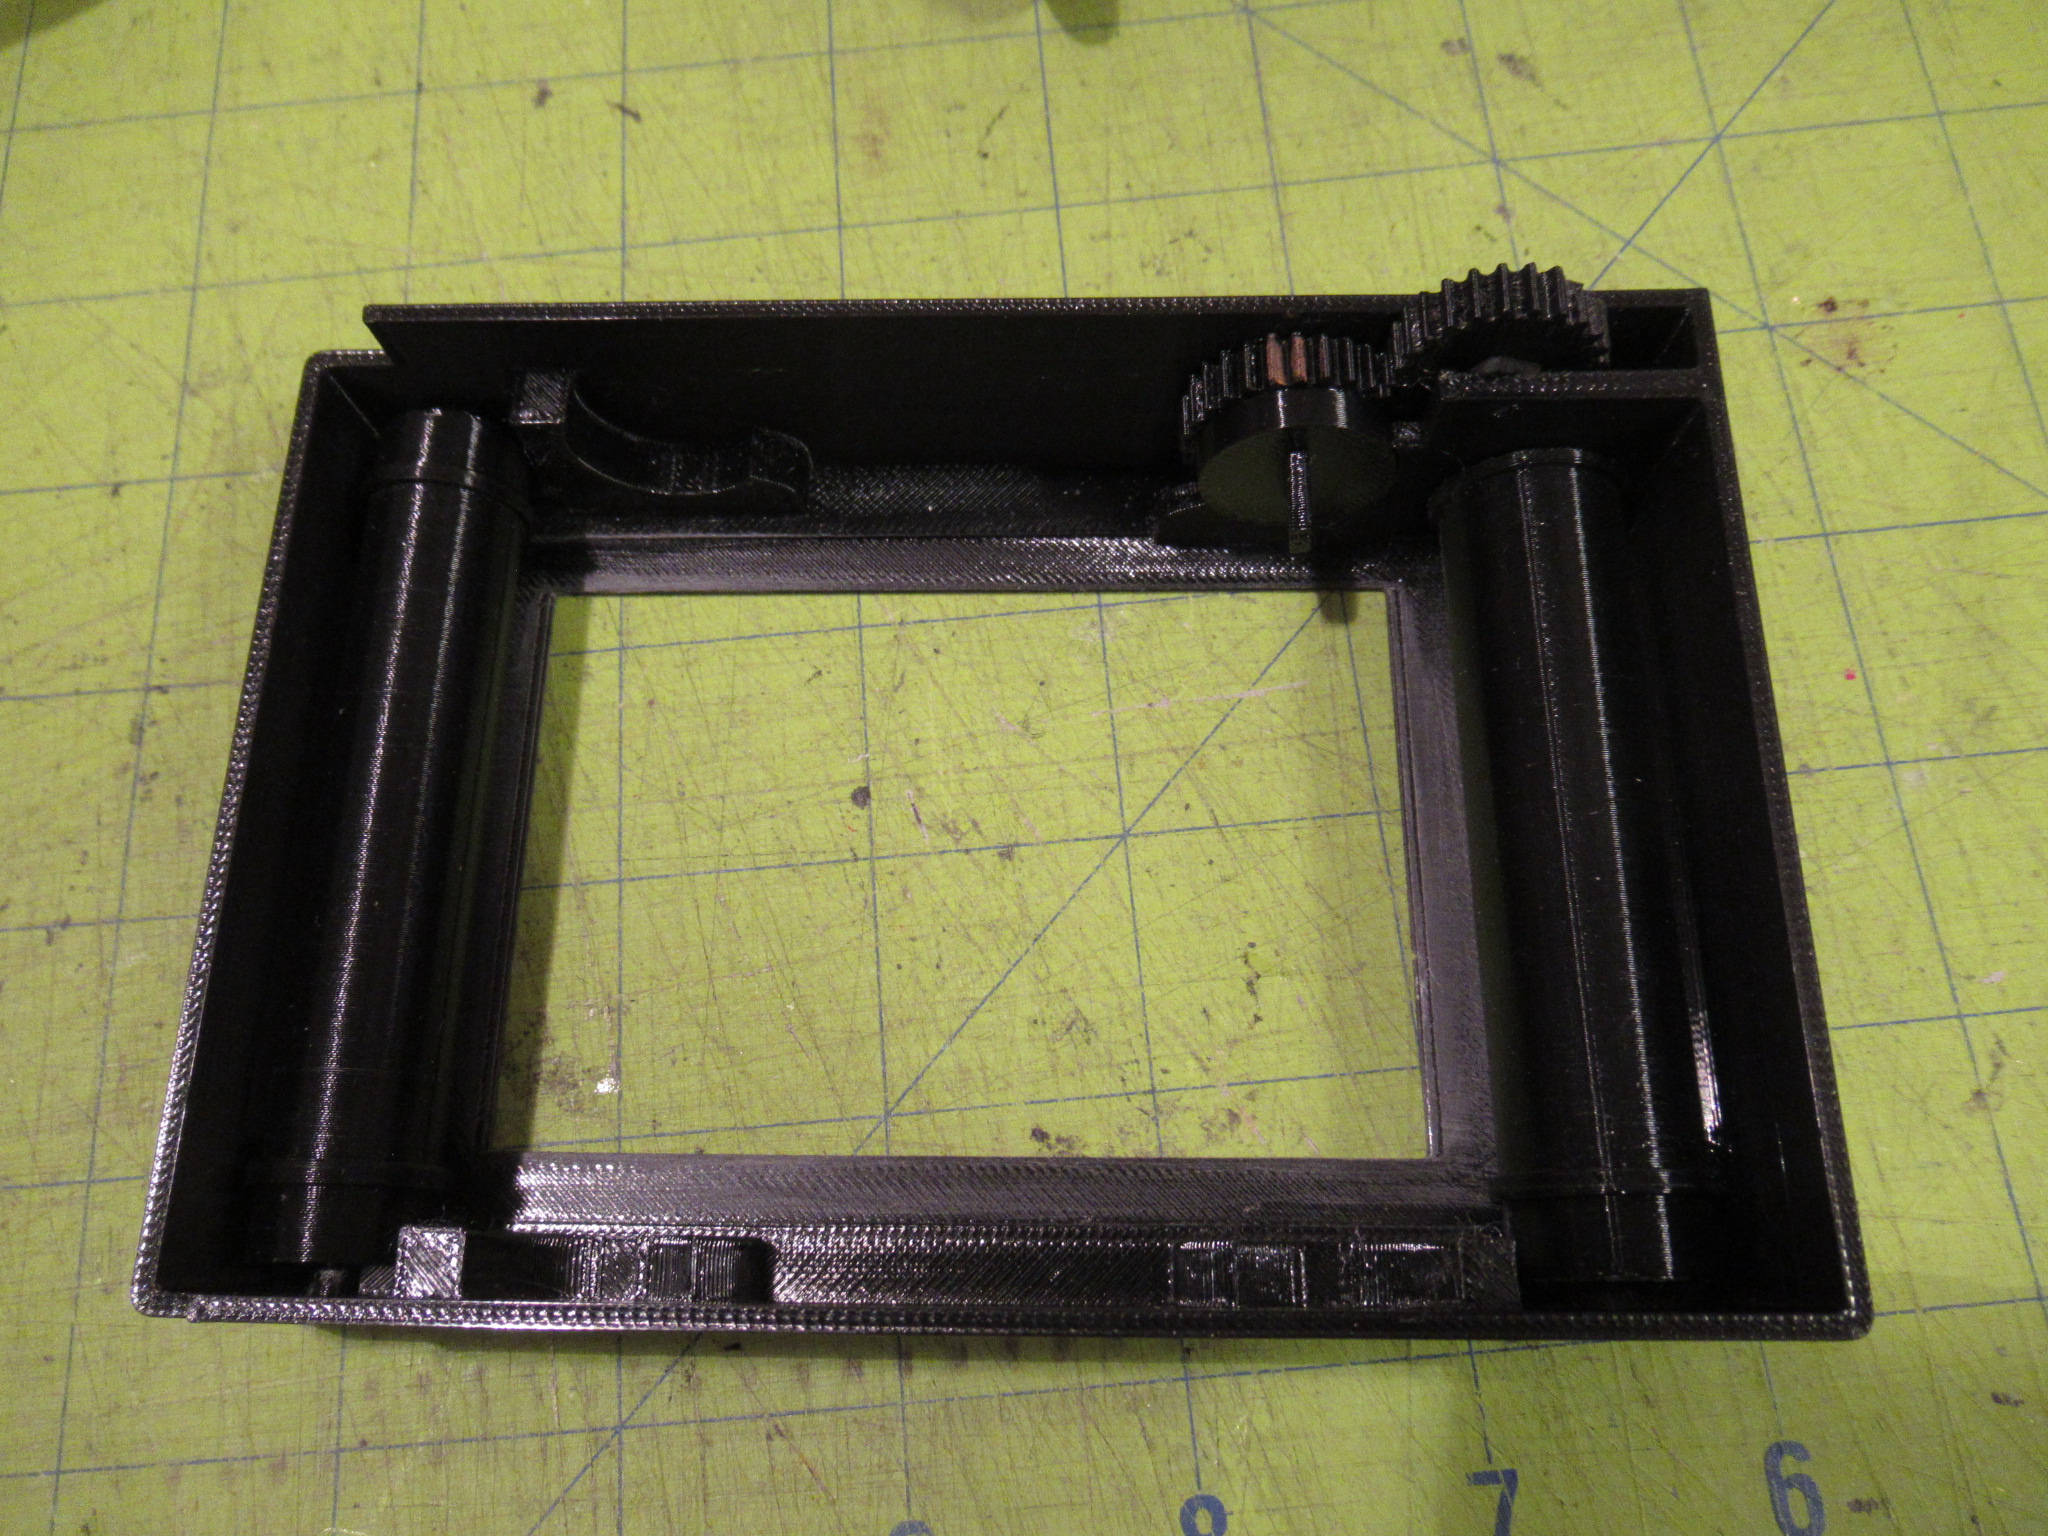
Insert the drive gear in the upper left of the cartridge. It'll install with a gentle snap. Mount the thumb gear in the two holes to the right of the drive gear with a small screw or pin (an old Polaroid hinge works) and be sure it turns the drive gear easily. IMPORTANT: mark the top of the drive gear (white paint) when the drive tab is vertical. This mark will be used to remove the film spool.
The roller ends were made slightly too large, so file off the ridges and file them them down slightly and evenly until the rollers fit into the indents in the sides of the cartridge and spin freely. A little resistance is acceptable. Don't file them down too much or they'll dislodge while operating.
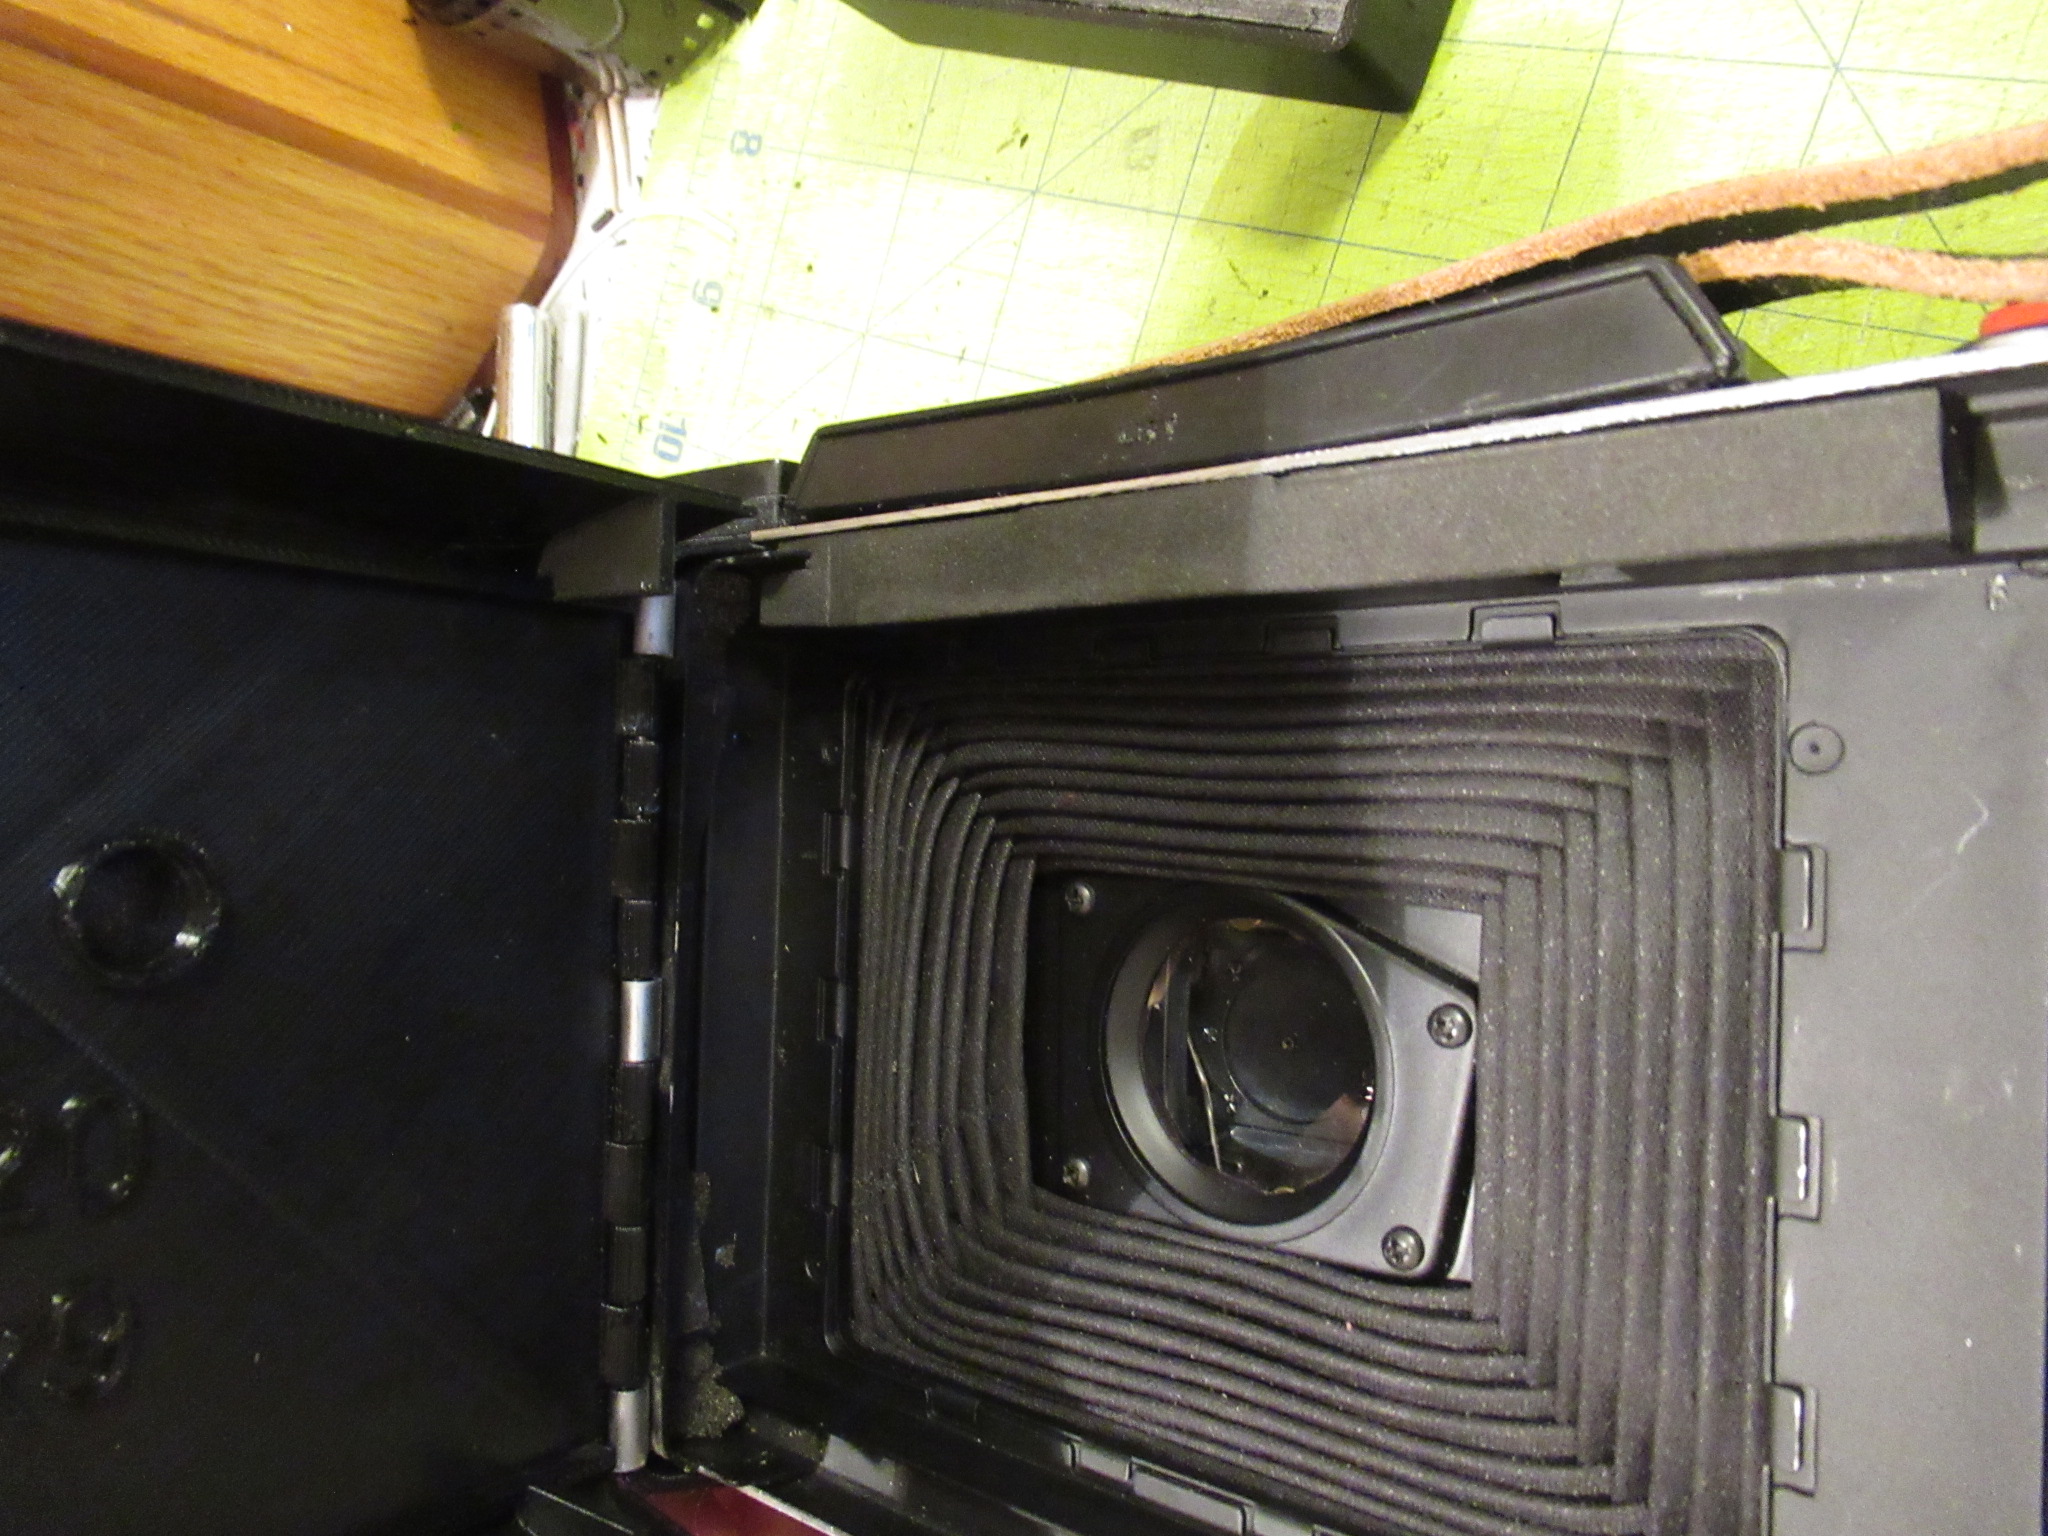
Remove the original back door by removing the hinge (you may have to remove the plastic pieces at both ends of the hinge) and install the new door. It may be tricky to align the hinge while inserting it. It would be best to insert the hinge pin into the 3D printed door before installing it, to ensure the print left enough room for the hinge. Close the door while pressing on the release latch and be sure the latch engages securely. If the latch doesn't seem to return freely, file a bit off of the bottom and tip of the latch hooks on the back. Be careful as the hooks are somewhat fragile. You can either cut/glue a red filter over the film counter hole, or you can place a piece of black tape over it to prevent light leaks through the exposure counter hole.
Line the top edge of the film compartment with 2mm black craft foam to prevent light leaks from the top of the door. Alternatively, you can glue a piece of craft foam onto the outside of the cartridge, butting it up to the top of the film bay while it's installed in the camera.
| Insert the end of the film roll under the left roller face down | 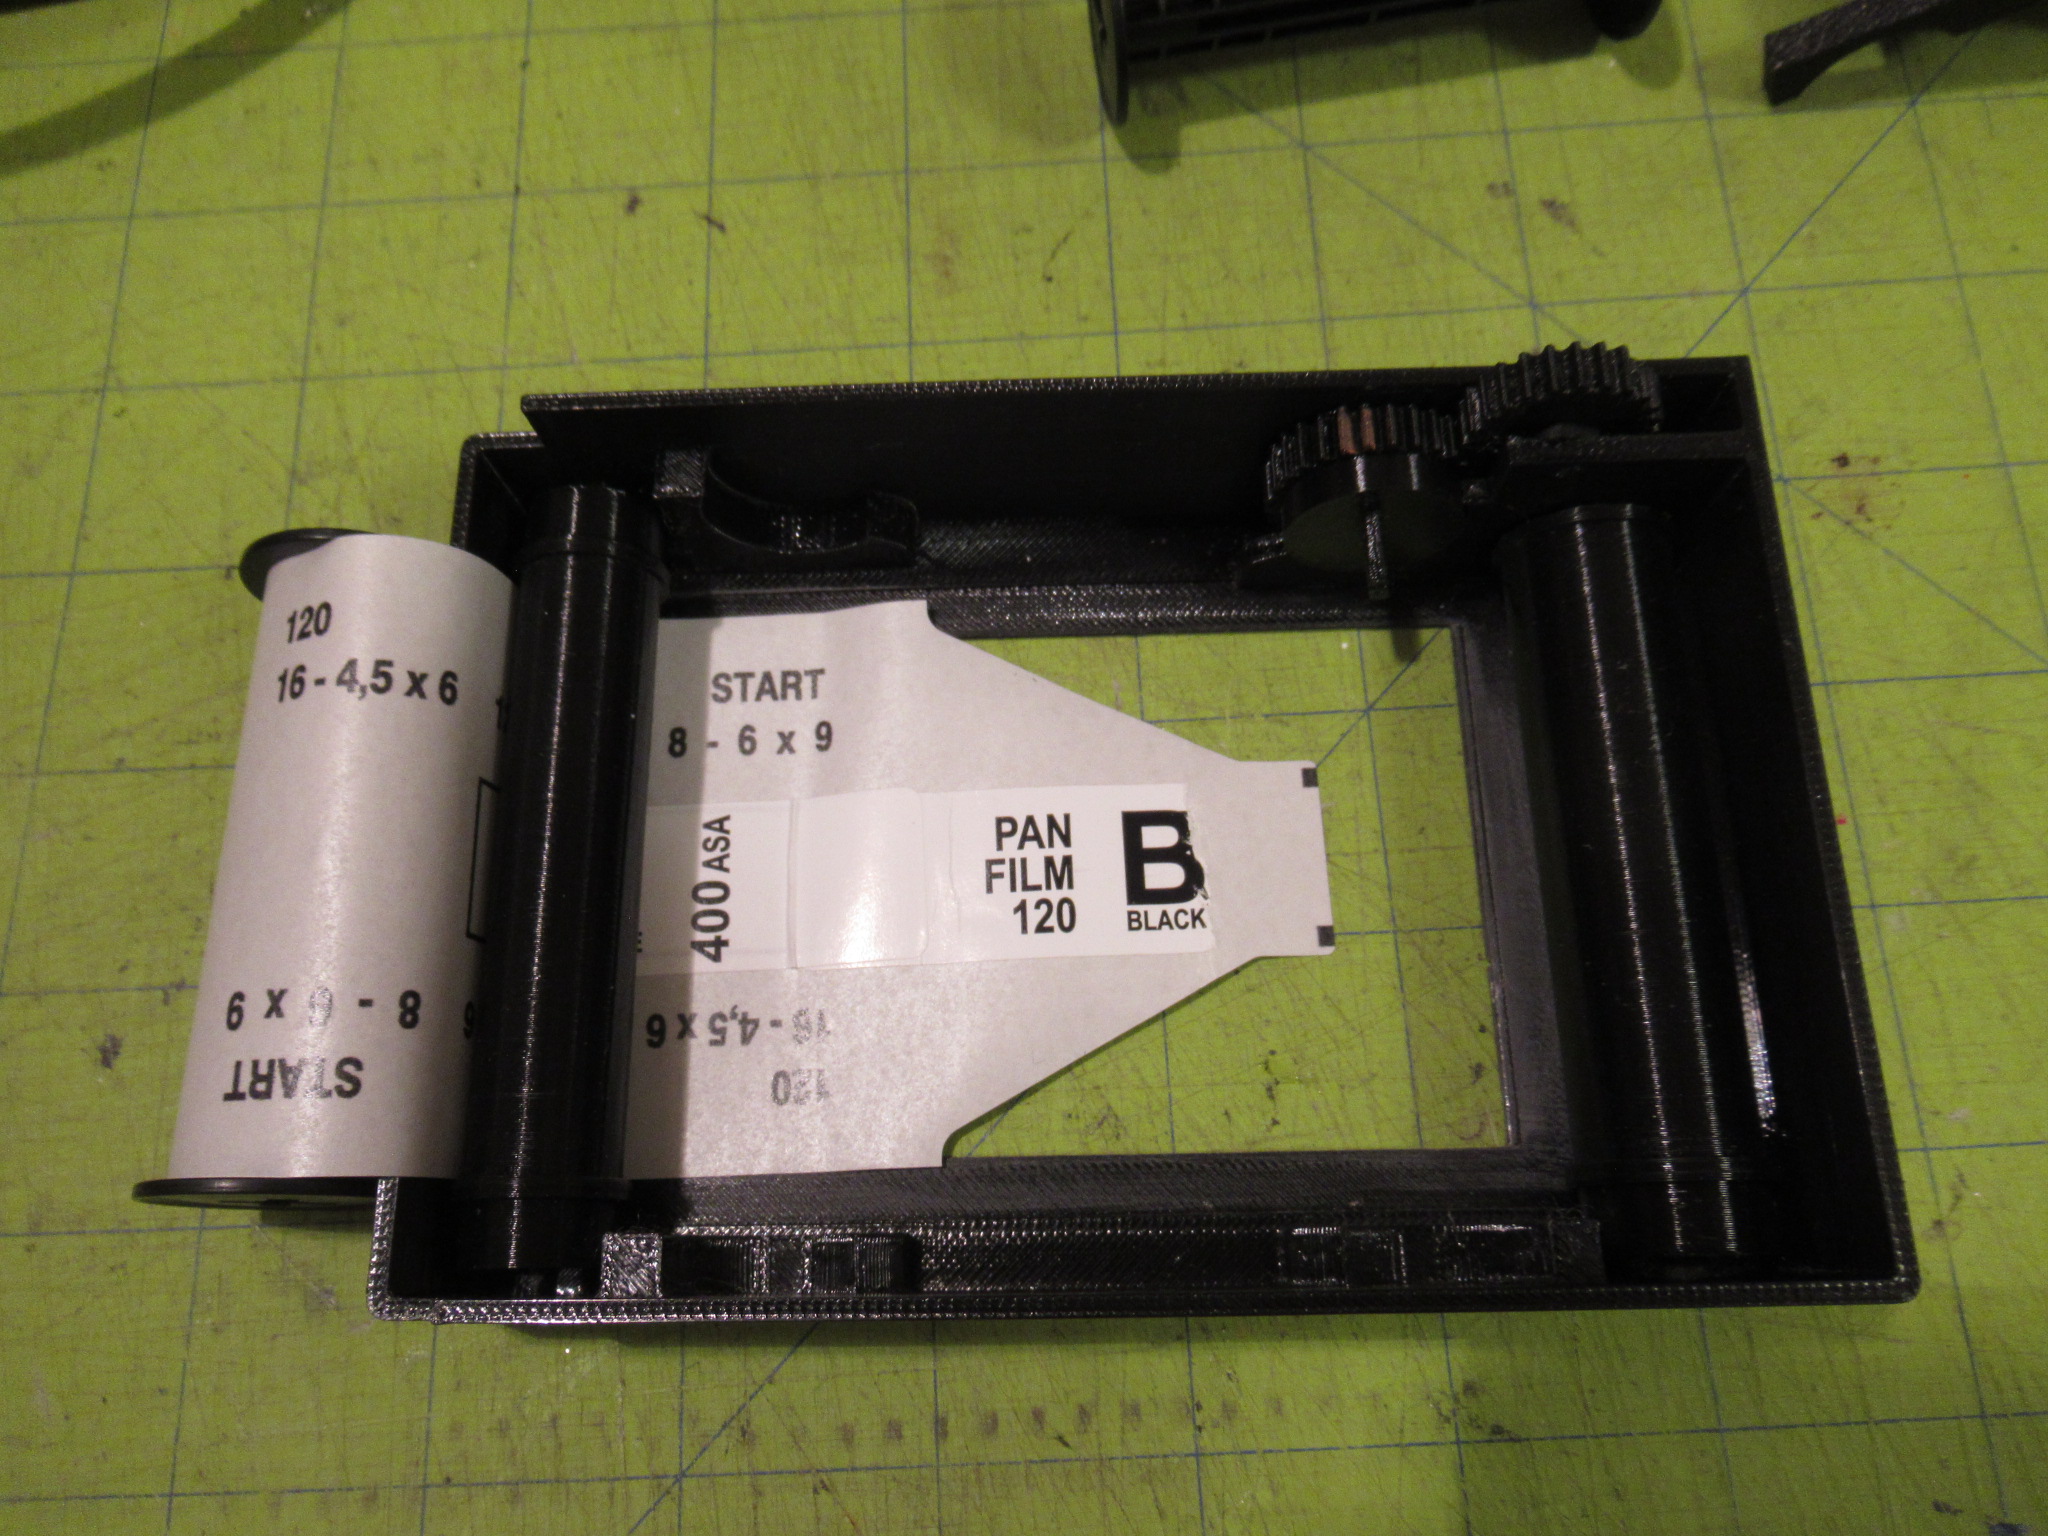
|
| Draw the film across the cartridge and under the right roller | 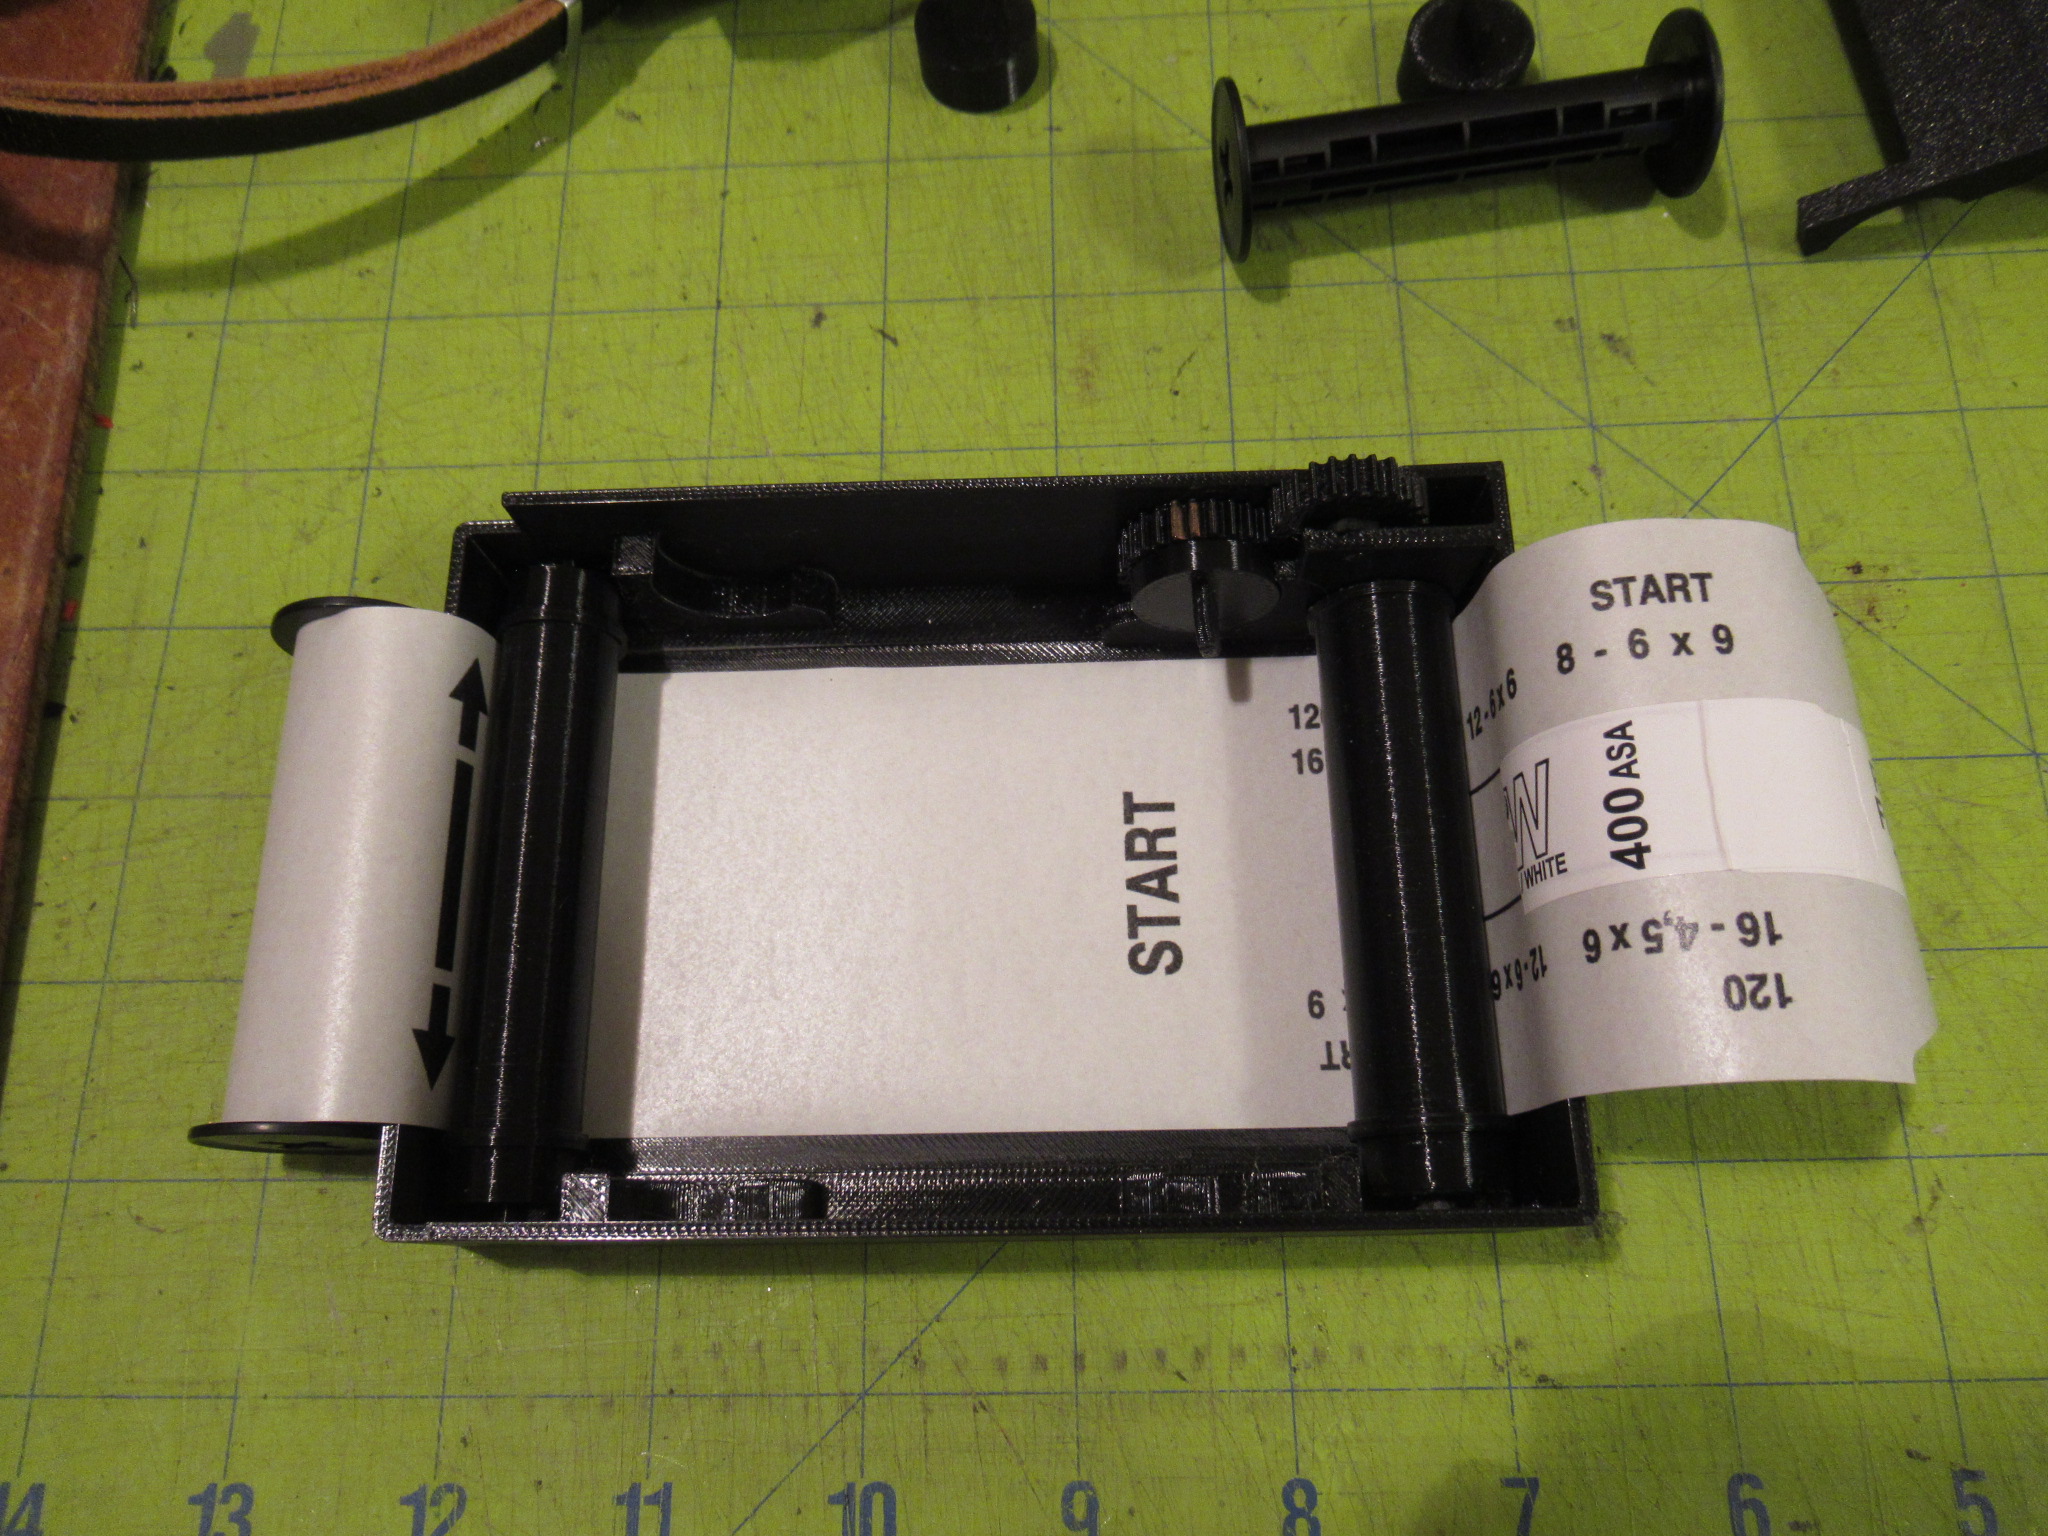
|
| Align the drive tab so it is vertical, then install the pressure plate by inserting the left side under the roller first, then lower the right side being sure that the drive tab slips through the slot in the pressure plate | 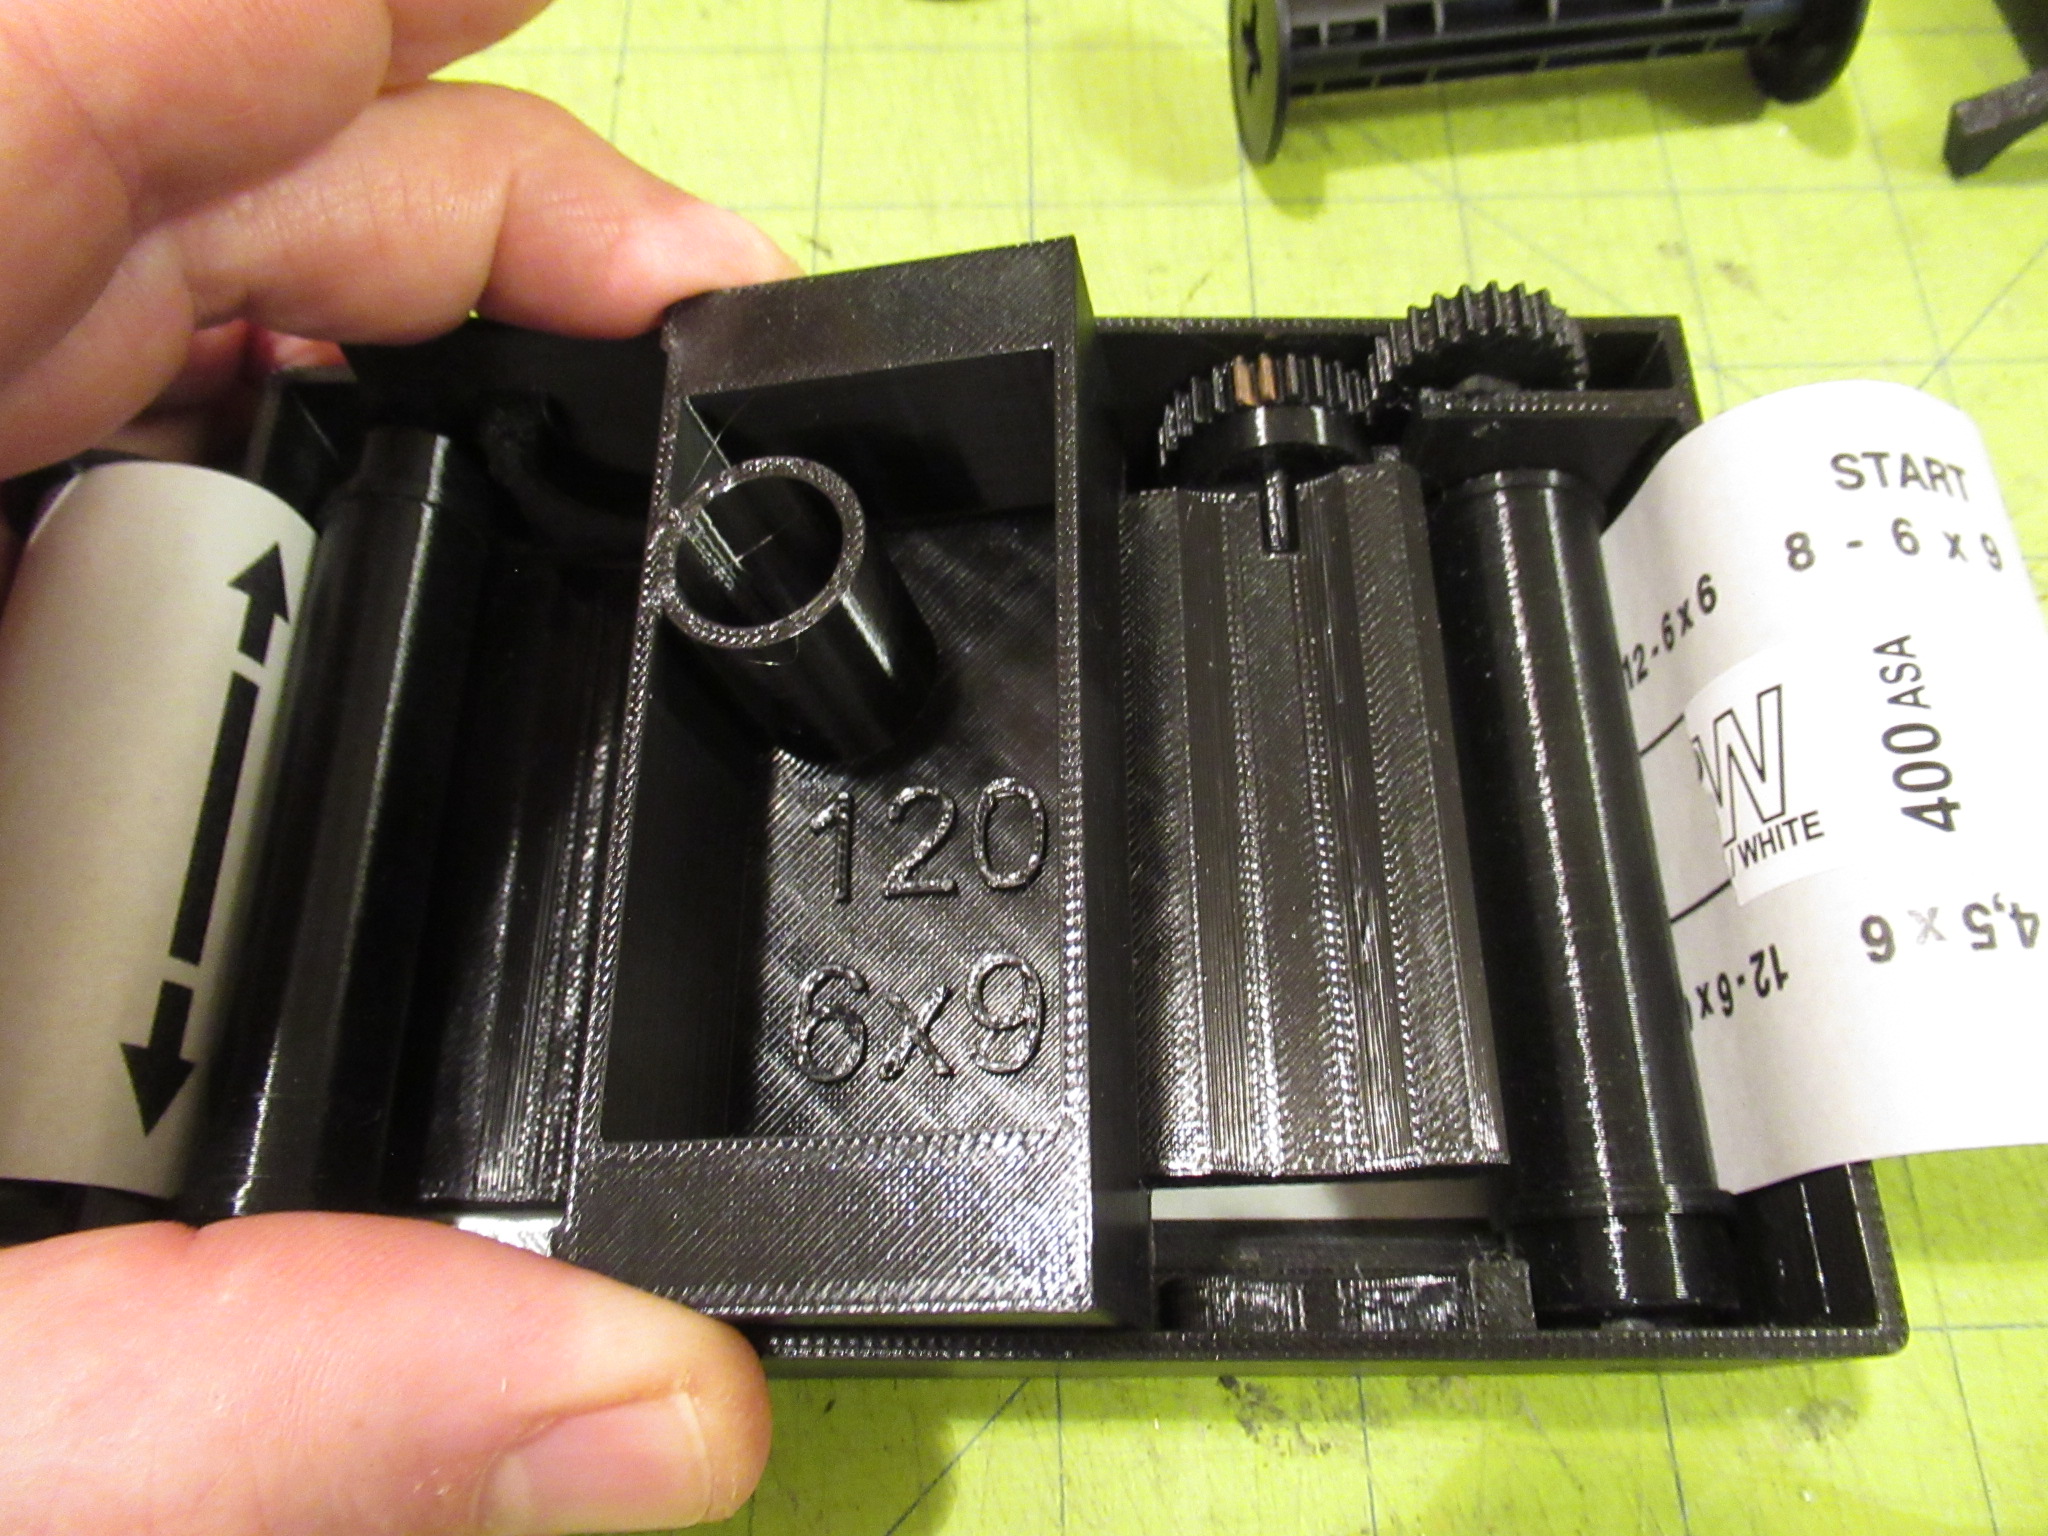
|
| Place the spool ends on the left full roll of of film and flip the film into the spool seats. Place a spool end on the bottom of the take-up spool and while the drive tab is aligned vertically, slip the tab into the top end of the spool and lower the bottom end into the spool seat. It will take a bit of pressure to snap it into place |  
|
| Be sure the drive tab and spool has engaged the film backing paper by winding the knob a couple of turns, then install the covers | 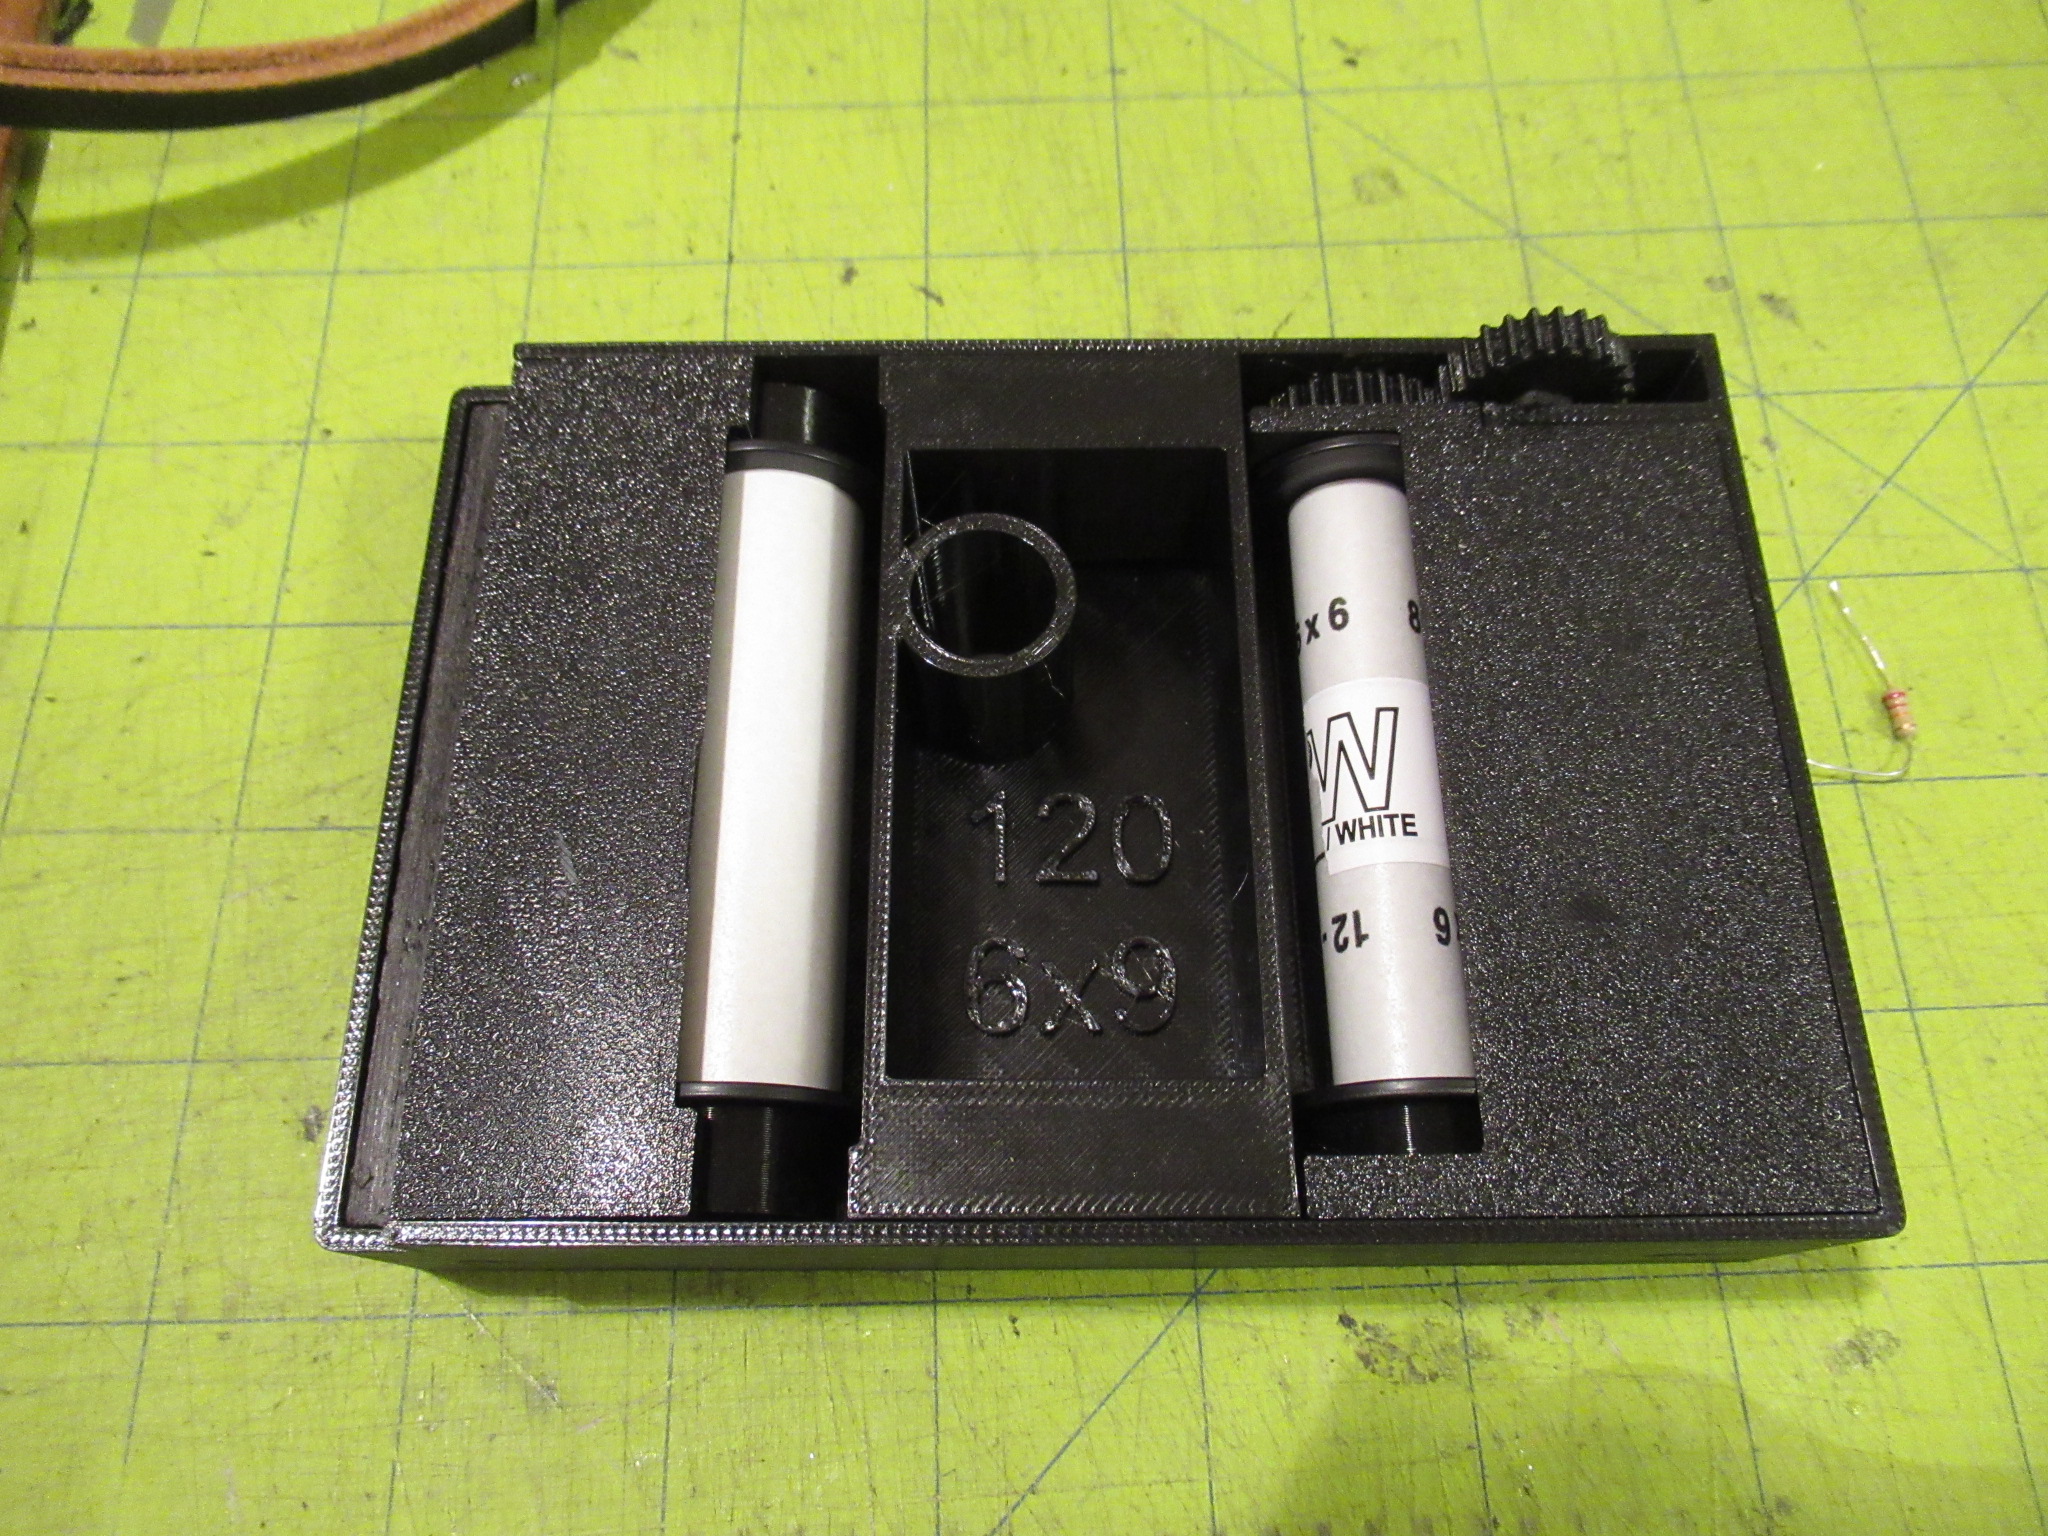
|
| Insert the cartridge into the camera, being sure it's seated correctly. Verify that there is no gap in the light seal between the cartridge and the film bay at the top of the camera | 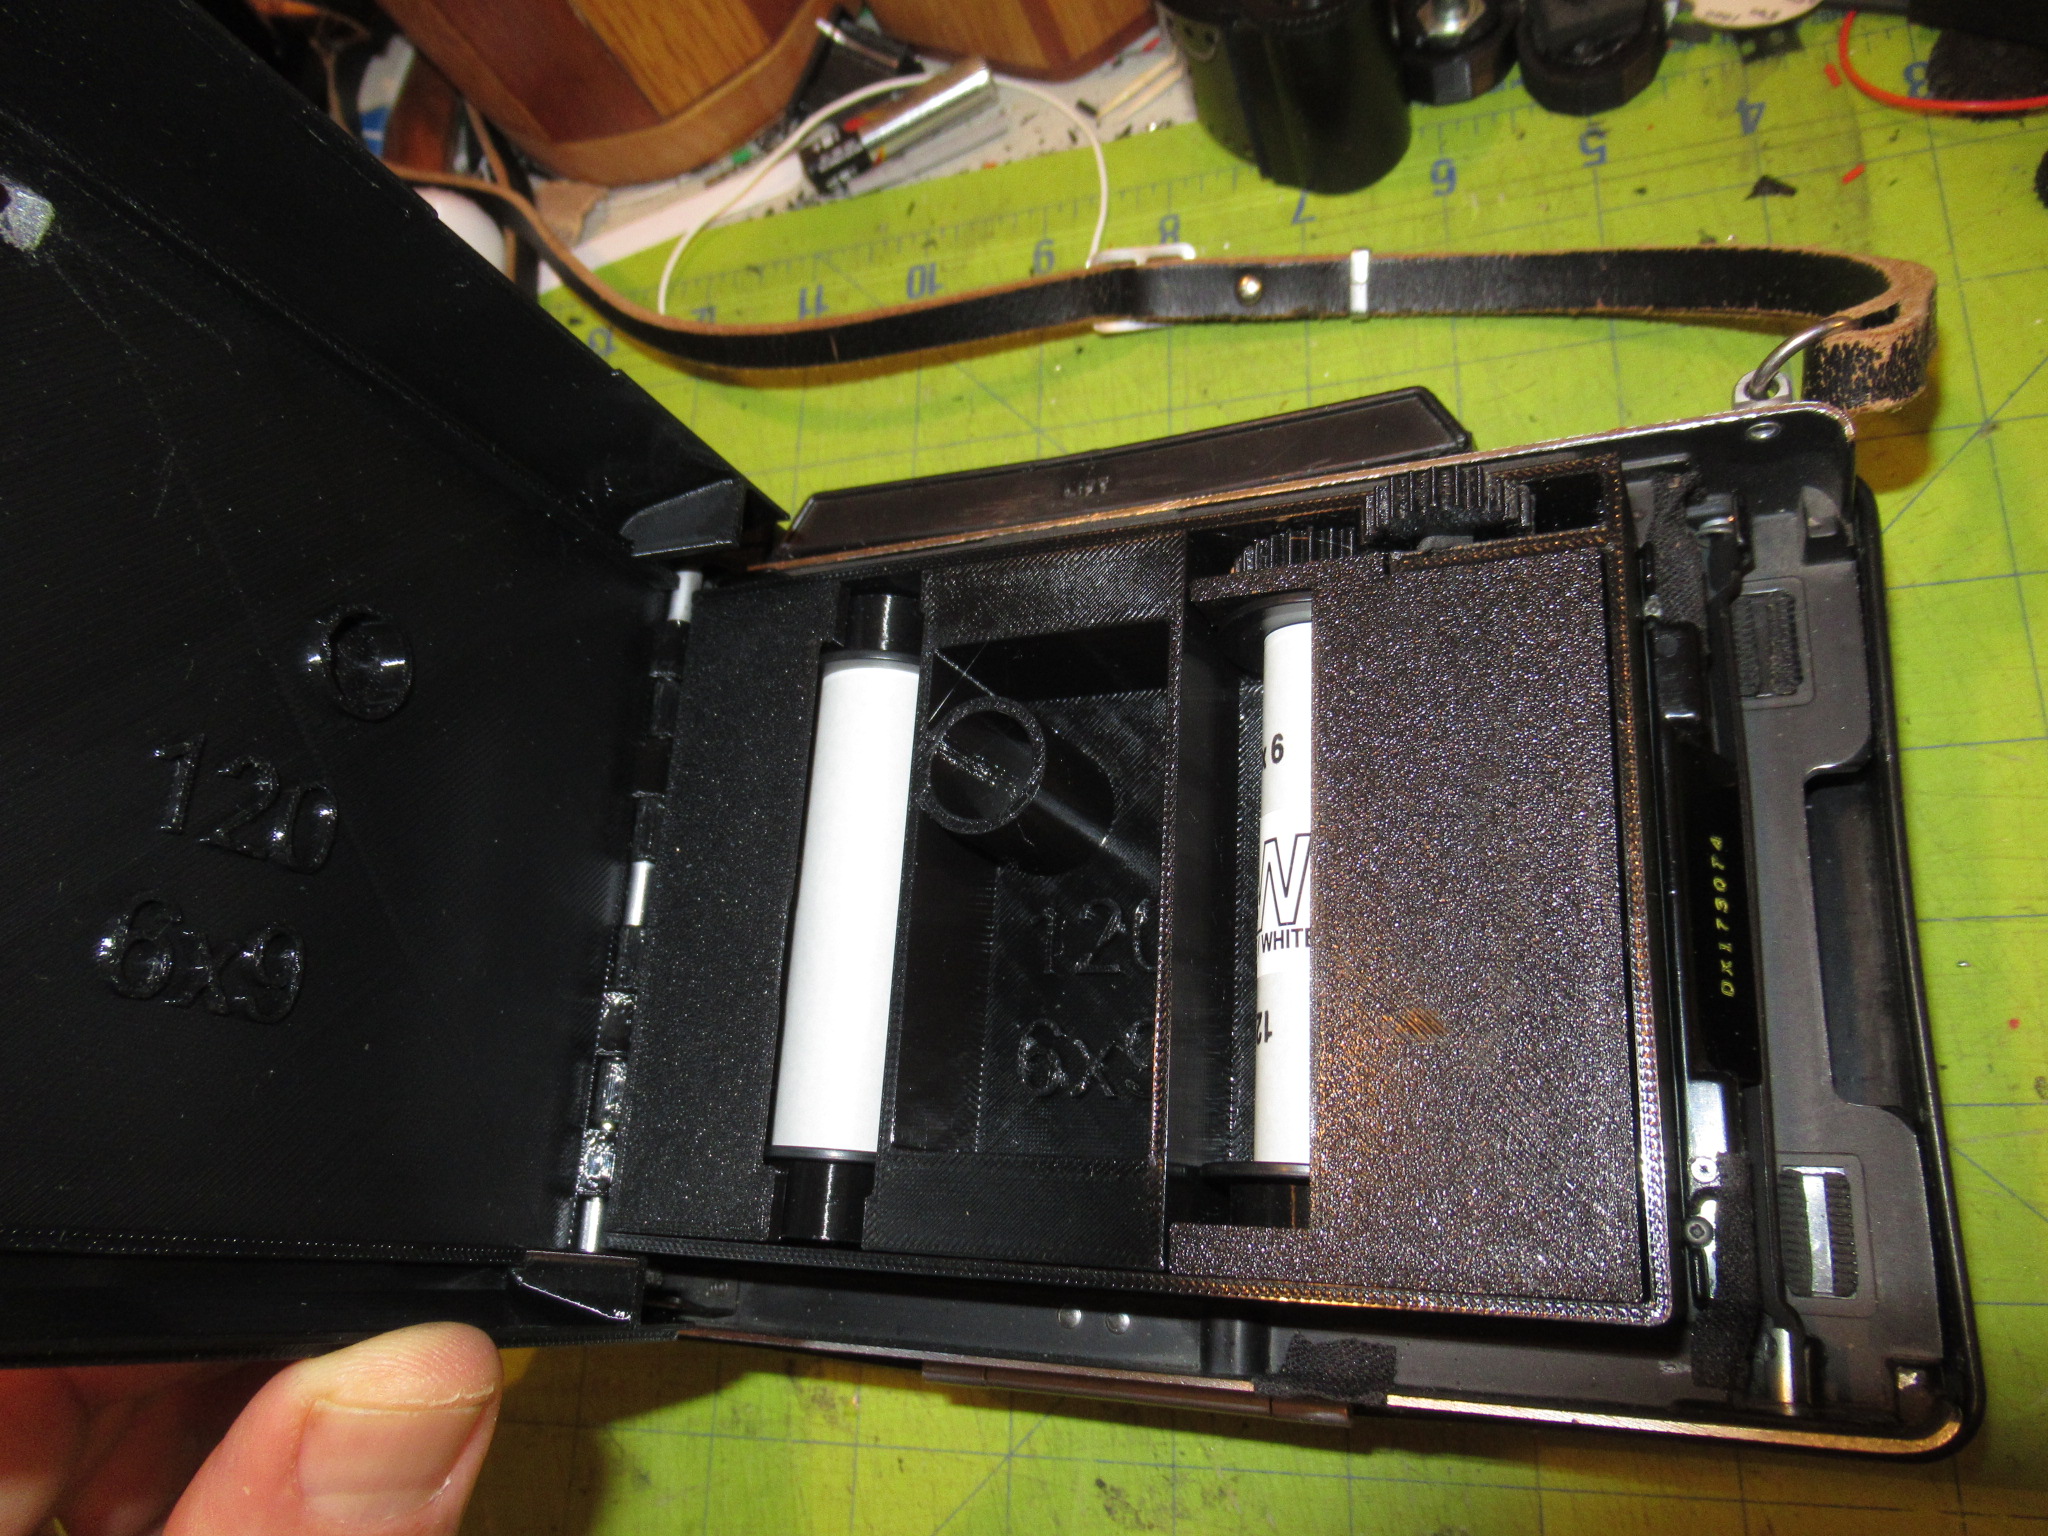
|
| Close the door, making sure it latches firmly, and wind the knob to the first exposure either indoors or in the shade. If you are using a piece of tape to cover the film counter hole, be sure to cover the film counter hole after winding the film. Be sure to only wind the film in the shade unless you've installed a red filter over the film counter hole | 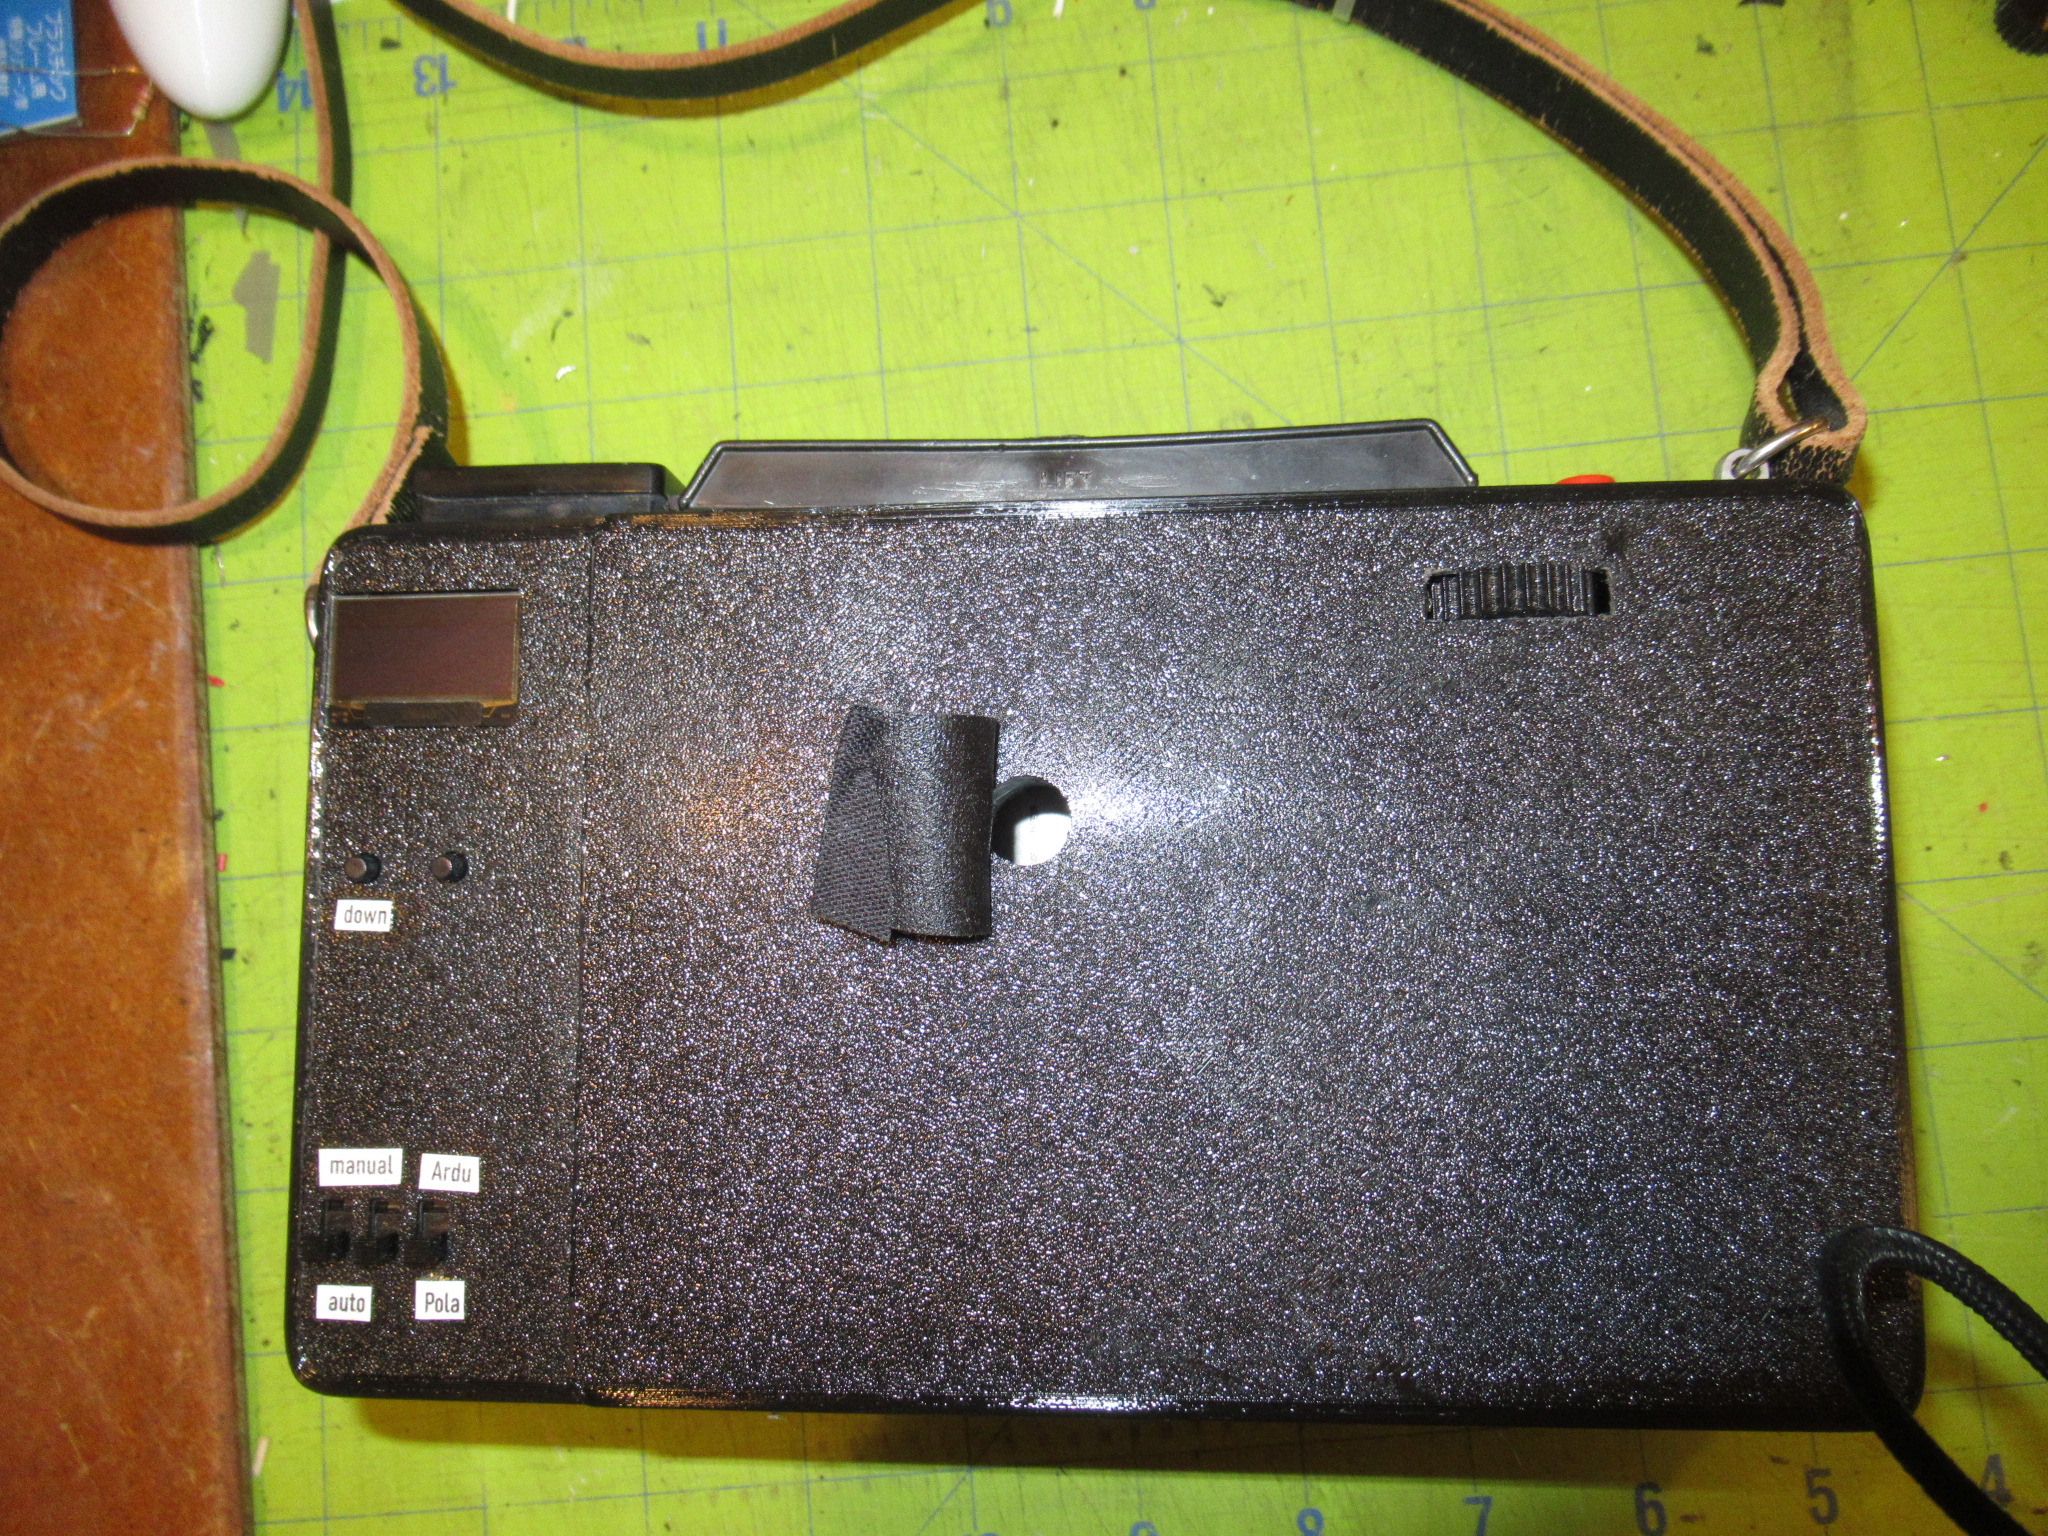
|
| After the last exposure, close the film counter hole and wind the film onto the take-up spool. To remove the roll, be sure the drive spool is vertically aligned (by the mark you previously put on), then pull the spool down and up, wiggling it if necessary to get it free. Be sure to remember to vertically align the drive tab before removing the pressure plate. |
|
Feel free to contact me with any questions or news about your build!