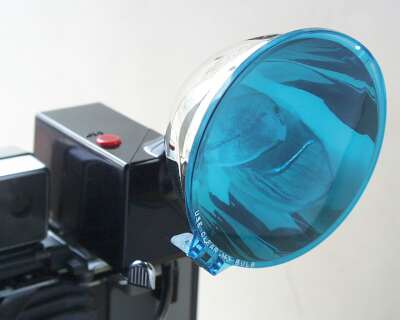
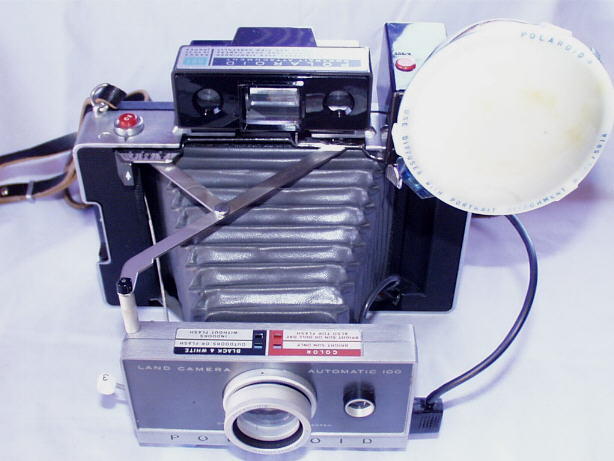
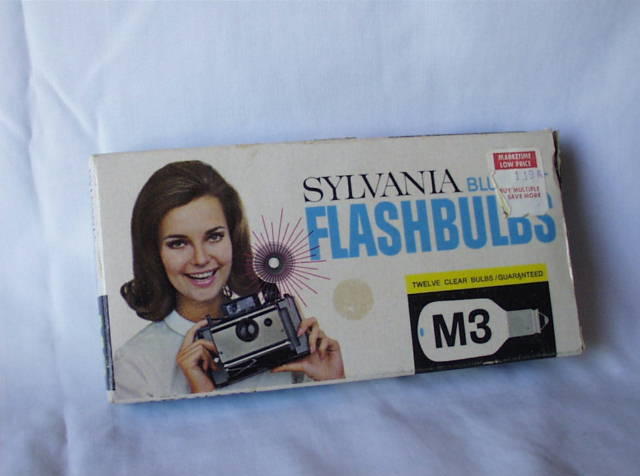
100 to 300 series cameras used a flash bulb unit which took M3 clear flash bulbs. These single use flash bulbs needed to be changed after each use. An eject button popped the used flash bulb out of the unit. A variable shutter speed controlled the exposure. This unit required one AA battery. Unfortunately, M3 bulbs are no longer made, but you can often find old boxes of them at garage sales, camera stores (ask for them), or swap meets. M3B (blue) blubs weren't designed for this flash unit, since it already has a blue cover. These M3 bulbs emit a lot of light, having a guide number of 260 at 100 ASA, which is almost twice as powerful as a good electronic flash unit.
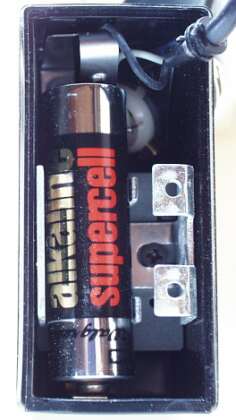
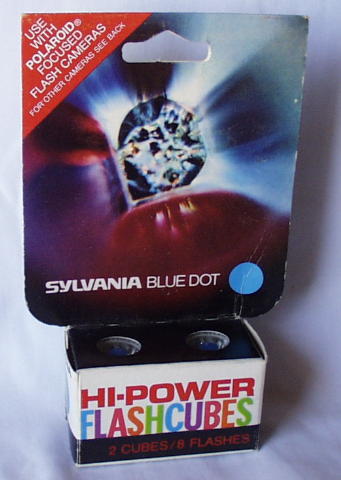
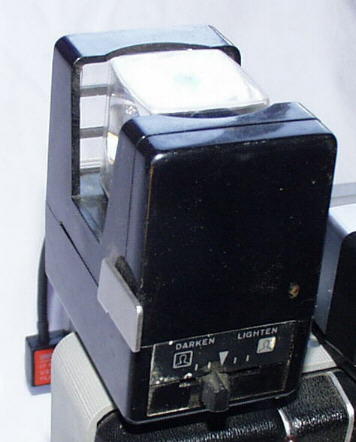
 400 series cameras used a focused flash unit which took Hi Power GE flash cubes. These flash cubes were designed to emit more light than normal flash cubes because of the shuttering system, which blocked some light even at its most open setting. Even so, they are not as powerful as M3 bulbs, having a guide number of around 150 using 100 ASA.
Exposure was controlled by shutters which opened and closed on the flash unit depending on the focus of the camera and the lighten/darken setting on the flash. The shutter was set at a fixed speed.
The flash cube needed to be manually advanced after each flash.
This unit required two AAA batteries. Hi Power flashcubes are also no longer made.
400 series cameras used a focused flash unit which took Hi Power GE flash cubes. These flash cubes were designed to emit more light than normal flash cubes because of the shuttering system, which blocked some light even at its most open setting. Even so, they are not as powerful as M3 bulbs, having a guide number of around 150 using 100 ASA.
Exposure was controlled by shutters which opened and closed on the flash unit depending on the focus of the camera and the lighten/darken setting on the flash. The shutter was set at a fixed speed.
The flash cube needed to be manually advanced after each flash.
This unit required two AAA batteries. Hi Power flashcubes are also no longer made.
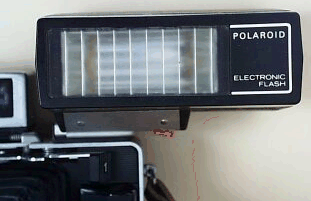
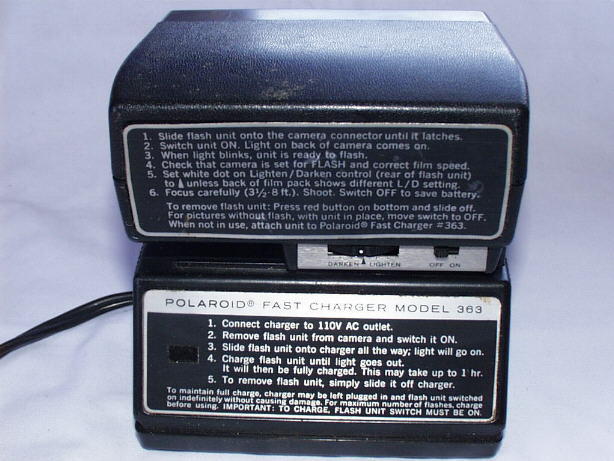
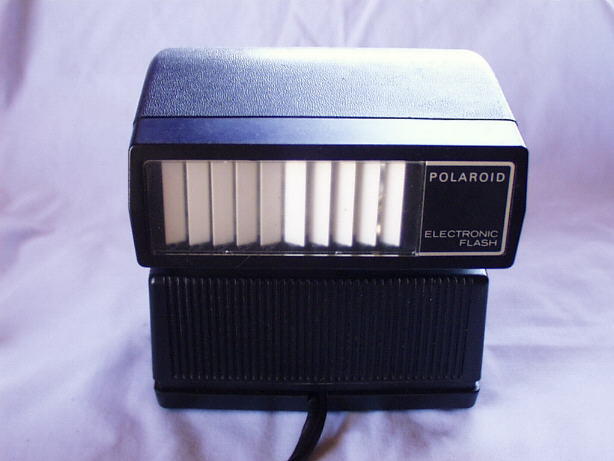 Only one camera, model 360, used the electronic flash unit. This unit worked similar to the focused flash unit, by opening and closing shutters to control exposure. This was because at the time, there was no photo cell fast enough to respond to the fast output of the electronic flash, so the exposure control had to be mechanical.
This flash unit used a rechargable battery and came with a charging base.
Often if you find one of these units, you'll find that the NiCad battery is worn out. Replacing the battery isn't very easy, but can be accomplished by removing the rear metal sticker (which often deforms the sticker!) and the 2 screws under it, the screw on the bottom near the front, and the two screws under the front face that pops off.
It appears that the replacement cells would be two 2/3rd "C" size cells.
Only one camera, model 360, used the electronic flash unit. This unit worked similar to the focused flash unit, by opening and closing shutters to control exposure. This was because at the time, there was no photo cell fast enough to respond to the fast output of the electronic flash, so the exposure control had to be mechanical.
This flash unit used a rechargable battery and came with a charging base.
Often if you find one of these units, you'll find that the NiCad battery is worn out. Replacing the battery isn't very easy, but can be accomplished by removing the rear metal sticker (which often deforms the sticker!) and the 2 screws under it, the screw on the bottom near the front, and the two screws under the front face that pops off.
It appears that the replacement cells would be two 2/3rd "C" size cells.
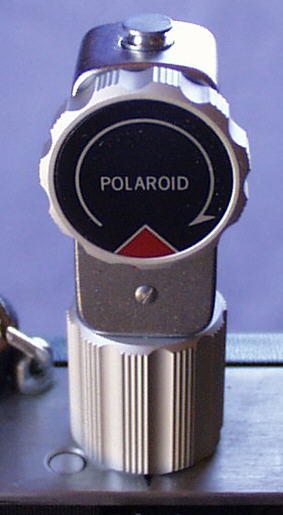 Any of the polaroid cameras could be outfitted with a mechanical self timer which allowed for around a 10 second delay in taking the picture.
This unit is fitted over the shutter release button and manually wound up. A button on the top of the unit activated the timer.
Any of the polaroid cameras could be outfitted with a mechanical self timer which allowed for around a 10 second delay in taking the picture.
This unit is fitted over the shutter release button and manually wound up. A button on the top of the unit activated the timer.
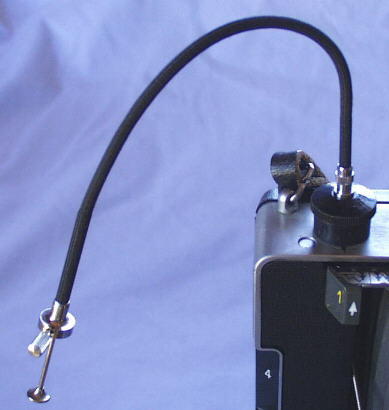 A cable release could be clipped onto the shutter release. This was useful for taking longer exposures in dark settings, since the shutter could stay open for up to 10 seconds. This allowed you to hold the shutter down without shaking the camera.
 Only polaroids that had glass lenses could use the close-up lens kit, which included an adapter that attached to the viewfinder to adjust the rangefinder for closeup use, a close-up lens which attached to the lens, and a diffuser for the flash unit to reduce the intensity of the flash.
The viewfinder/rangefinder attachment actually tips the rangefinder forward to compensate for vertical parallax which occurs when the camera is so close to the subject.
Only polaroids that had glass lenses could use the close-up lens kit, which included an adapter that attached to the viewfinder to adjust the rangefinder for closeup use, a close-up lens which attached to the lens, and a diffuser for the flash unit to reduce the intensity of the flash.
The viewfinder/rangefinder attachment actually tips the rangefinder forward to compensate for vertical parallax which occurs when the camera is so close to the subject.
A similar kit was made for taking portraits, which allowed one to focus from 1.5 to 3.5 feet.
Different kits were made for the different configurations of cameras. For example, a kit was available for cameras with the zeiss-ikon viewfinder and cube flash unit, and another type of kit was made for the separate viewfinder/rangefinder and bulb flash unit.
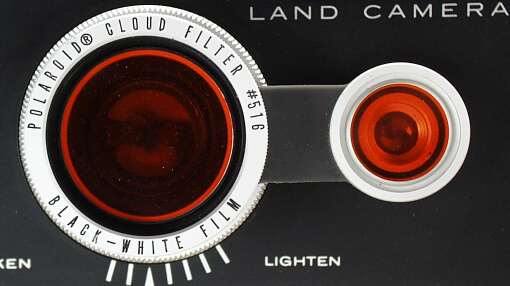
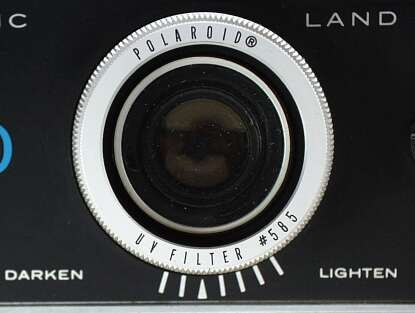 A UV filter was available, as well as a cloud filter, to accentuate clouds and turn the sky darker with black and white film.
Note that the cloud filter needed a mask over the exposure light sensor for the camera to make the correct exposure.
A UV filter was available, as well as a cloud filter, to accentuate clouds and turn the sky darker with black and white film.
Note that the cloud filter needed a mask over the exposure light sensor for the camera to make the correct exposure.
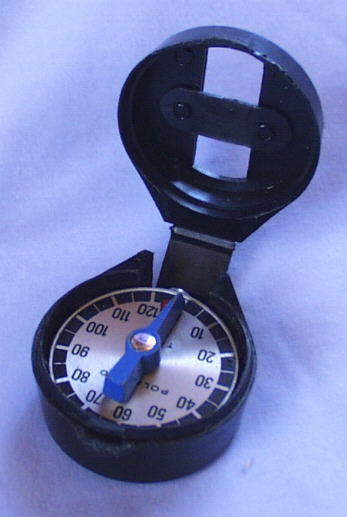 For models that didn't come with a development timer, a mechanical timer was available which attached to the strap of the camera.
The dial was manually wound to the number of seconds you wanted to develop the picture, and a button was pressed to start the timer.
For models that didn't come with a development timer, a mechanical timer was available which attached to the strap of the camera.
The dial was manually wound to the number of seconds you wanted to develop the picture, and a button was pressed to start the timer.