


By far the easiest way to get started with film holders is to download this file and print them on a 3D printer. Cut some dark slides out of black vinyl material such as folio covers. Glue some black felt at the entrance to the film holder on each side, then slide the dark slides into the film holder grooves. Push the end piece over the felt end--you may have to tap it a bit since it's a tight fit. Make sure it slides right to the end stop. Avoid pulling the dark slide all the way out. It helps seal out light and may be difficult to put back in.
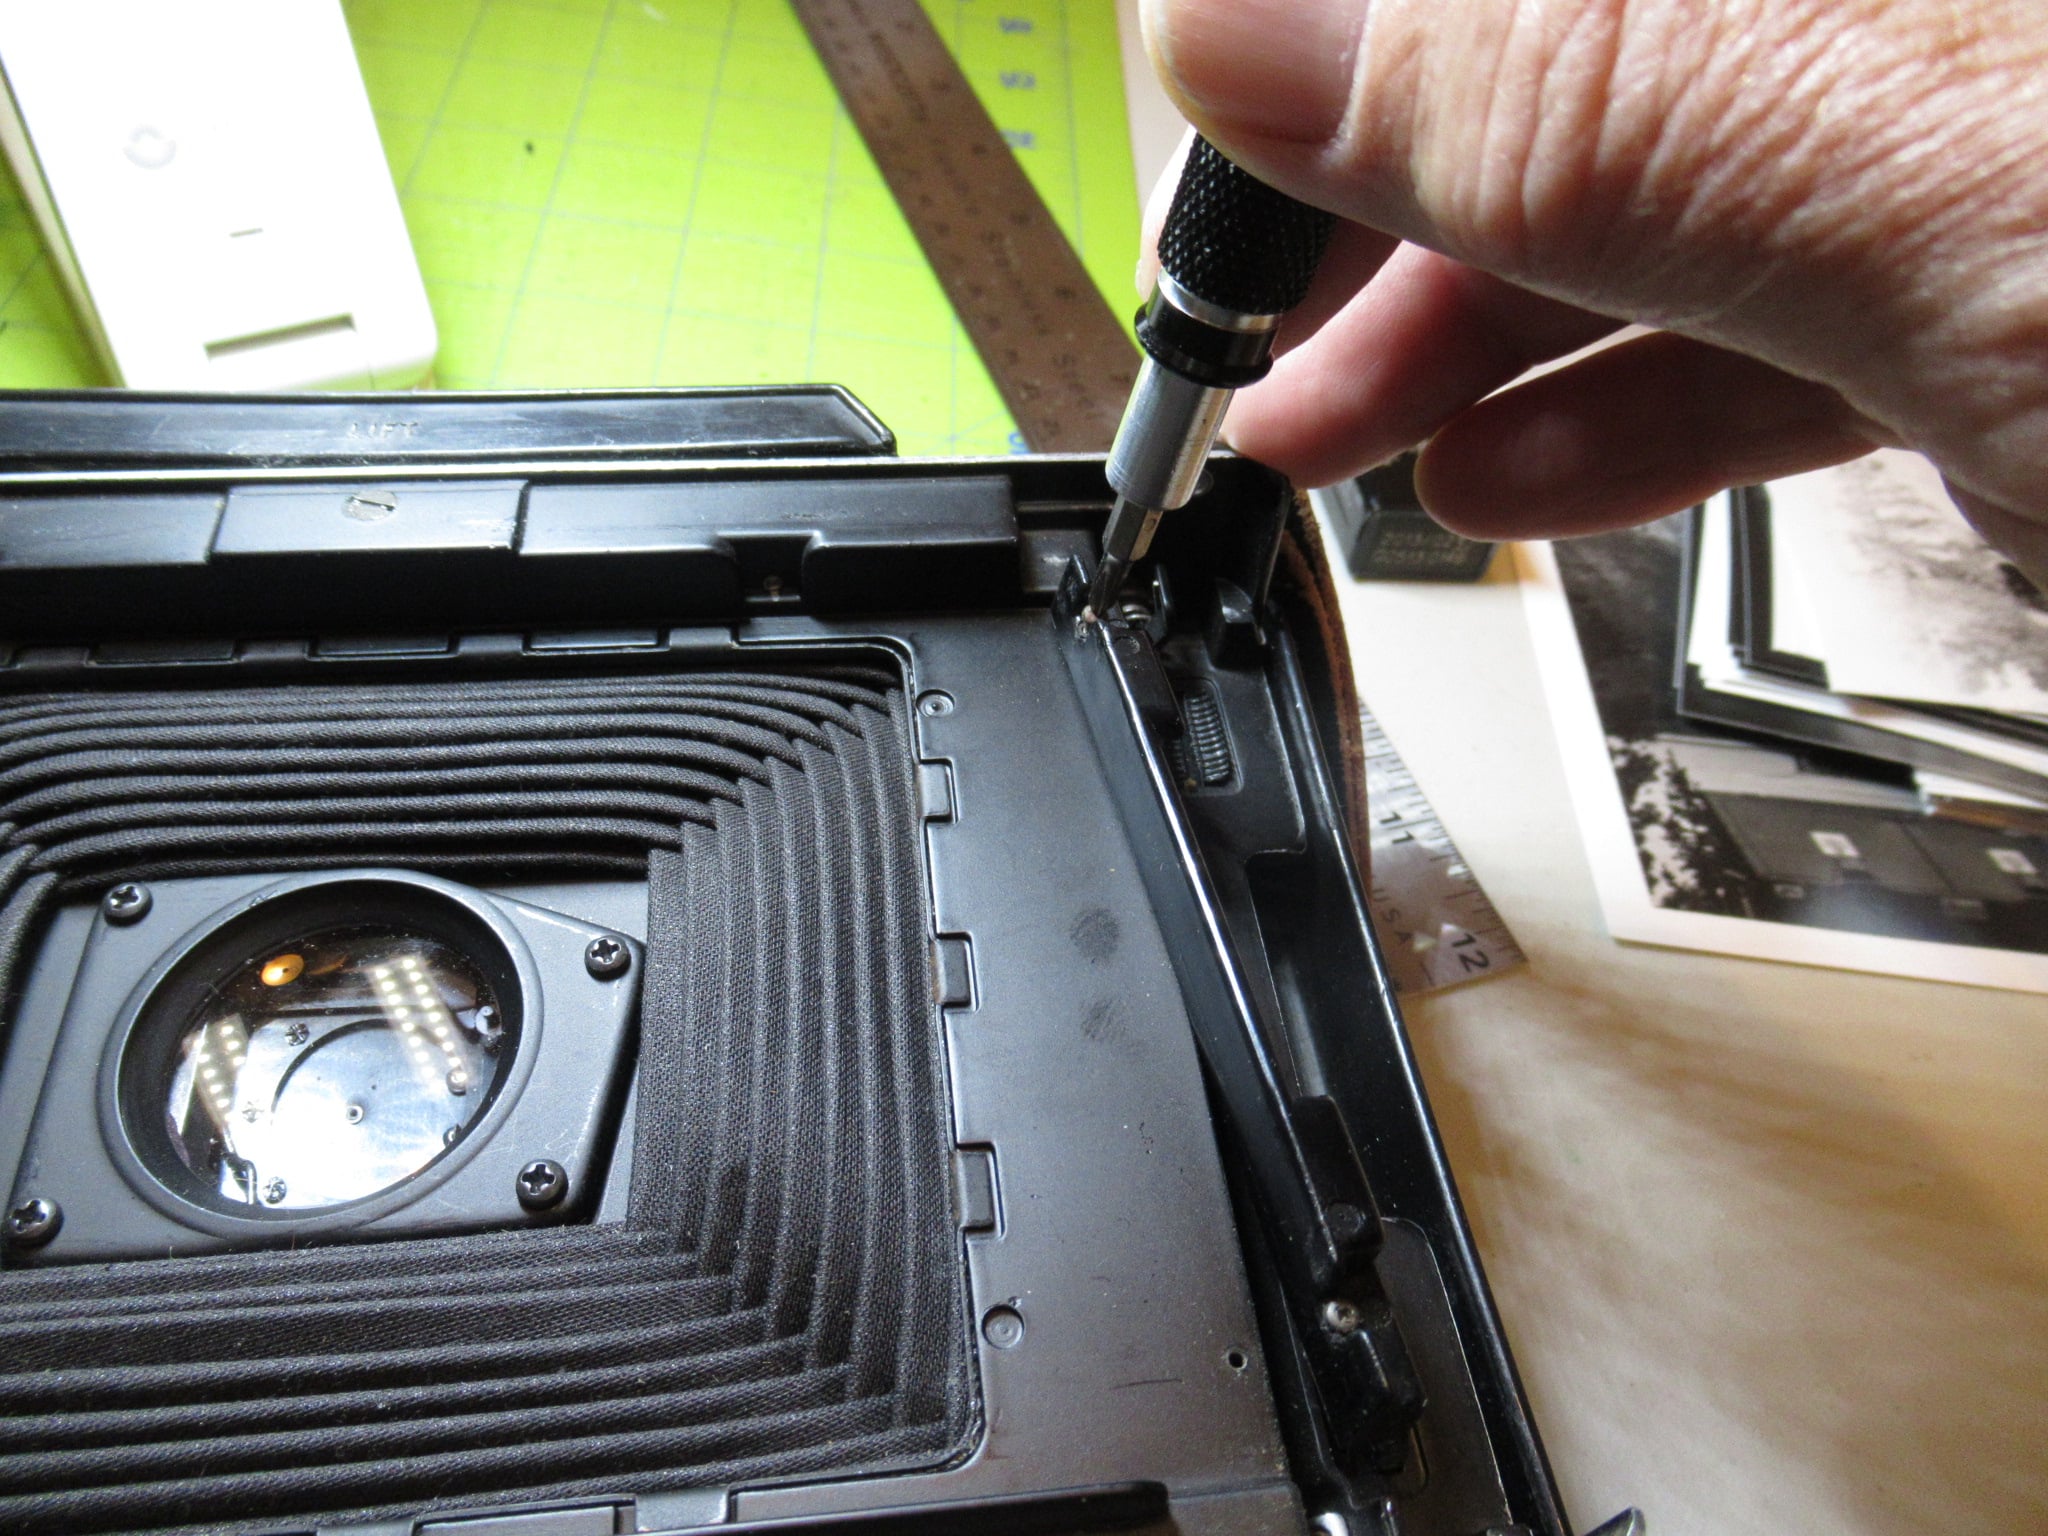
Remove the pack retainer/light trap at the right side of the film bay by removing the 2 small philips screws.
You will need to adjust the rangefinder to compensate for the 1.5 or so millimeter film plane offset introduced by the film holder. Remove the cover of the rangefinder and use small pliers to turn the square shaped screw to adjust. Open the back and place a ground glass (or a piece of fogged plastic) with the same offset as the film holder into the film bay. Focus on a closer object on the ground glass and compare it to the rangefinder. Adjust the rangefinder until the images line up on the object you are focusing on. After this is done, technically the camera won't focus on infinity but you will be able to get subject in focus by selecting a smaller aperture such as f/17.5.
To load, pull the dark slide back and curl the negative and fit it into both sides of the holder. Flatten the negative at the far end of the holder and push it into the end under the groove. Once it stops, the end of the negative near the opening can be lowered into place into the grooves and flattened out. Push the dark slide in. You may want to practice this in daylight before attempting in the dark. To remove the negative, take a knife blade and slip it under the negative near the opening and lift/curl the negative upwards and pull it out.
To install the back, remove the hinge from the camera back. You will have to remove the 2 black hinge covers. They will likely break when attempting to remove them. If they do, push a thin rod into the hinge and push out the other black plastic hinge cover. Then using the same tool, push the other side of the hinge until the other hinge cover comes out and push the hinge out.
You can either permanently modify an existing back or swap it with a 3D printed one. If you have a spare back or are committed to using film holders, I would advise you to modify a Polaroid back permanently. It will give you a back that matches the camera, and will be much more durable than a 3D printed one. The back will opened and closed a lot when using film holders. If you'd rather print up a back, skip this next section.
| Step 1: First, the pack retainer/light trap is removed. It's screwed in by two small philips screws, making this a reversible step, as long as you don't lose it! |
|
| Step 2: Next, the rivets holding the rollers are drilled out |
|
| Step 3: The rollers are removed by unbending the retainer making the camera quite a bit lighter. |
|
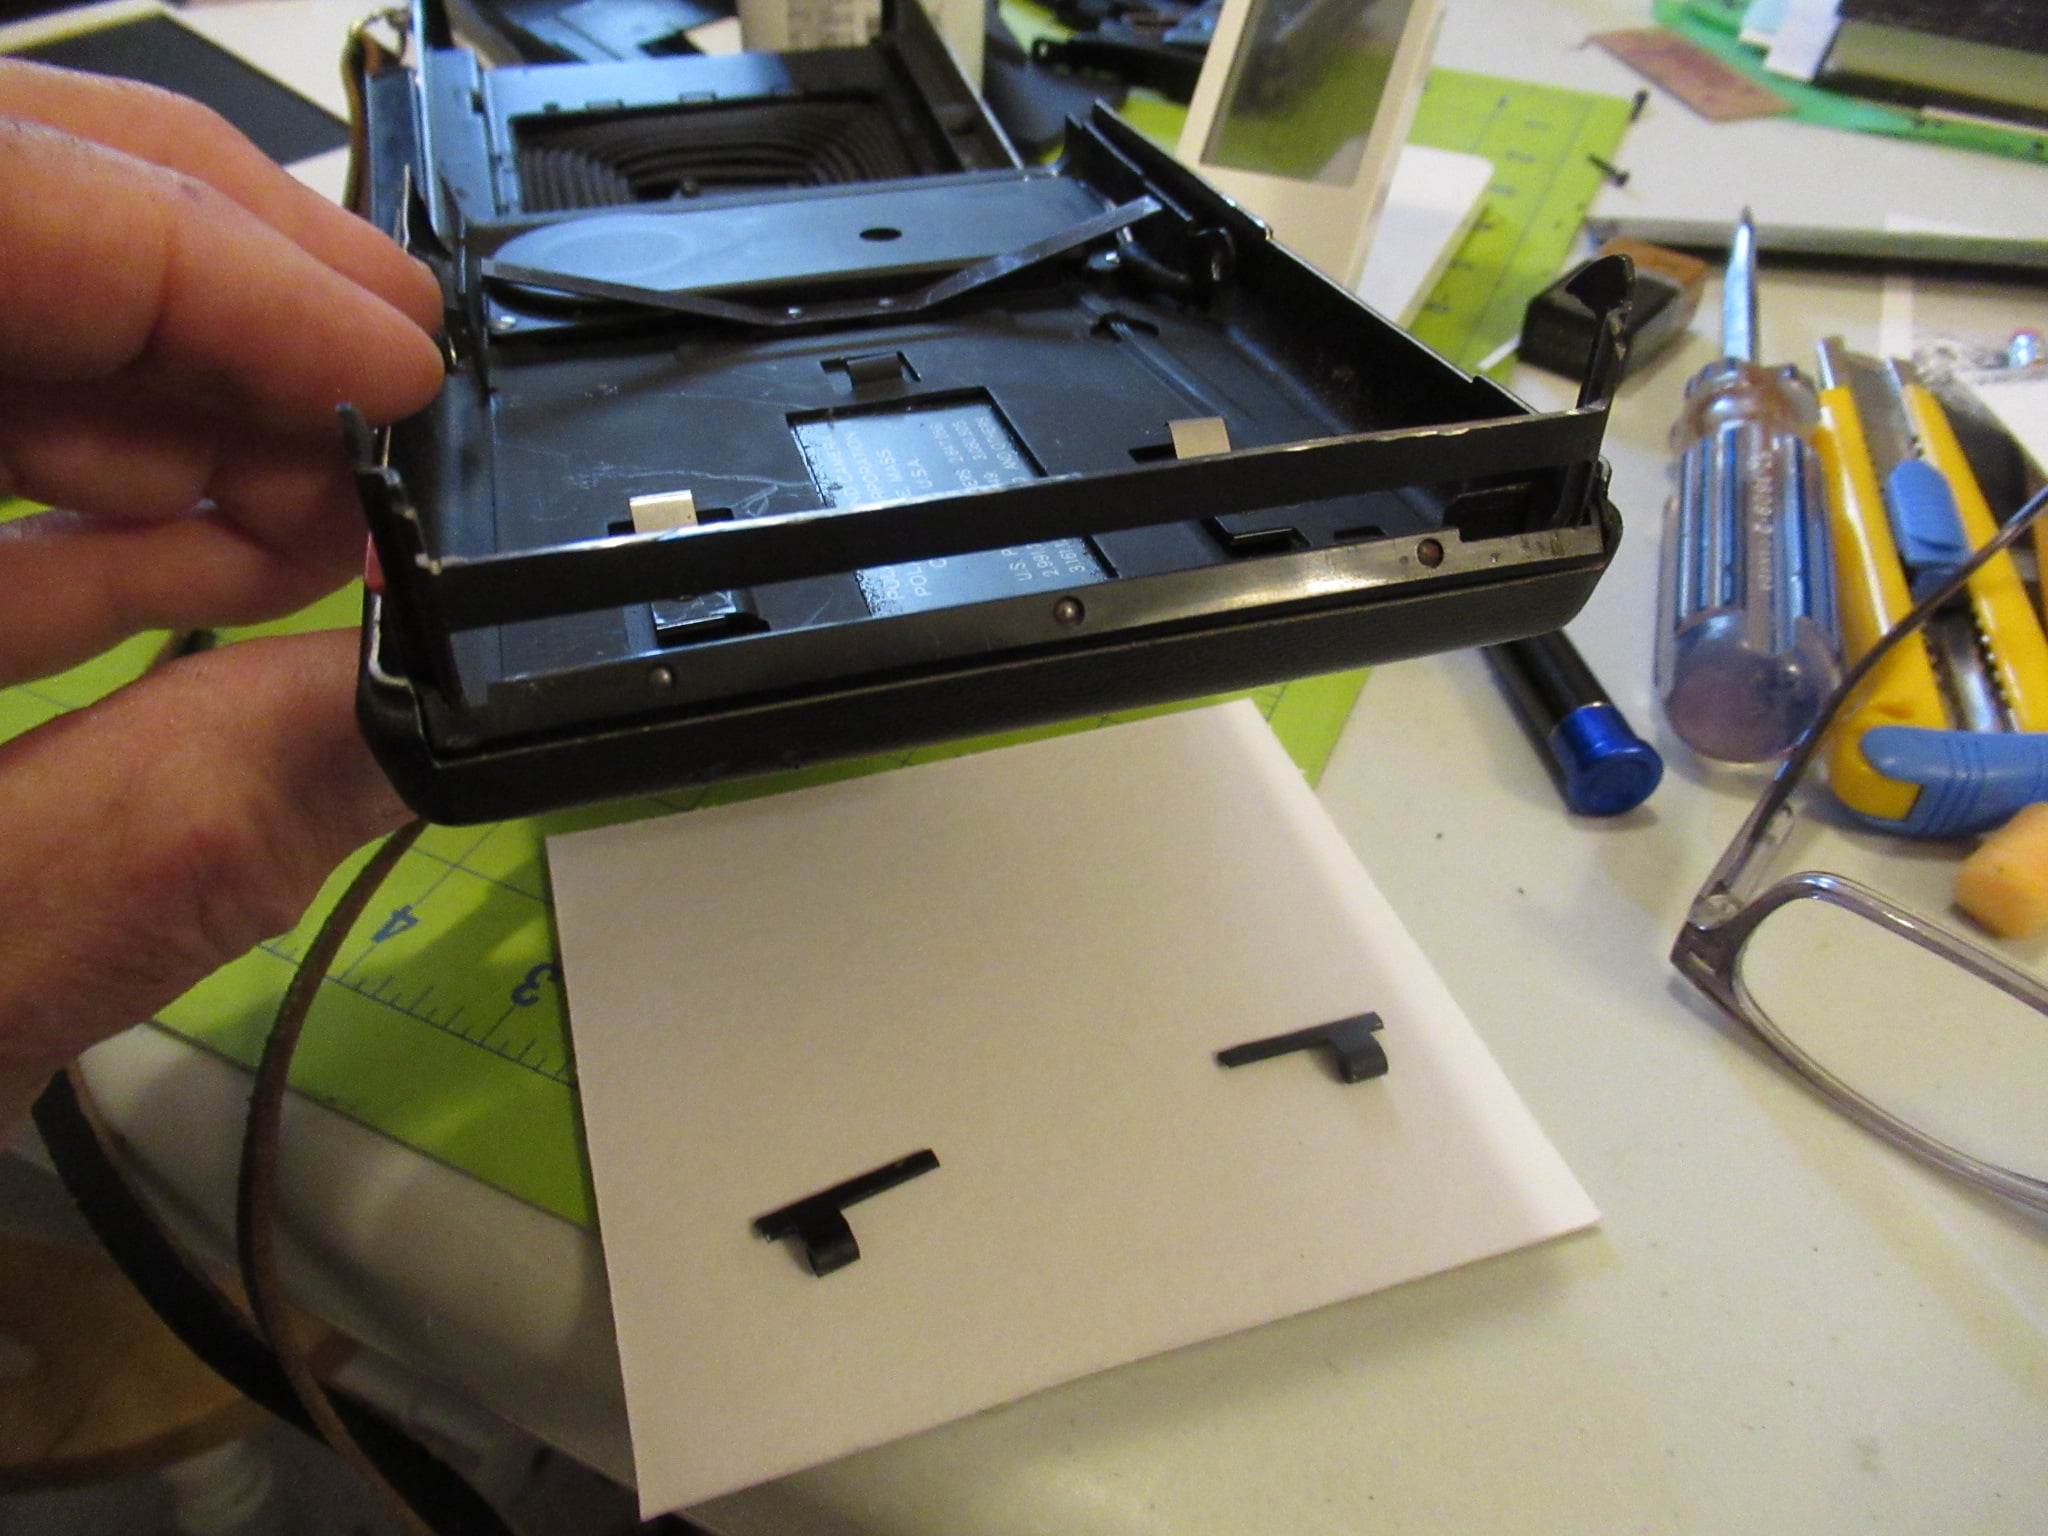
| Step 4: The tab door hinges are removed by prying out the hinges |
|
| Step 5: Then, the door hinges on the back are cut off using a dremel. This is the hardest part because it's irreversible. I ended up cutting off the whole bar, so that the film holder doesn't need to be inserted in the groove. |
|

Download the STL files here and print it up with supports and 20% or higher infill. The locking tabs may need some filing to fit perfectly, both the flat surface that locks and both edges to fit inside the latch. The hinges were made exactly to spec, so they may need filing due to printing inaccuracies. The door needs to put some pressure on the film holder when closed, but not too much pressure or things will break. Use foam on the inside of the door for this, but be aware of excess pressure on the hinges and latching mechanism.
The weak points of the door are the locking mechanism and the hinges. Be sure not to latch the door just by pushing it closed. Unlatch it on the camera, push the door closed, and release the latch. And be sure there is minimal pressure on the hinges when closing. If you break a locking tab, don't despair. I repaired mine by heating up a straight pin and sinking it into the PLA, joining the broken tab to the main base. PLA is weldable with a metal pin and lighter. You can add material if needed and form the plastic around the pin. The excess pin can be cut off with a dremel.
The camera is now ready to use a film holder. You can either make a film holder from scratch, make one from parts, or print the whole film holder. Jump to the section that pertains to you.
A home made holder is good if you don't have access to a 3D printer and want to try film holders. The downsides are that it is labour intensive and getting all the clearances correct and the dark slide sliding well is a challenge. Also, it is almost impossible to make a film holder which is able to hold a Polaroid sized negative. There is not enough clearance on the edges when using book board for rails. You will need to cut the negative slightly more narrow than a Polaroid print.
| Step 1: The film pack is made starting with a foam board, with matt board cut to make a paper well where the negative sits. | 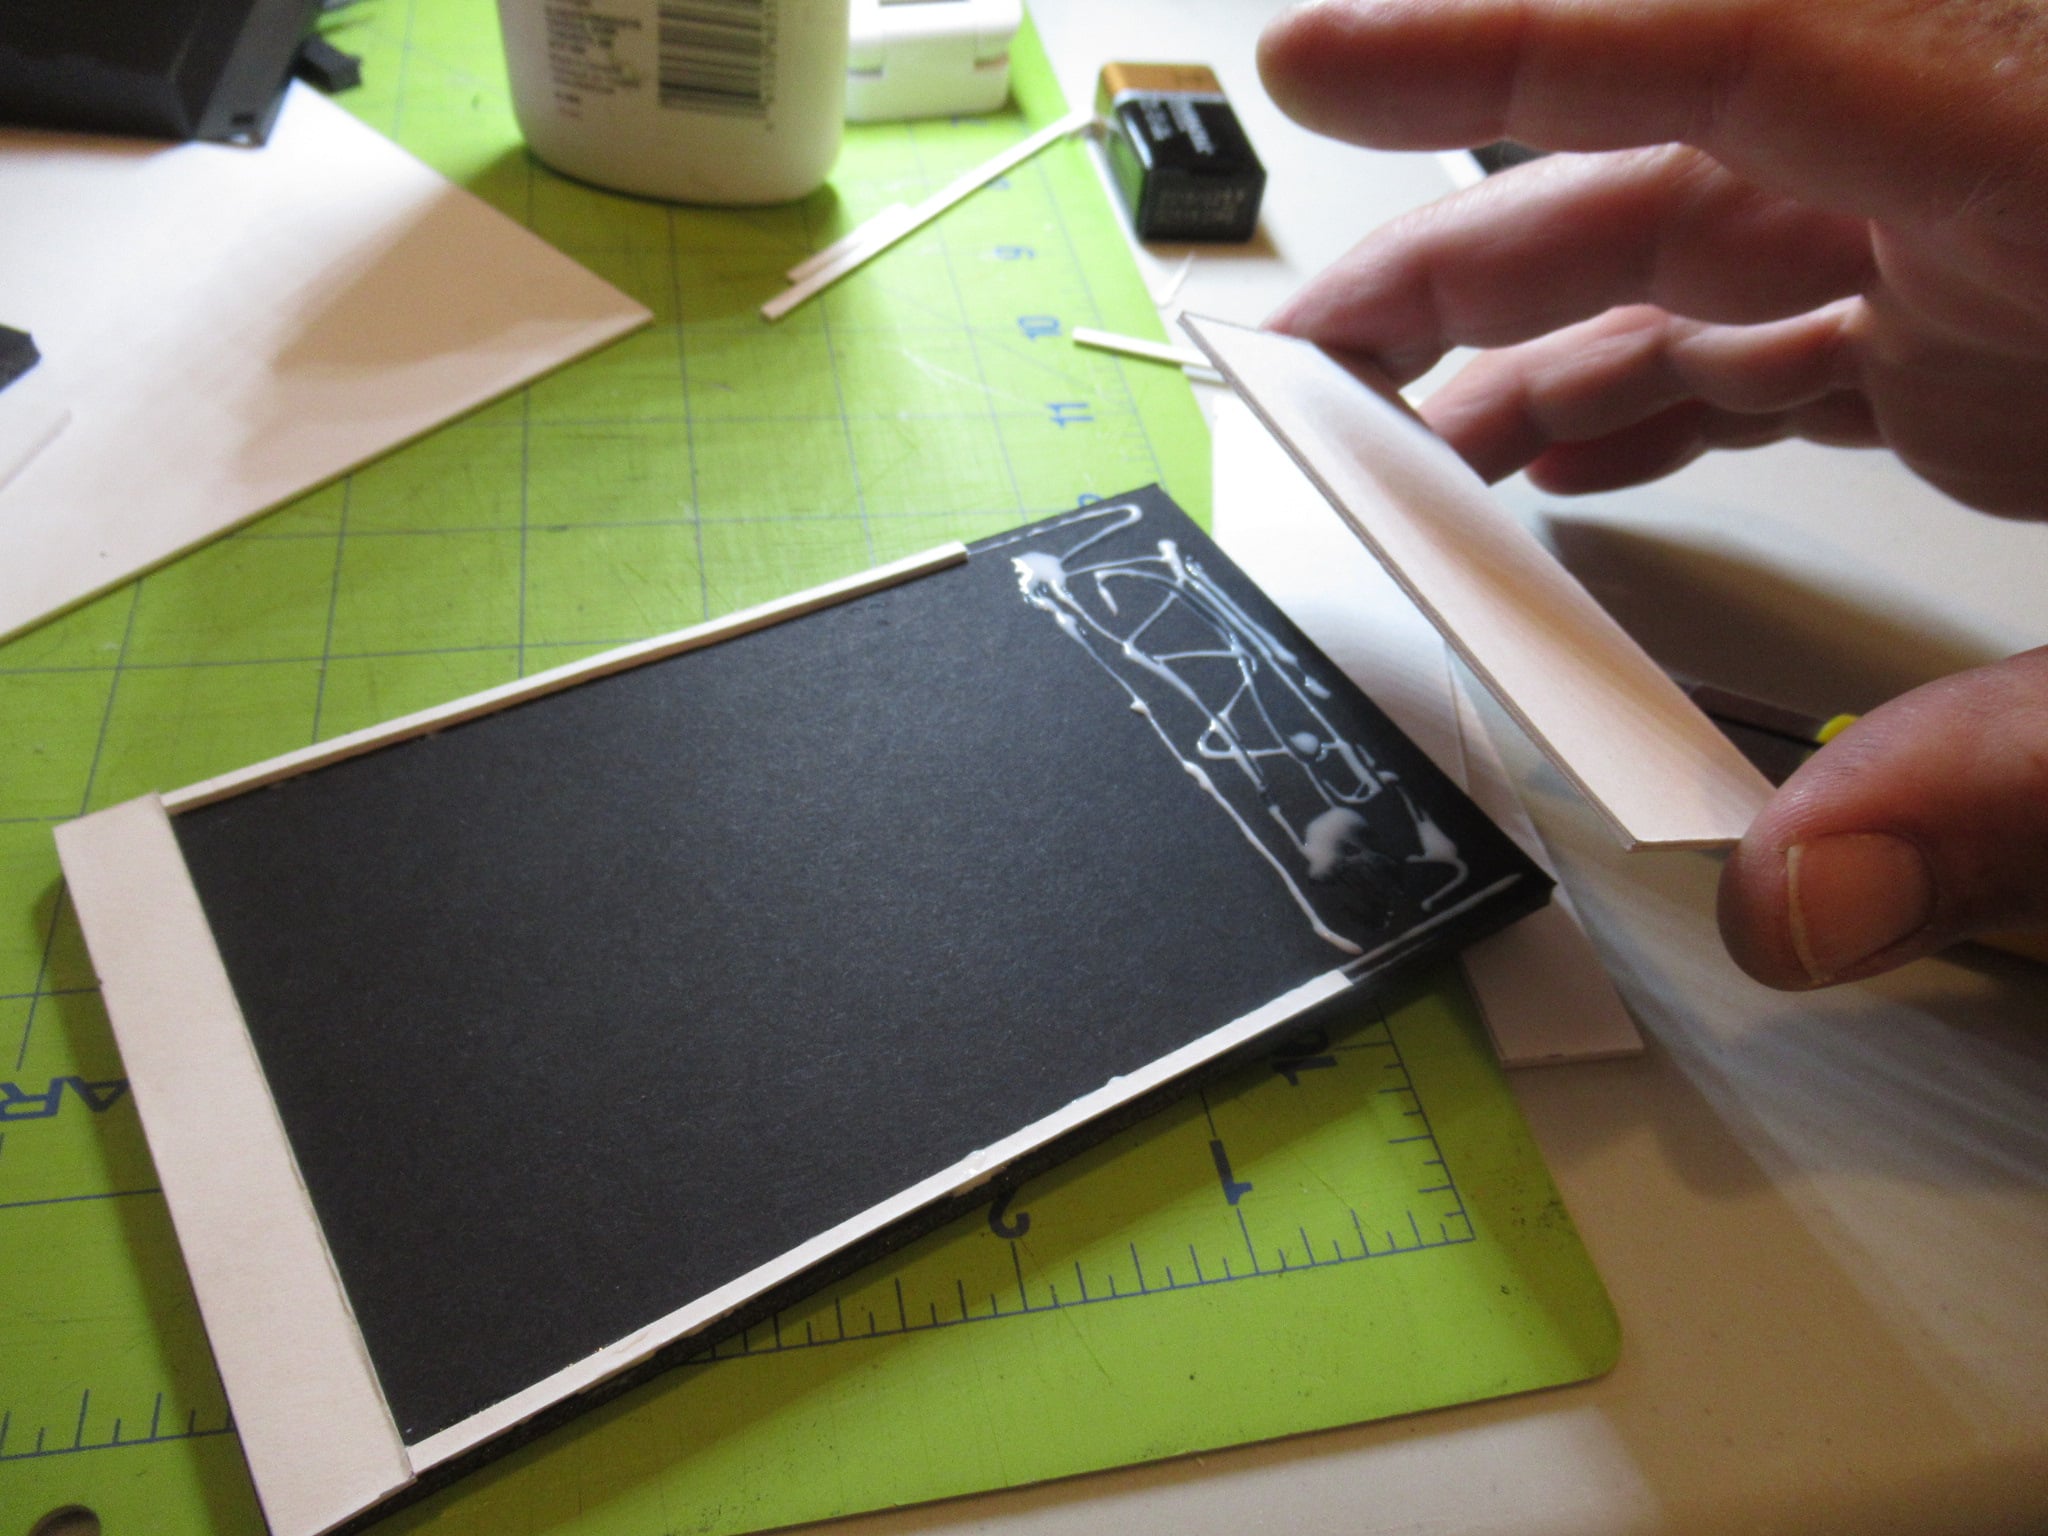
|
| Step 2: Grooves need to be cut into some book board for the dark slide to move in. I found this to protect against light leaks the best. I made a makeshift table saw out of a dremel sitting on modelling clay, a few blocks of wood, and a table made of a piece of plastic. I just screwed the shoulder/guide on with the correct clearance. This step doesn't need to be done, but makes it much easier to cut the grooves in the book board at a consistent depth. | 
|
| Step 3: This made cutting the grooves into the book board far easier than doing it by hand. I did have to hold the dremel, since it's just sitting on modelling clay and could move a bit. This generated lots of smoke! But the grooves came out straight and consistent in depth. | 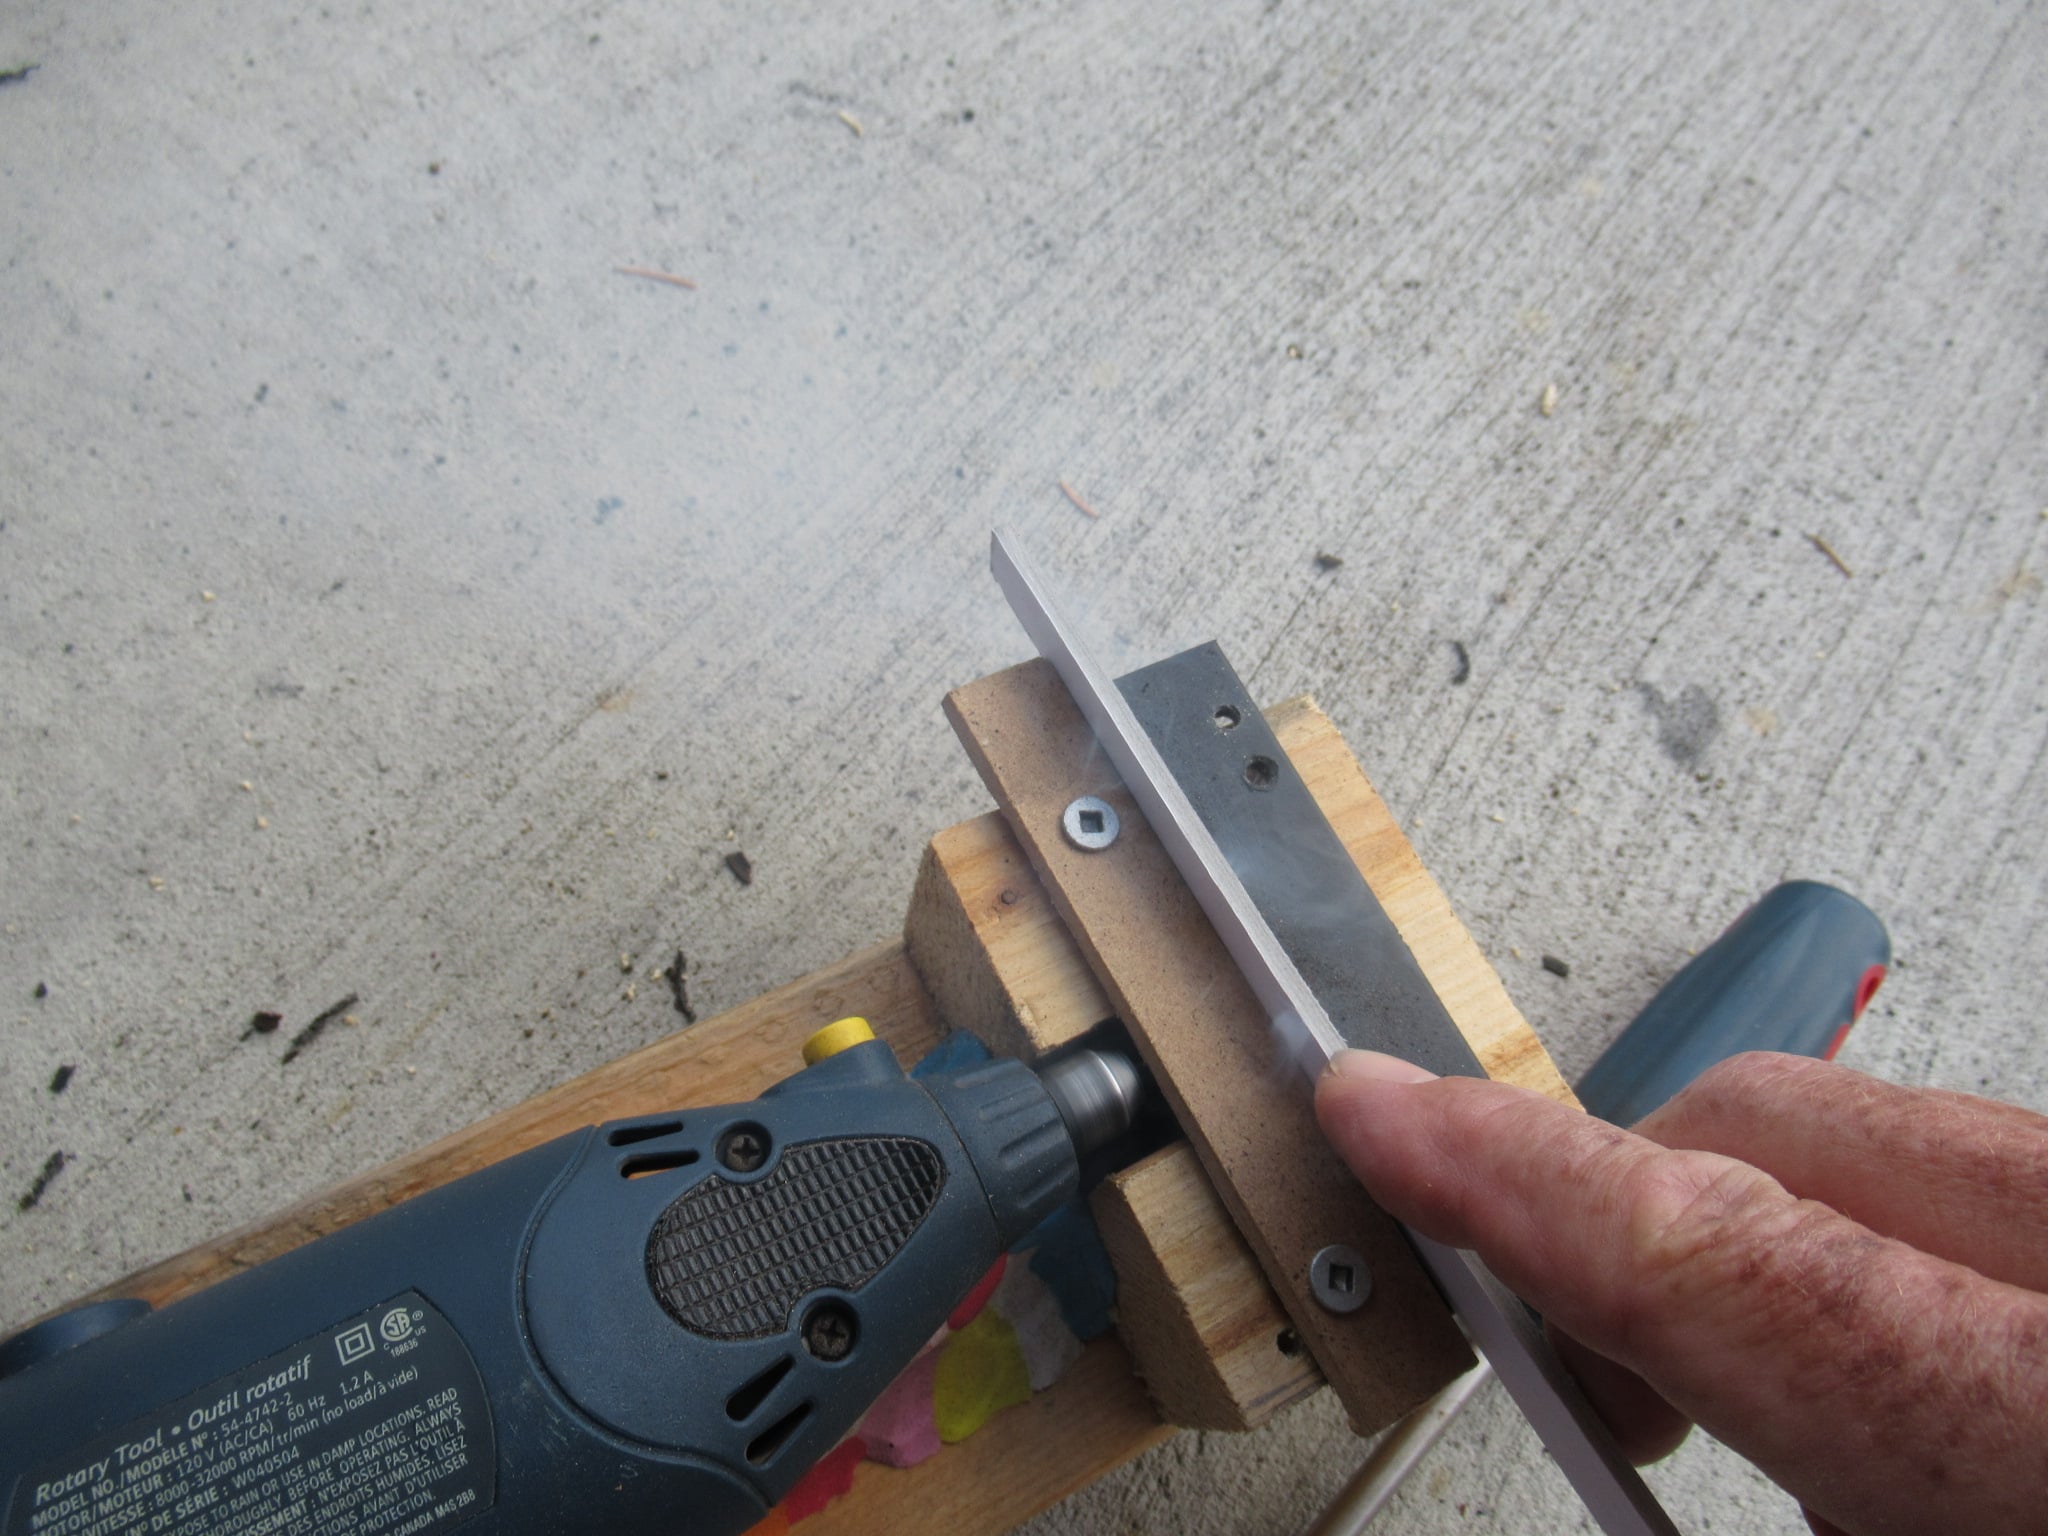
|
| Step 4: The dark slide guides with the grooves are mounted on the film holder with glue. | 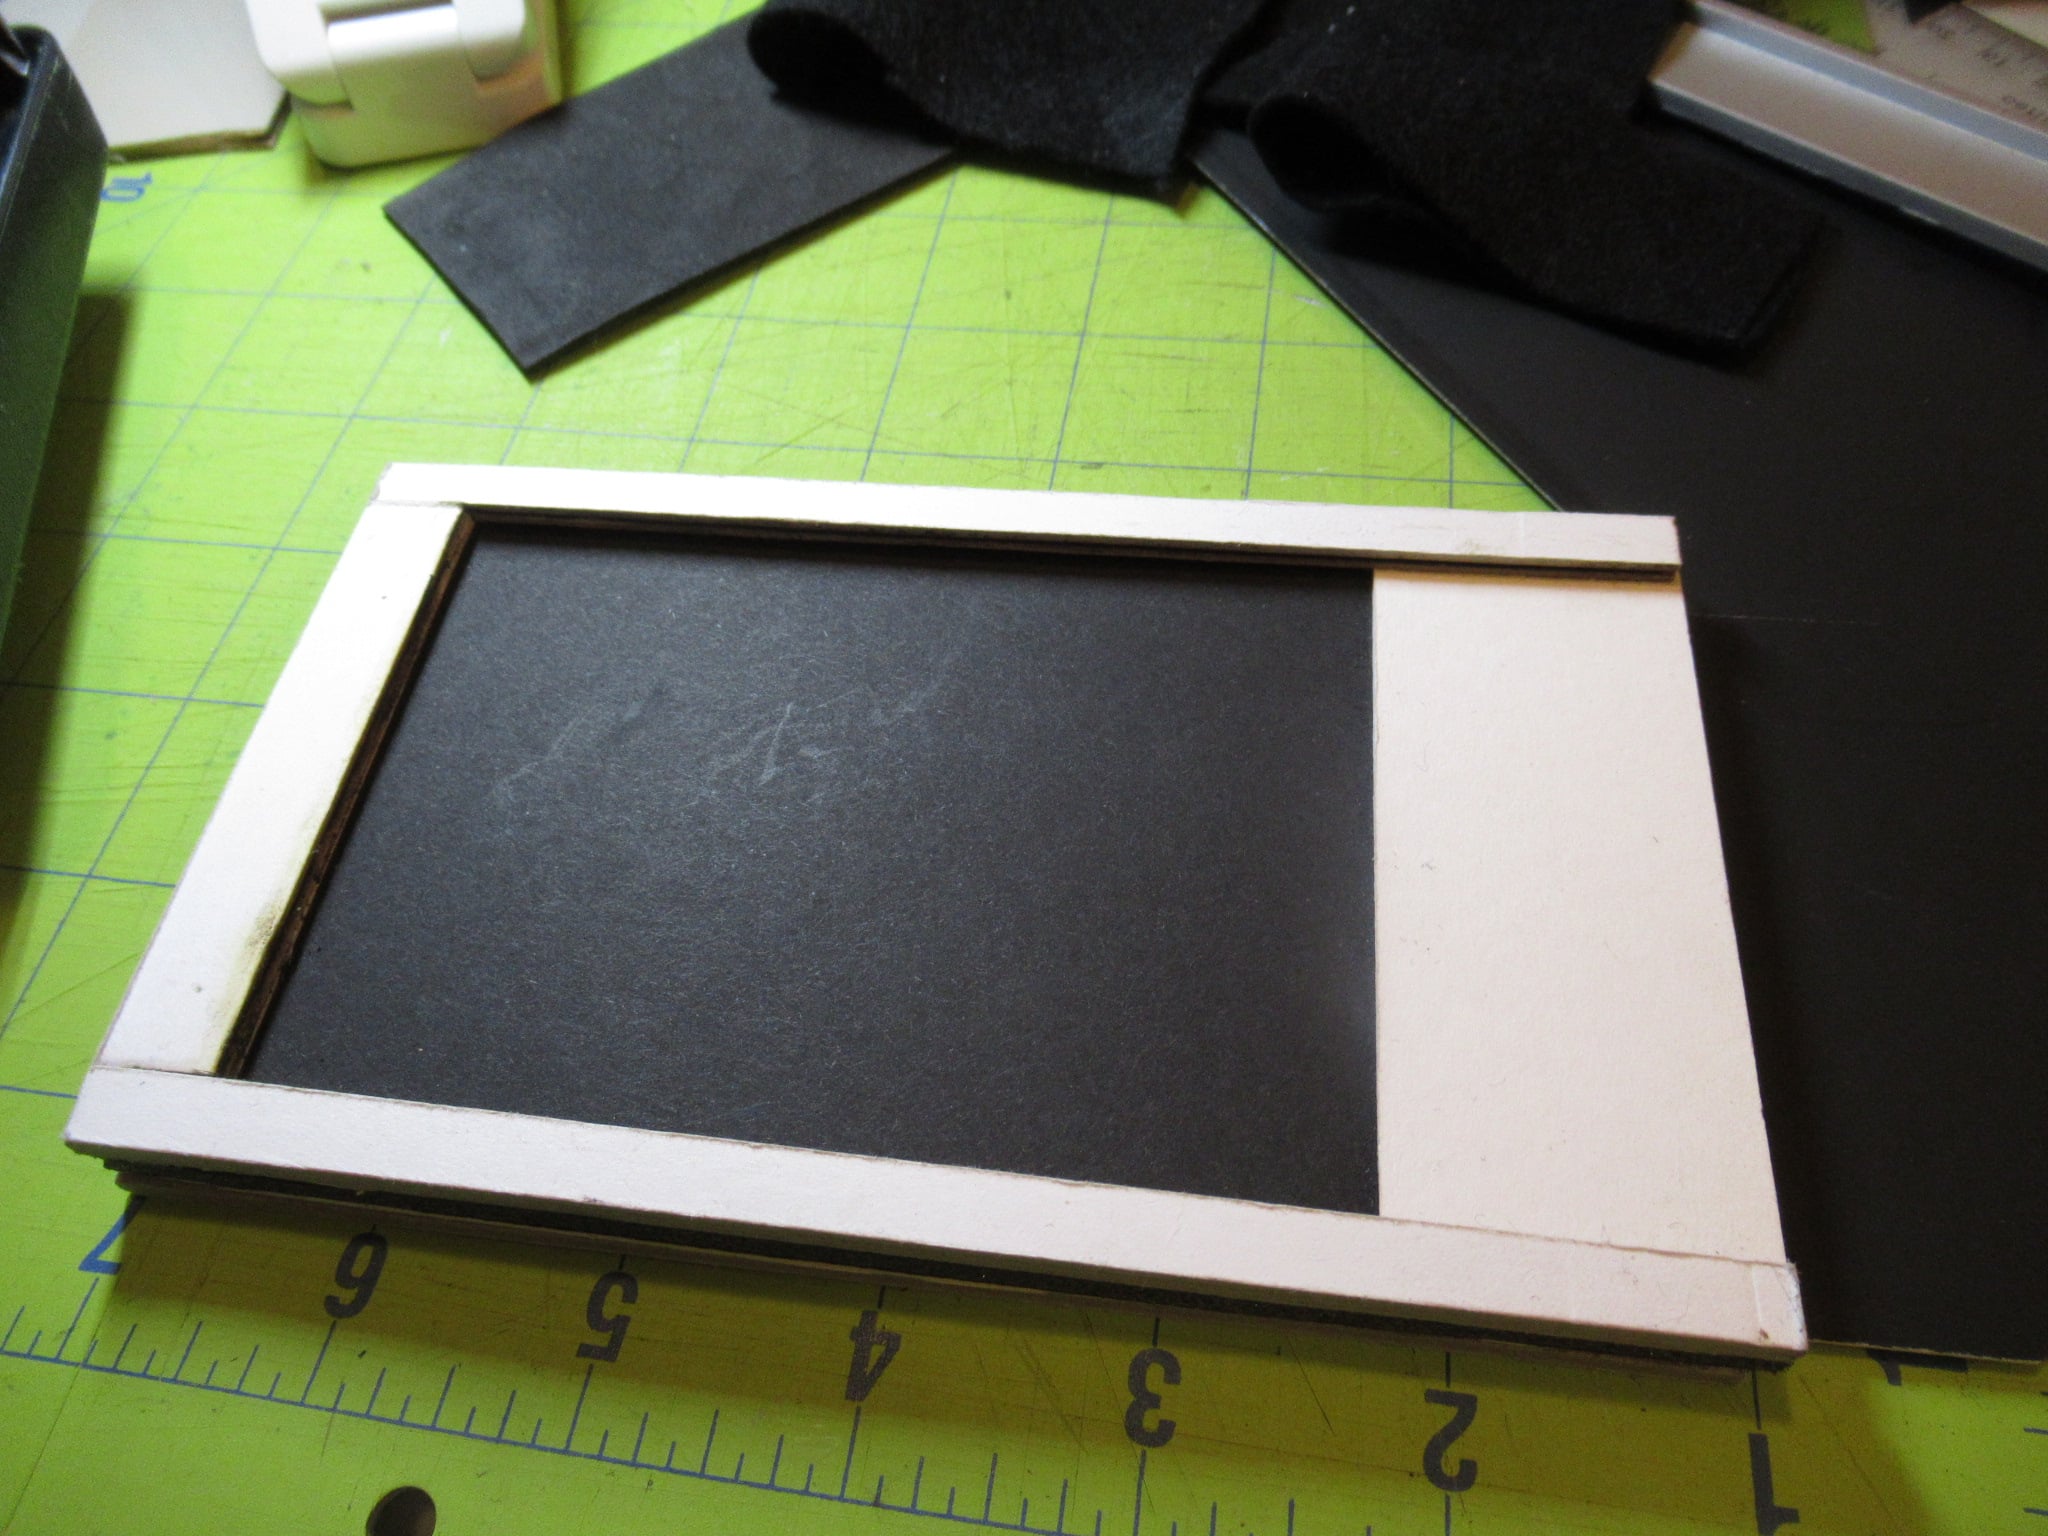
|
| Step 5: A piece of felt is glued to the opening, the dark slide is cut out of bristle board, and a piece of hard plastic is taped at the opening to hold down the dark slide to seal out light leaks. Be sure to tape it down firmly. | 
|
| Step 6: The finished film holder is double sided, which makes it just about the size of a Polaroid film pack. The darkslide grooves should be painted matt black to avoid light transmission. | 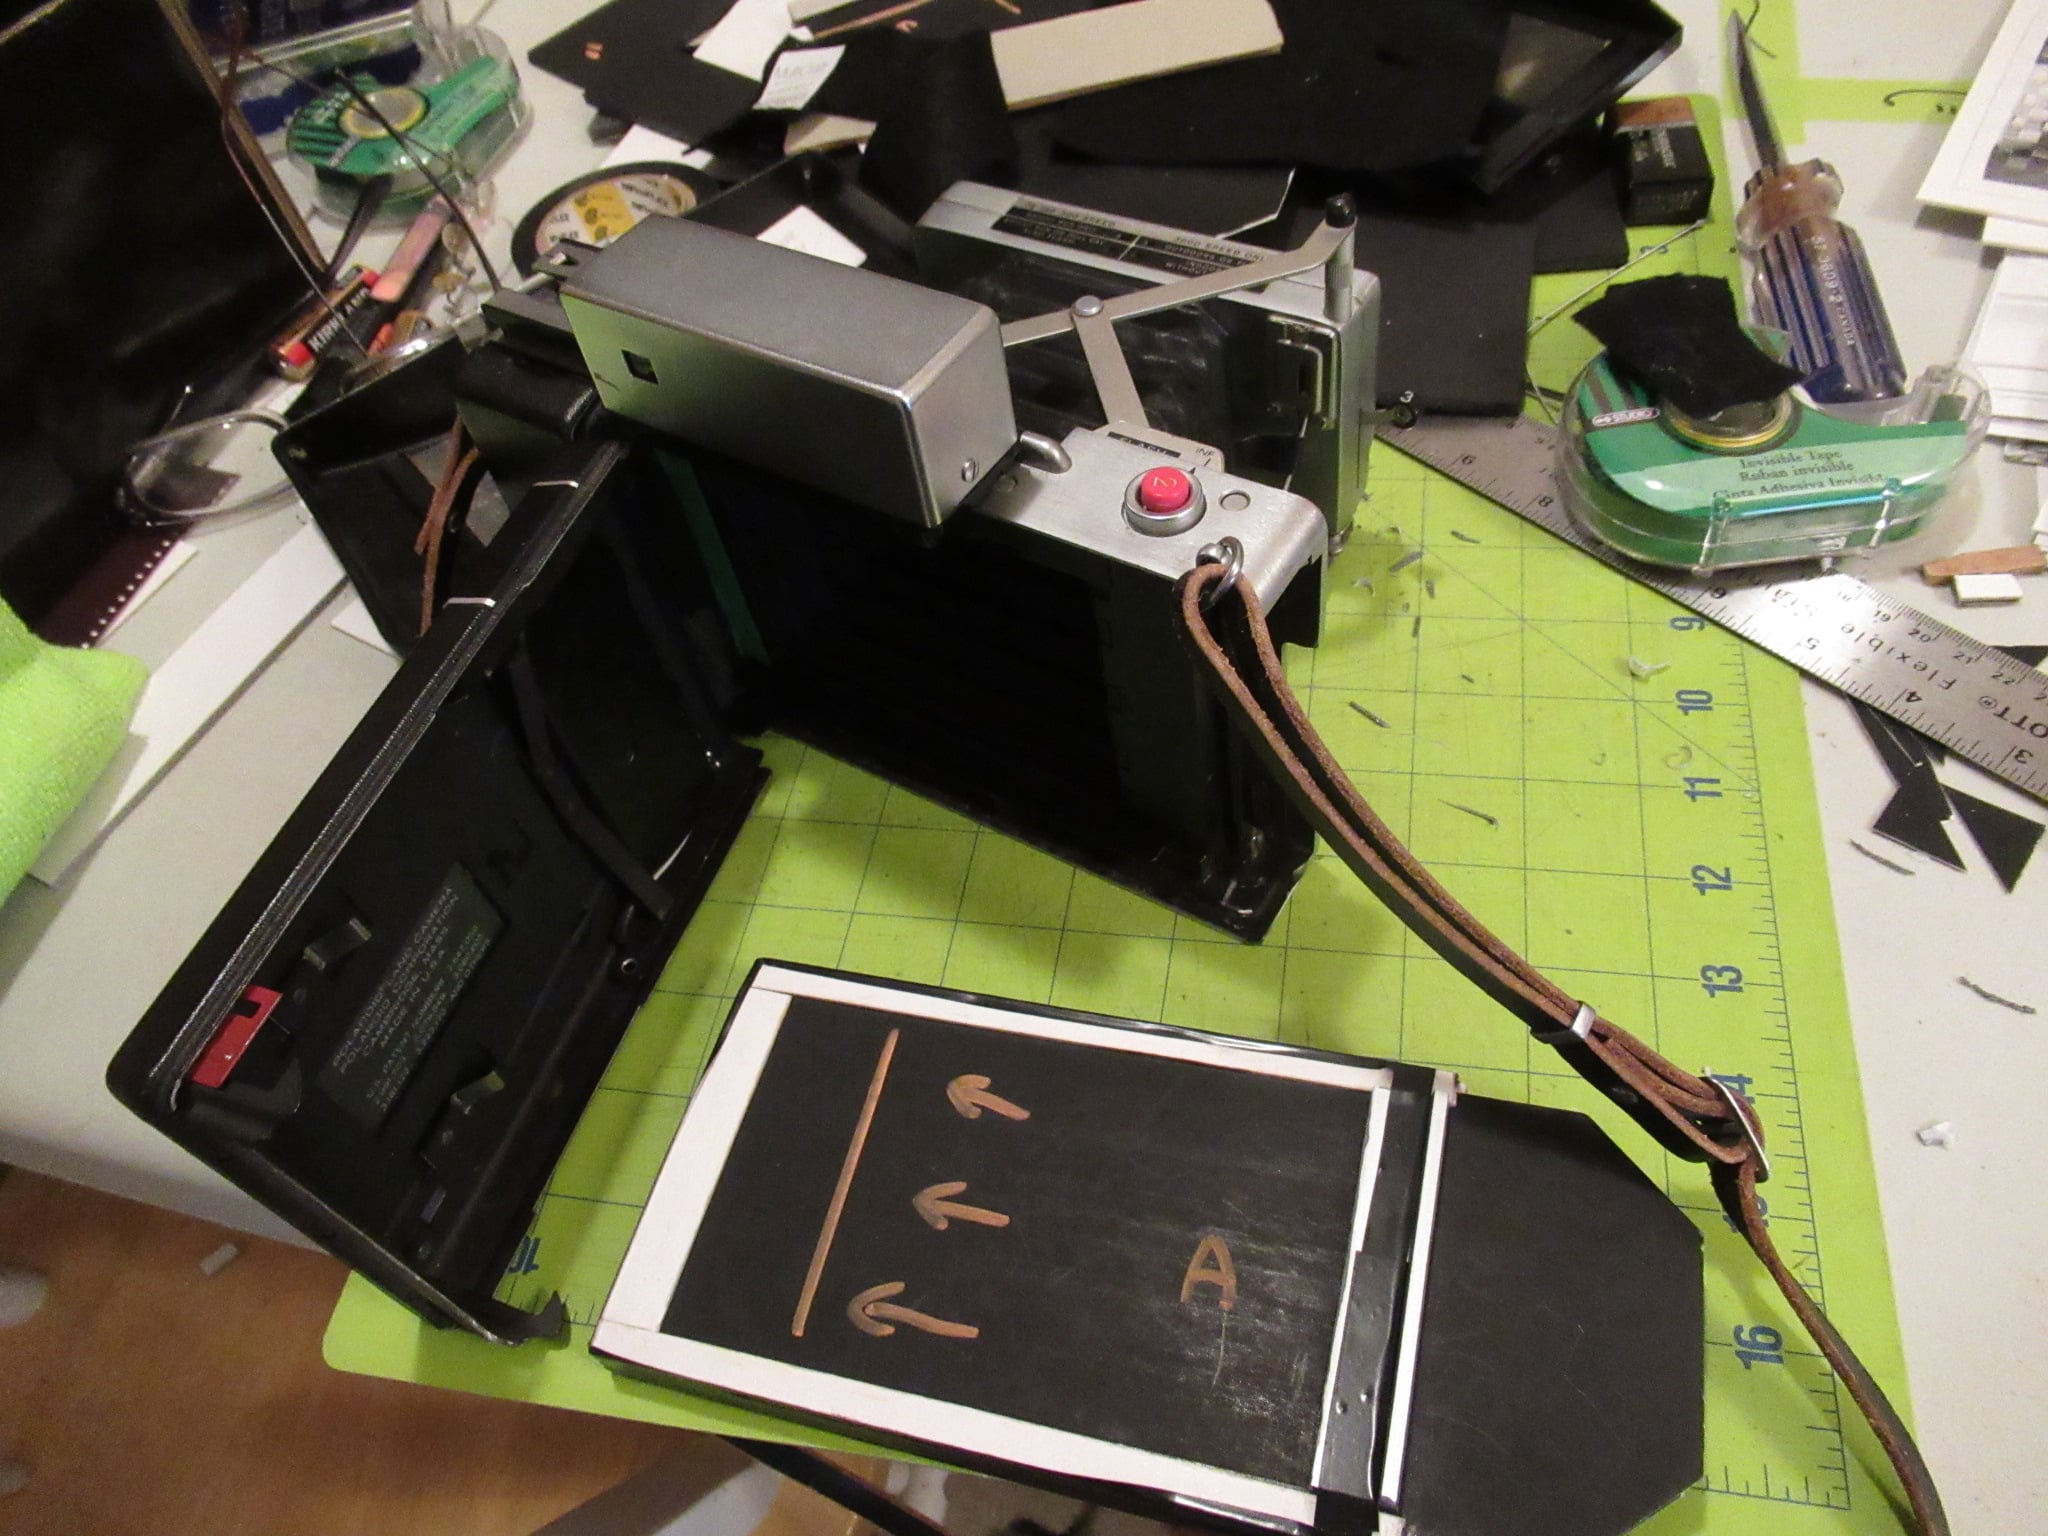
|
| Step 1: The paper or film negative is cut to size either under a safe light (paper negatives), or complete darkness (film negative). I found it easiest to use masking tape on a paper cutter as guides when trimming paper to size. Use an existing Polaroid picture as a guide, or place the masking tape at 3 3/8" and 4 1/4". Butt a 5x7 piece of paper up to the inside guide to cut the paper in half, then trim the cut off sheet with the same guide, then trim both sheets using the outside guide to get the correct width. | 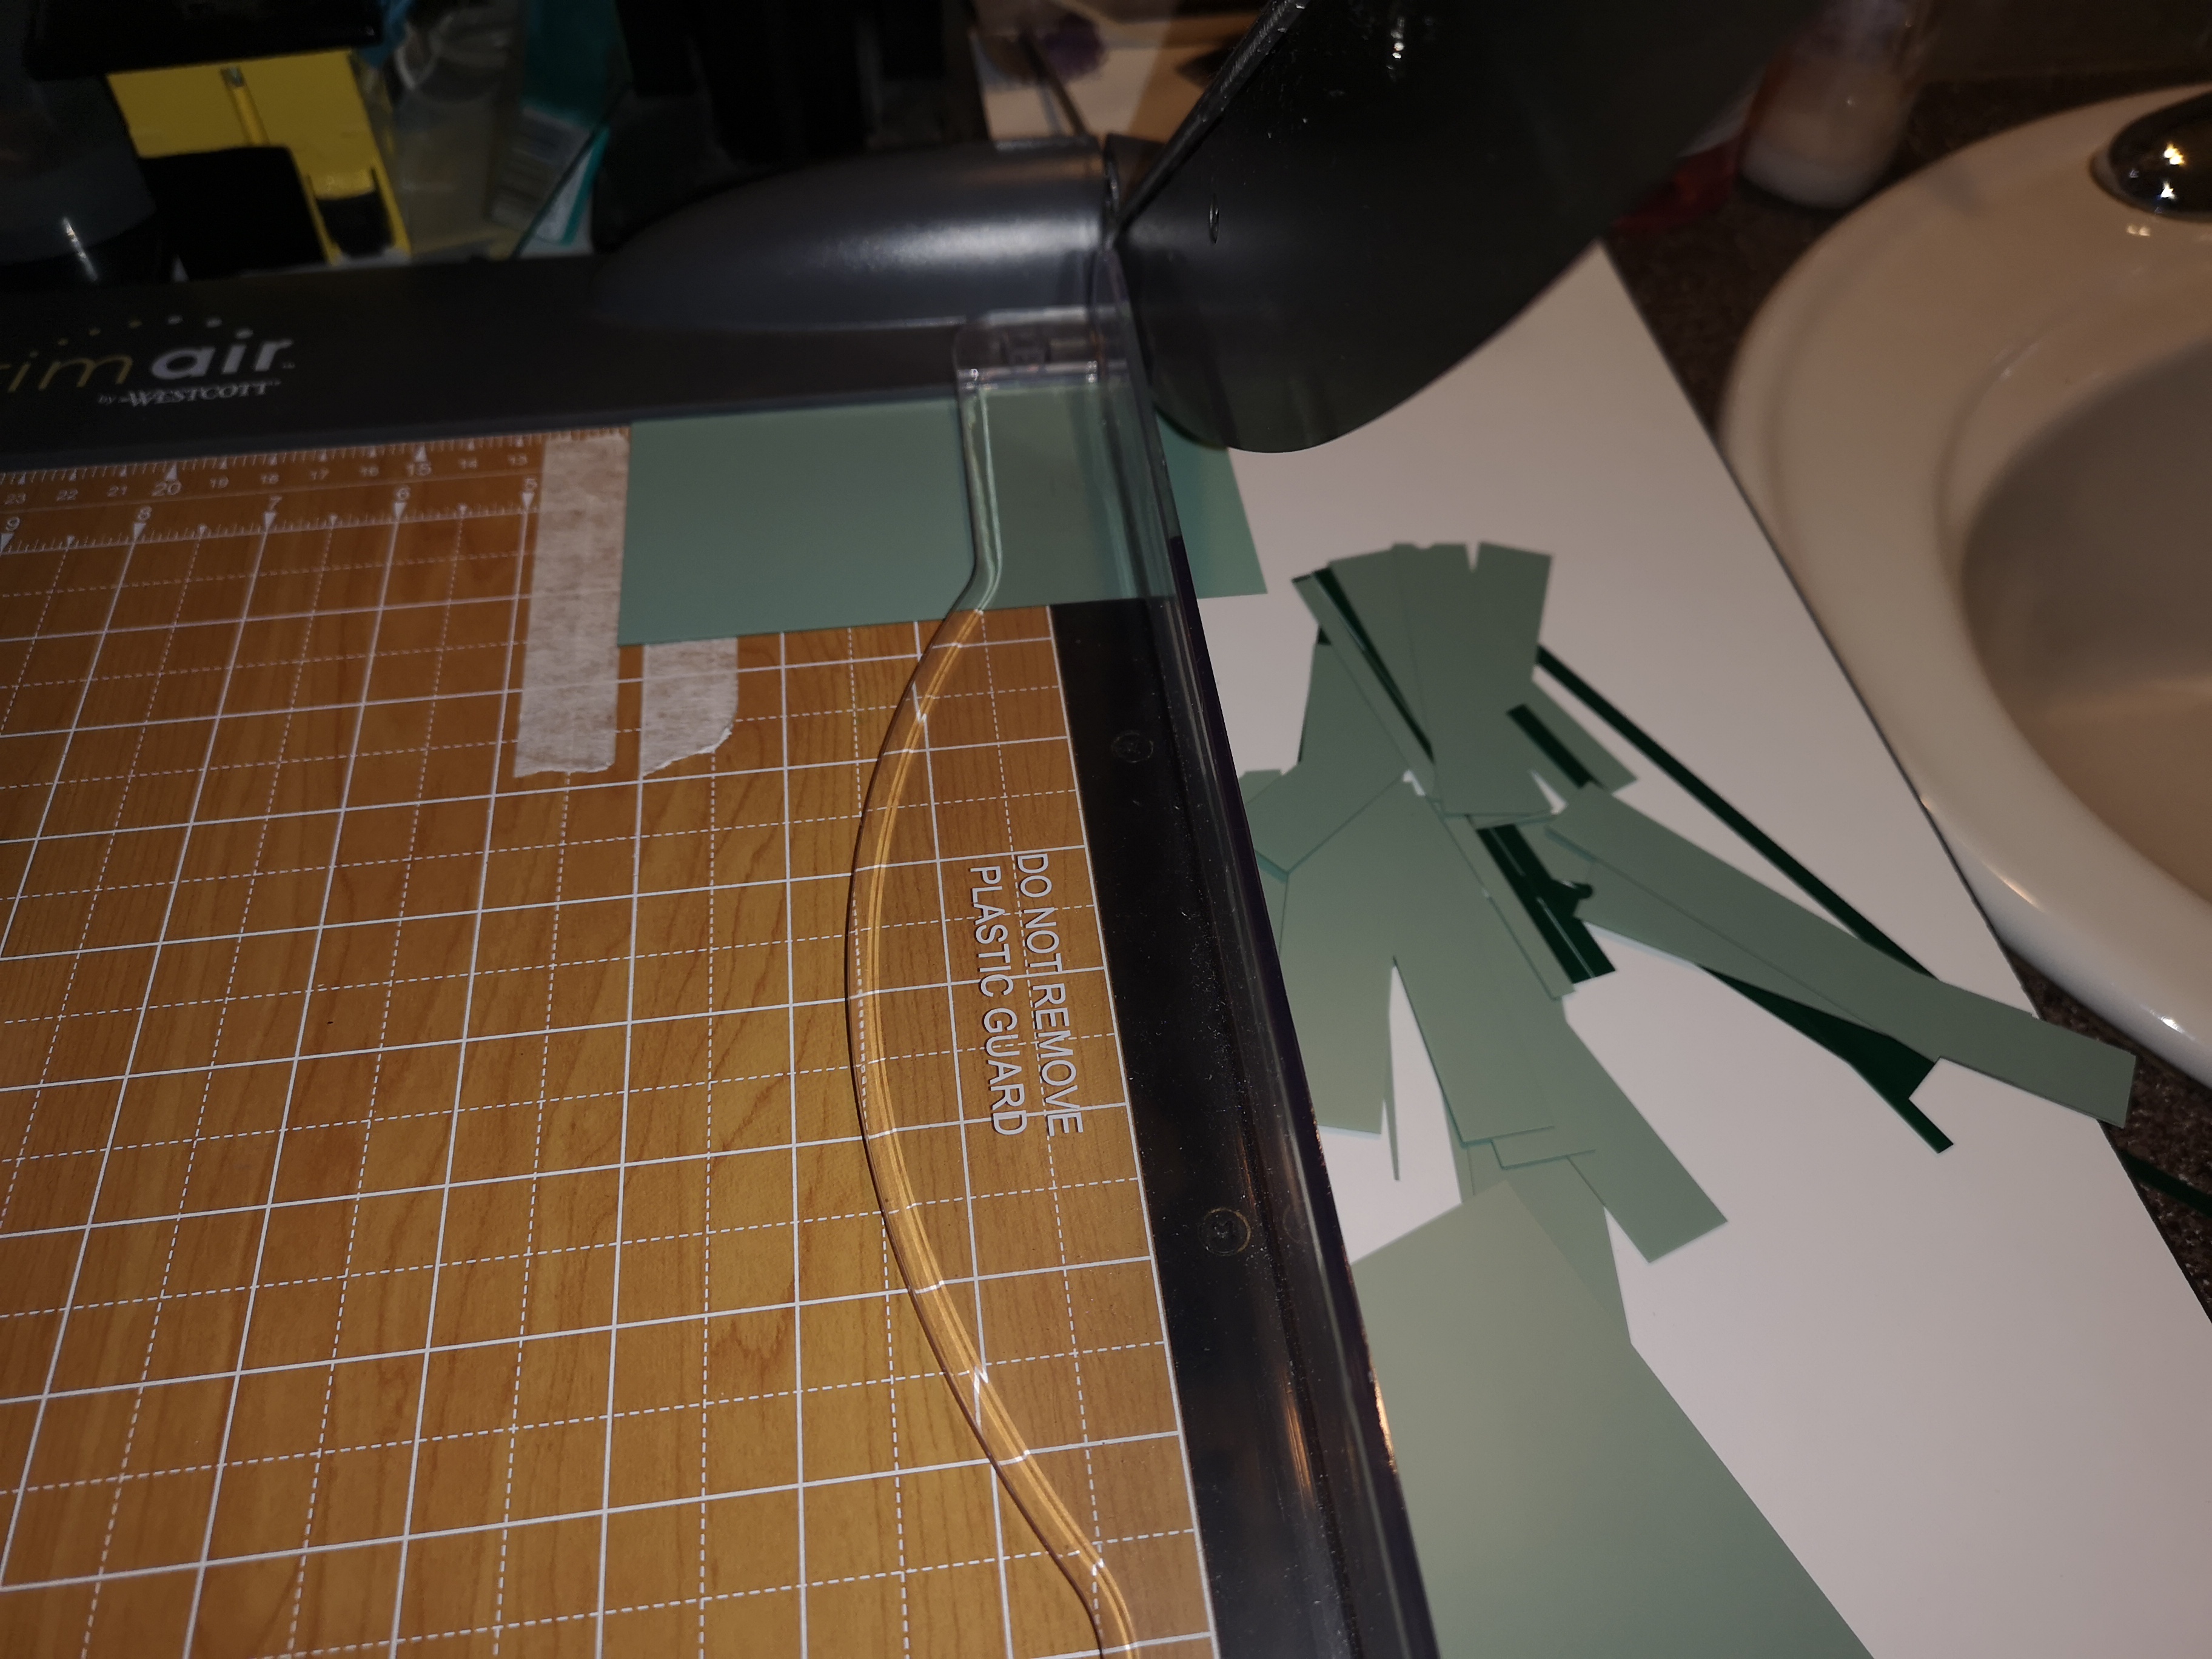
|
| Step 2: The negative is loaded into the film holder in a darkroom. | |
| Step 3: The film holder is loaded into the camera and the door closed until it locks shut. Be sure the film holder is inserted all the way to the left and that it's seated firmly down onto the film plane. | 
|
| Step 4: When ready to take a photo, the dark slide is removed, but not all of the way. Draw a mark on the dark slide to show when it clears the negative. If you pull it out all of the way, you won't be able to get it back in again easily, if at all. After the dark slide is removed, take the photo and replace the dark slide. | 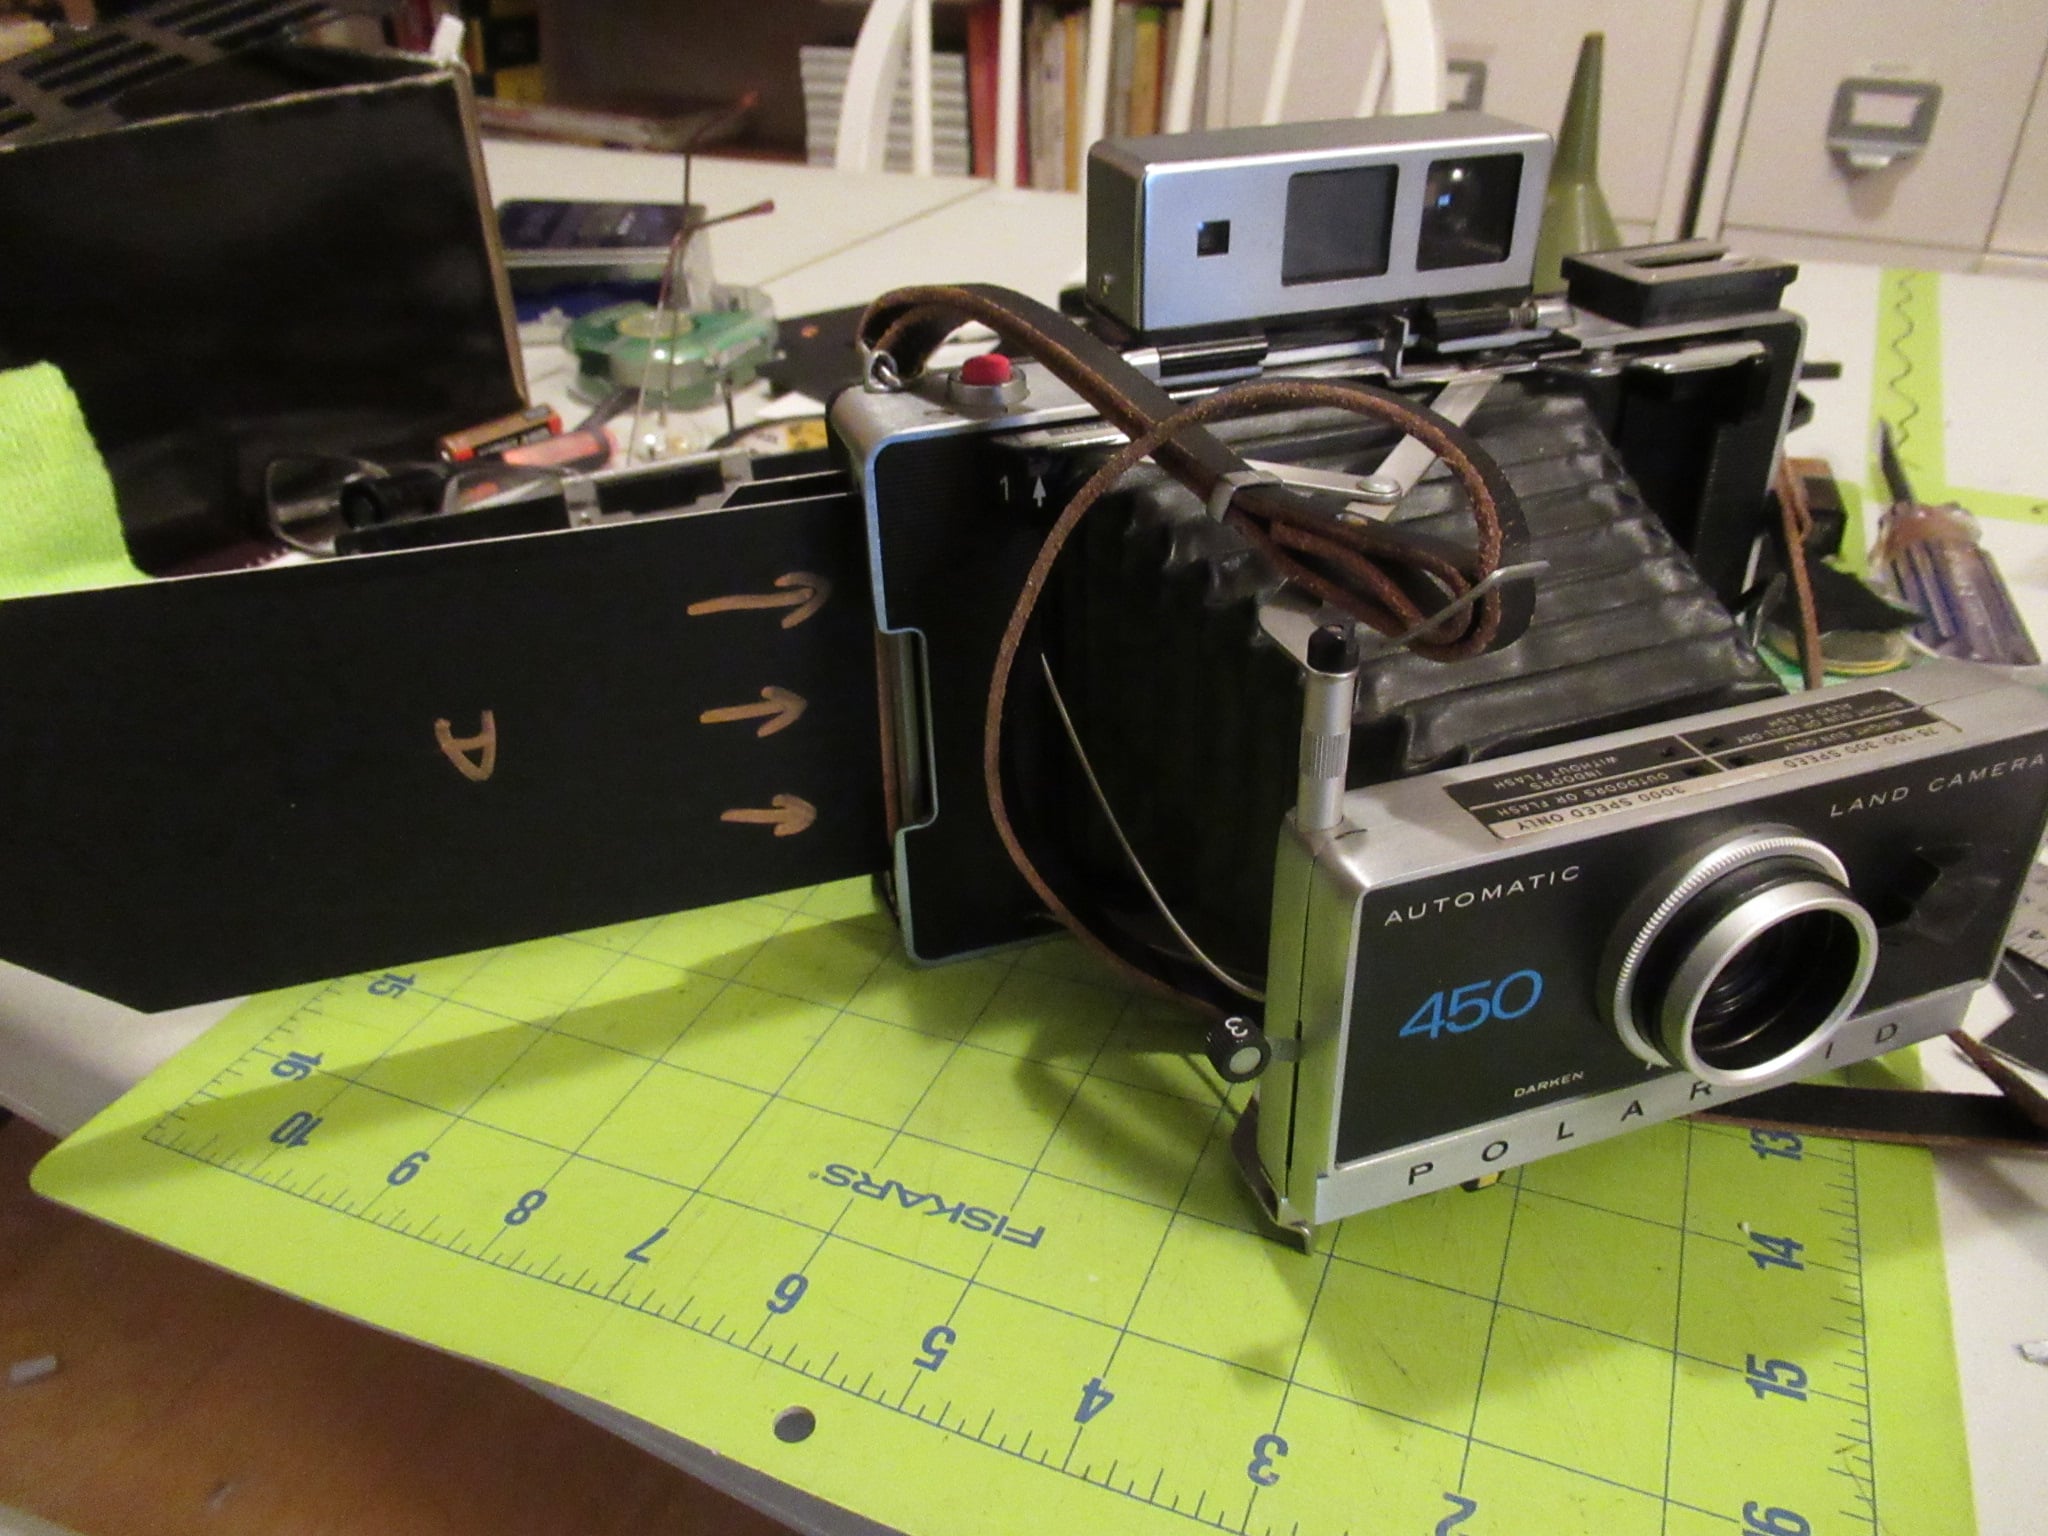
|
| Step 5: Write notes recording the holder number/side, and any exposure/subject information. | |
| Step 6: Develop the paper negative either on the field, or back at the darkroom. | 
|
| This is a demonstration of using the film holder outside. This is the ultimate test for light leaks. I ended up having to put a piece of foam on the door to help press the film holder in place to help prevent light leaks. | 
|