This conversion can be done by using the film handling mechanism from an i-type/600/SX-70 camera. The easiest and best donor camera to use is the OneStep 2, which has been discontinued but can be found inexpensively online. It fits very well into a pack camera without any permanent modifications. Access to a 3D printer is essential for making the adapter and other parts to seal out light. Although instructions are provided below on using a foldable SX-70 camera for this conversion, it is not recommended as it is quite difficult to modify the cycle switch to get it to eject film correctly.
Download and print the files in itype.zip.
Detach the film handling mechanism from a Onestep 2 by unscrewing the 4 bottom screws and removing the bottom panels, taking care not to dislodge the rollers. Unscrew the 6 screws holding it to the body of the camera and lift it out, swinging it up off the hooks on the end. Cut the ribbon cable off and wire it with the positive lead going to the switch and the other switch lead going to the inside motor terminal. Solder an additional lead to this terminal for the eject switch. Solder a negative lead to the forward motor terminal and lead them outside the unit.
Hook the adapter to the left side of the Onestep 2 back and lower it in place, then screw it down with 2 screws while holding the film door open. Reinstall the bottom covers, installing the film cover first, then the motor cover.
While holding it upside down, install the hooks facing up by pressing them into the indents. You may need to file the corners down to make it fit. Test the fit by inserting the left end into the pack camera and lowering in place. Gently press down on the back until it's seated, then press down on the hook body to engage the hooks. You may need to file down the hooks to fit your camera.
Remove the back from the camera and install the sides. They should slide into retainers on the Onestep 2 back. Reinstall the back and adapter and check the fit. Install the left cover with the hinge pin.
Wire it to a 3.7v LiPo battery, and wire the positive lead and the switch lead to a push button switch. You may want to wire in an on/off switch to prevent accidentally pressing the eject switch.
Install the 13.5mm image offset struts by removing the lens body from the focusing scissors. Remove the top black cap on the vertical strut and remove the nuts on the top and bottom of the strut. Pull out the rod. Remove the screw at the end of the horizontal strut holding the lens body on. The lens body should come free.
Cut a piece of 3/16" steel rod and insert it through the 3D printed vertical strut and the lens body. Attach the vertical strut to the top focusing scissor with the original nut. Install the horizontal strut onto the bottom of the lens body, inserting the left side (looking head on) and screwing down with the original bolt. Screw down the right side with the original screw.
Changing the ASA setting may be difficult but is easier if you restrain the speed knob with a sharp object, then change the scene setting the correct direction then moving the ASA dial the same direction to complete the change.
Download and print the files in itypereversekit.zip This kit will only work on a Zeiss Ikon combination viewfinder/rangefinder
Cut two mirrors: 80mm x 55mm and 80mm x 85mm and glue them onto the 45 degree surfaces. To use, mount the viewfinder attachment until it clicks into place. Carefully push on the lens attachment making sure it's seated completely. Composing the picture is a little tricky as movements for framing are reversed. The rangefinder works normally.
To shoot Polaroid i-type film, orient the camera so the right side is pointing up and shoot 90 degrees.
To shoot landscape paper negative reversals, orient the camera down like you are using a TLR (twin lens reflex). An arca tripod mount is provided for this purpose.
Although this method is not recommended, I've included it for information purposes.
The camera needs to be disassembled down to the bottom area which holds the film and drive mechanism. There is plenty of documentation online detailing the steps. You will need a 1mm robertson screwdriver, which you can make by filing down a thicker flat head screwdriver. At this point, you need to rewire the back and reorient a switch on the gear train, which is the most difficult step in this process.
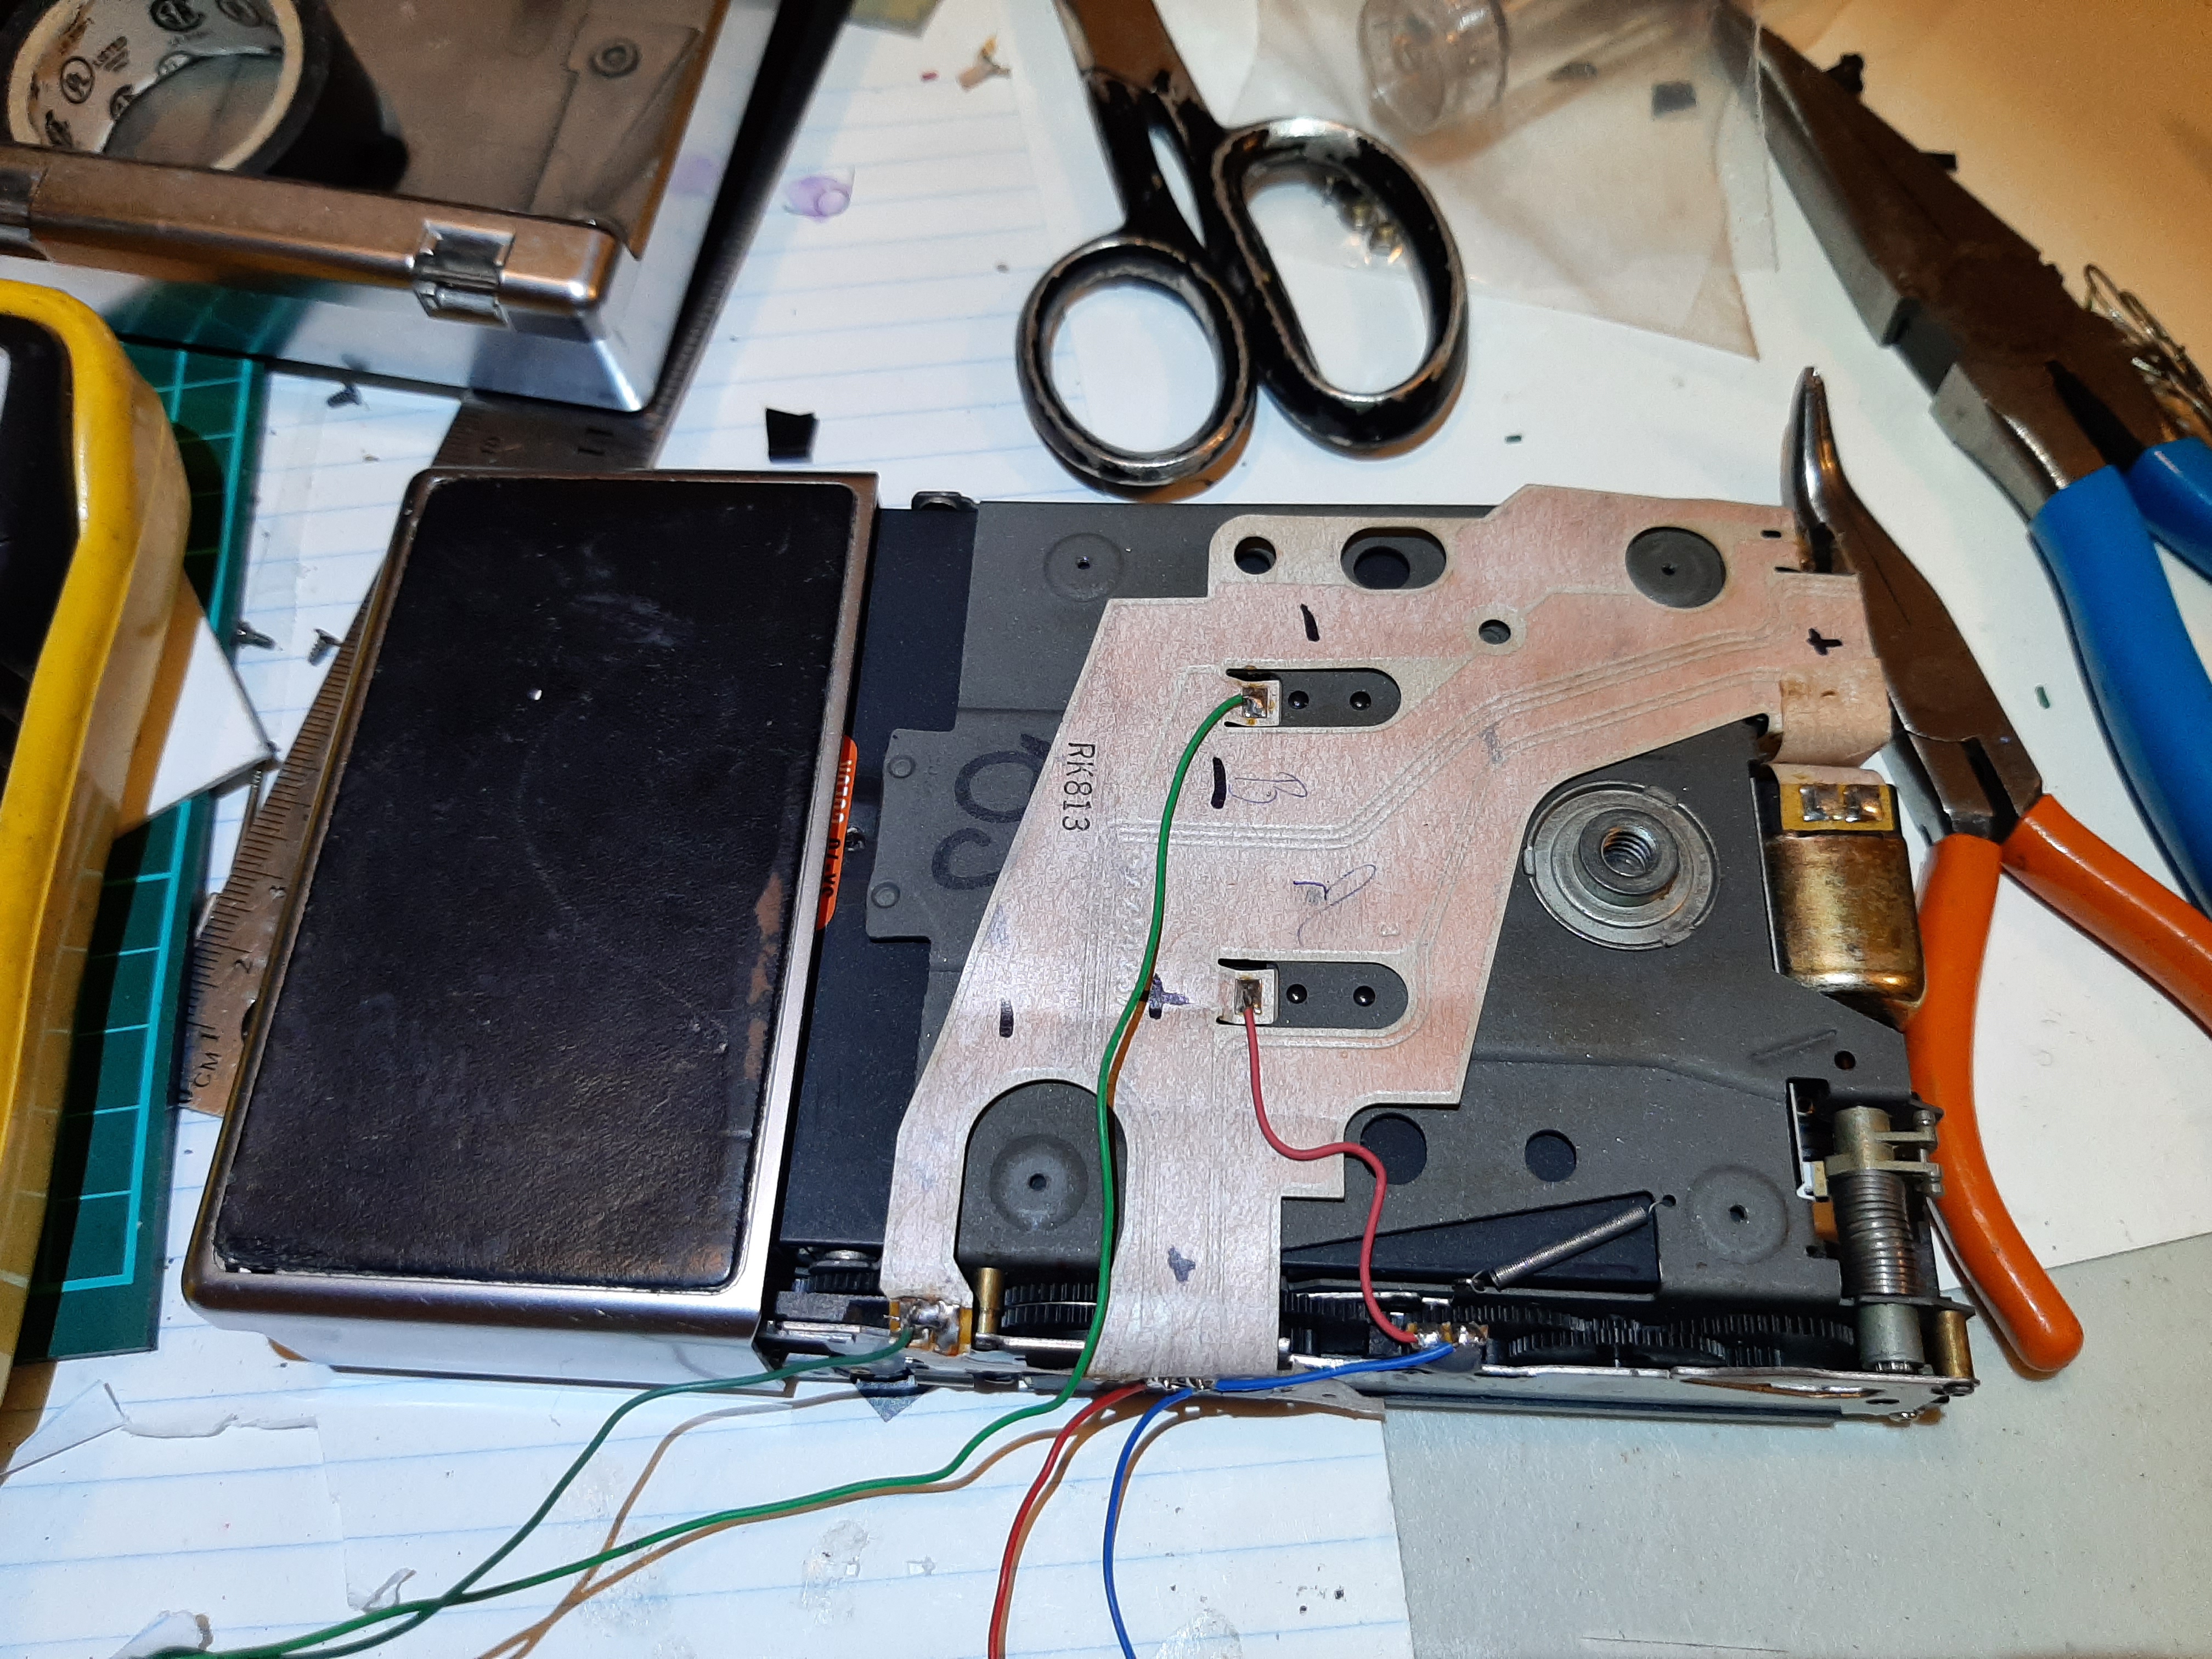
| Remove both switches beside the gear train and choose one of them to be used as the cycle switch. They can't be used as is unless you install a relay to reverse the effect of the switch. Both cycle switches close at the end of the ejection cycle and you want at least one of them to open to make the motor stop running after the film is ejected. Because the clearances are small, the switch will need some filing to make it fit reversed. This is a delicate procedure requiring working with very close tolerances. The switch is then reversed and installed so the sliding cycle tab opens it at the completion of the ejection cycle. You will need to power up the back to see how this works, and then to place the switch at the right position/angle. The switch needs to open slightly before the end of the ejection cycle (you'll hear a "snap" of the cycle tab at the beginning of the cycle) to compensate for motor run-on. This will require experimenting with a fresh battery. Once the switch is positioned correctly, epoxy it into place. |
|
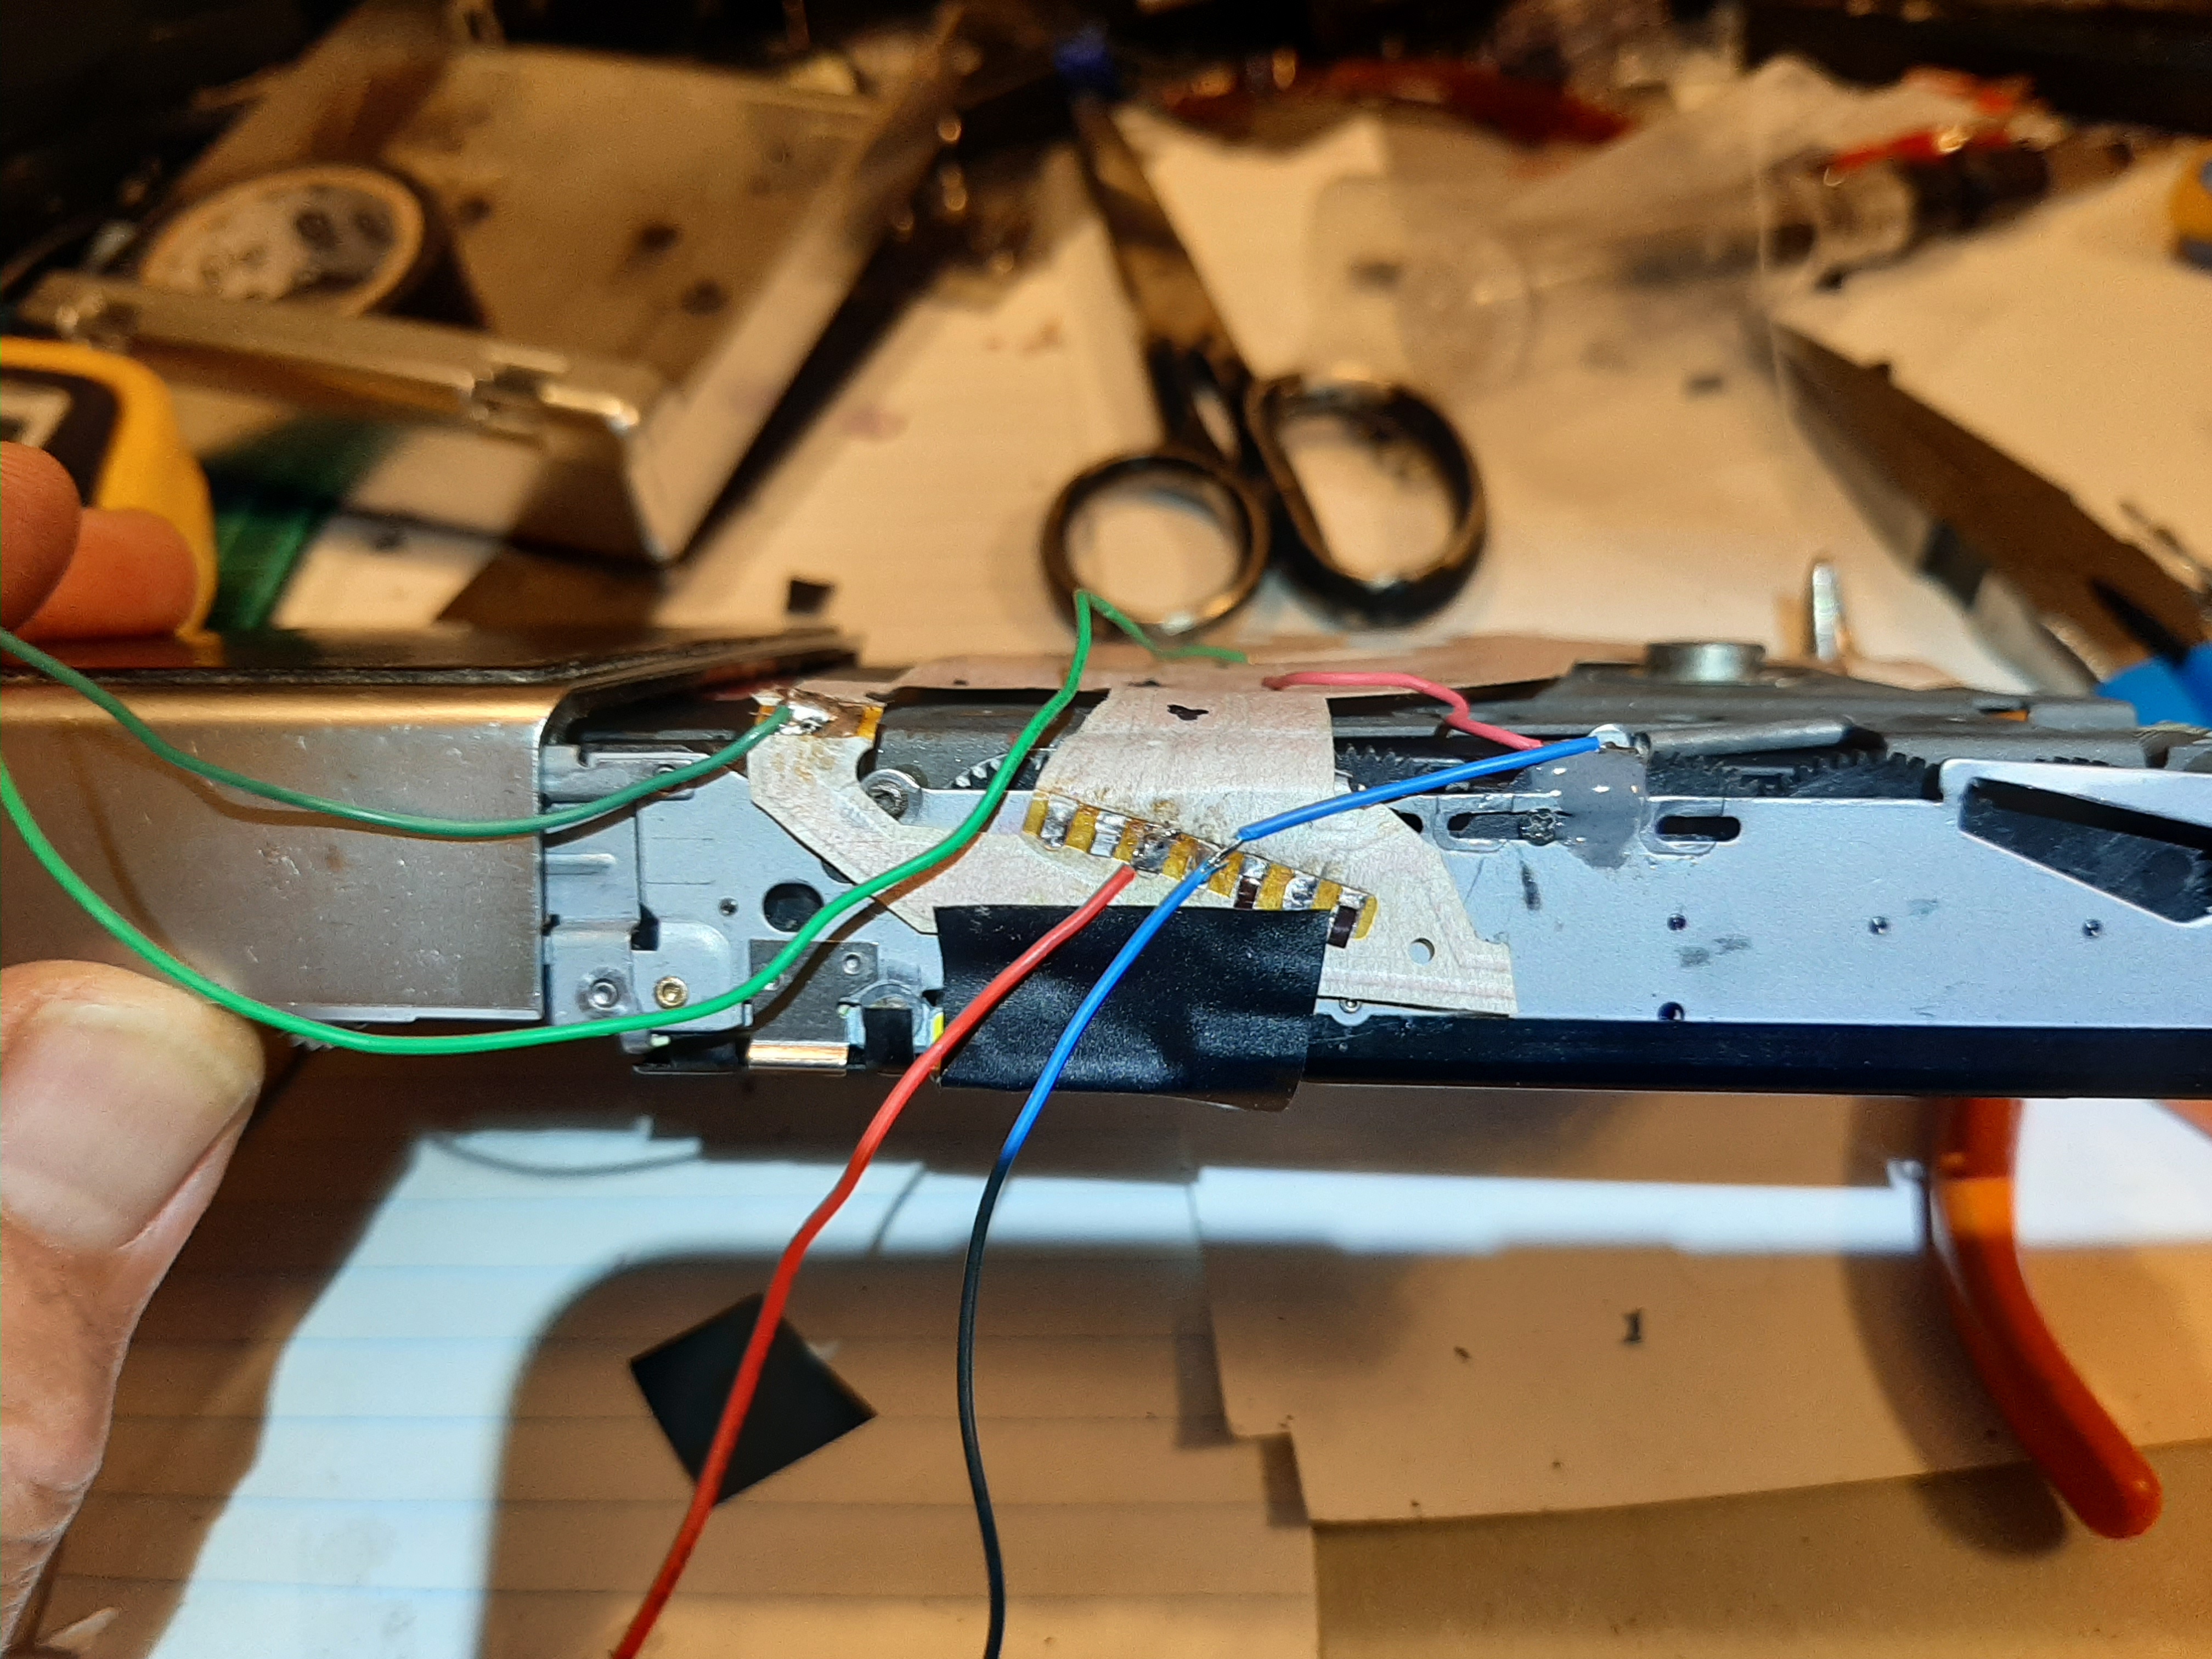
| I shorted the film door switch (lower left) and ran a wire outside for a master switch so I can turn off the back when not in use. This not only prevents accidental ejection of film, it also prevents battery bleed. For some reason, the IC chip which controls the motor eats power while on, so the master switch needs to be turned off when not in use. The lighter green wire comes from the negative battery terminal. Then, I ran a wire from the cycle switch, to the positive battery terminal. The other terminal of this switch gets connected to the motor terminal, which is #4 from the left or right since it's in the middle. I kept running this wire (blue) to the outside for the eject switch. The other wire (red) for the eject switch gets connected to the positive battery terminal, immediately to the left of the motor terminal, or 3rd from the left. See the previous picture for a closeup. When the eject switch is closed, it'll supply power to the motor. After pressing it for a split second, the cycle switch takes over and applies power to the motor until the sliding tab turns it off at the end of the cycle. I used the motor terminal on the ribbon cable because connecting directly to the motor makes it run really fast. I found out there's an IC chip between the power and the motor. This seems to slow the motor down a bit. |
|
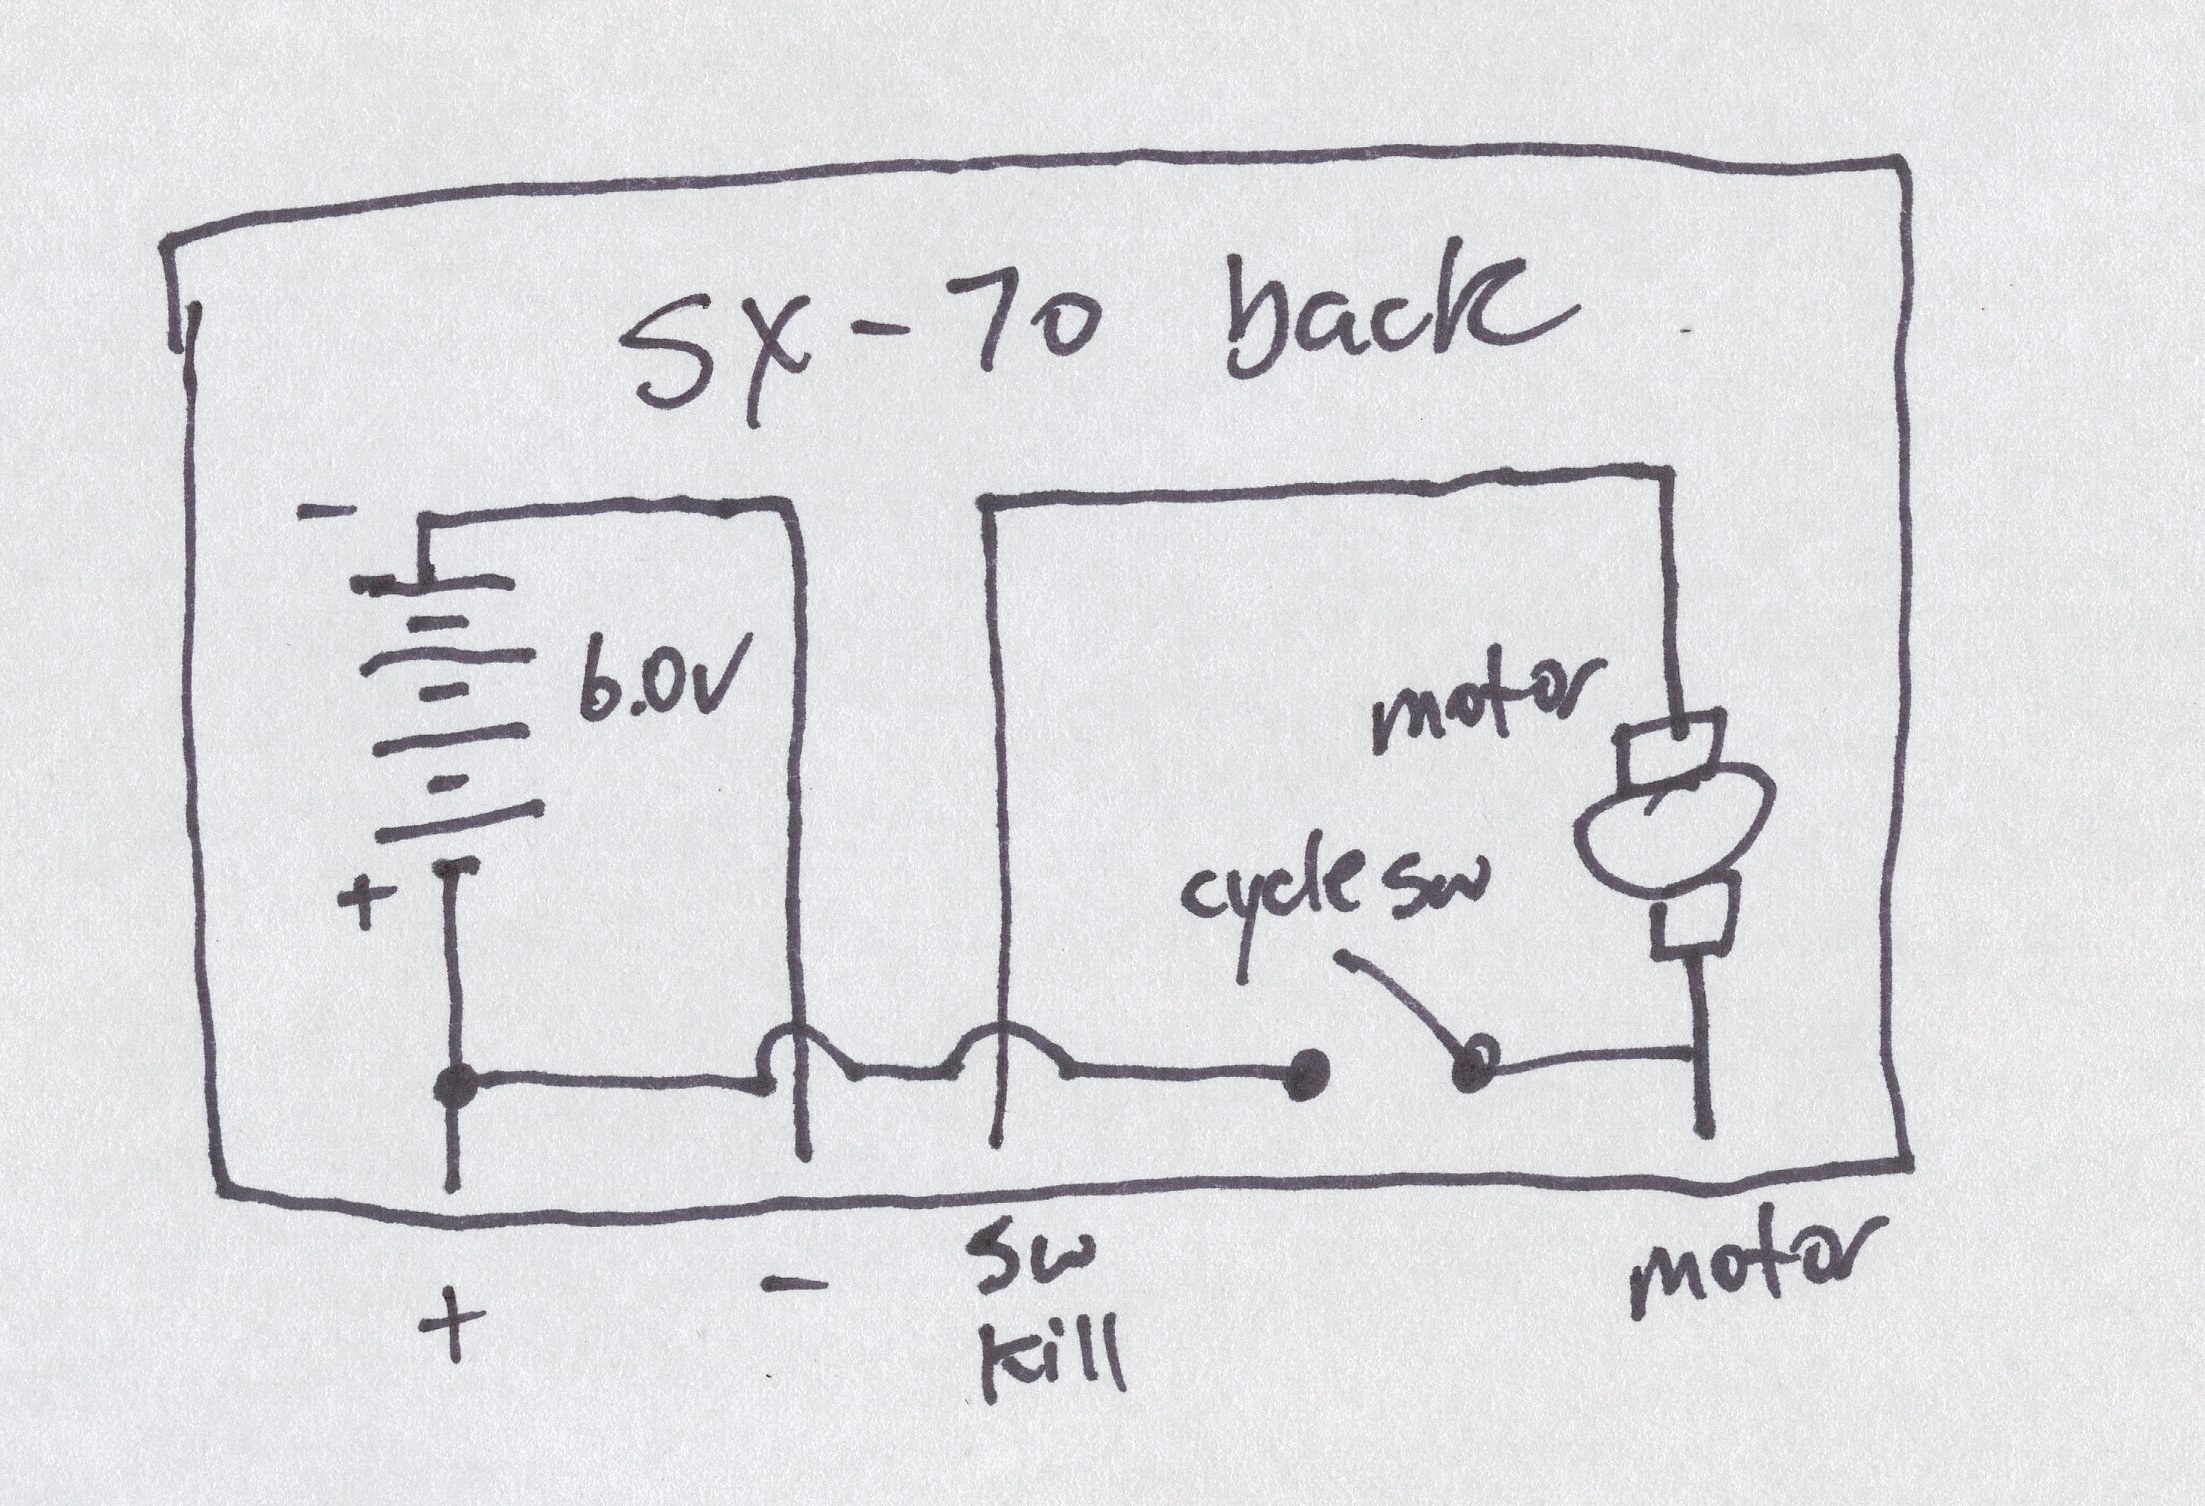
| The wiring diagram demonstrates how this works. The 4 wires running out the camera need to be labled or referenced to avoid confusion when connecting them up after mounting them on the camera. |
|
Because the film plane will be moved back, compensation needs to be made elsewhere to retain rangefinder functionality. One way of doing this is preventing the bellows from opening fully by creating another slot that the scissor stop can fall into when opening the bellows. The problem with this method is that although it will provide accurate focus at infinity (or at one point), because the rangefinder is precisely calibrated to how the focusing scissors work, and by not opening the bellows fully, you're modifying the focus slide/lens movement ratio, the rangefinder won't be accurate at other focus points. This causes the portrait and closeup attachments to be unusable.
The best method of compensating for a film plane farther back is to move the lens body back by the same amount that the film plane has been moved back. When mounting the SX-70 back, it should be mounted around 18mm back. This is the distance between the vertical strut holding the lens body and front of the camera. The idea is to move the lens body back by creating an extension of the strut.
| Remove the bellows from the body of the camera by removing the 4 screws holding it on. Free the bellows from the lens body. | 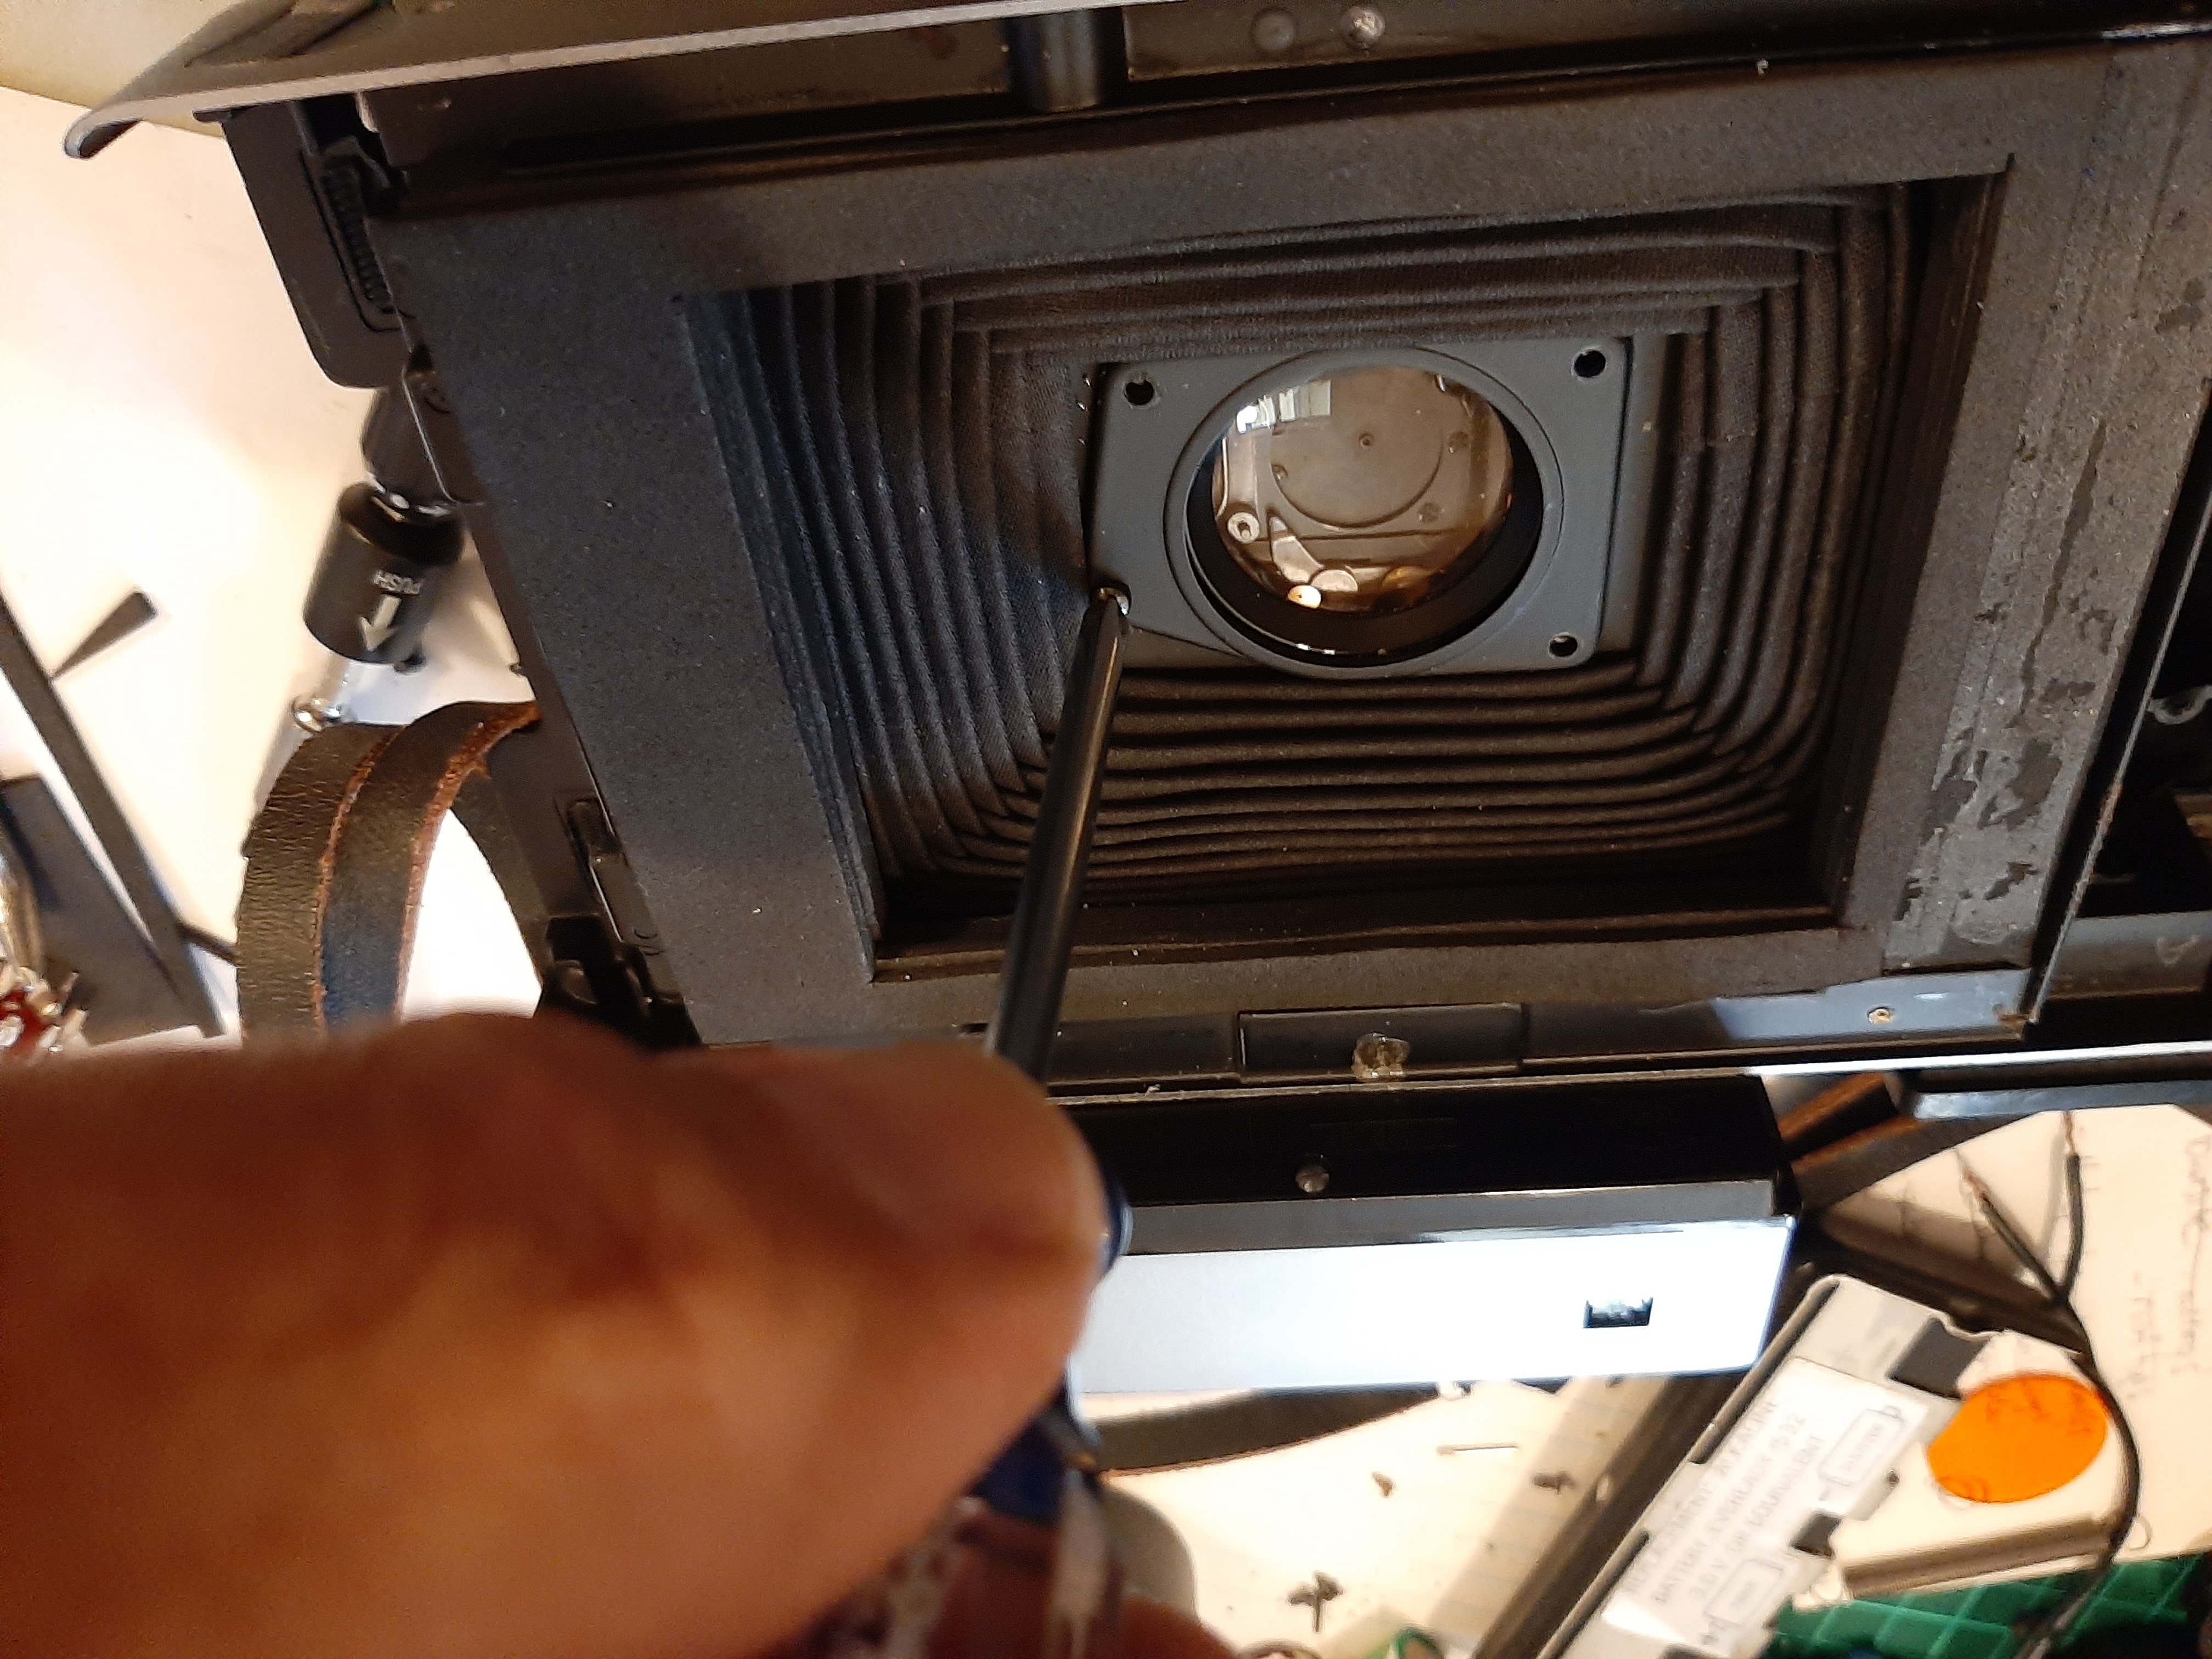
|
| Remove the screw holding the lens body onto the horizontal strut at the bottom and the nut holding the vertical strut. | 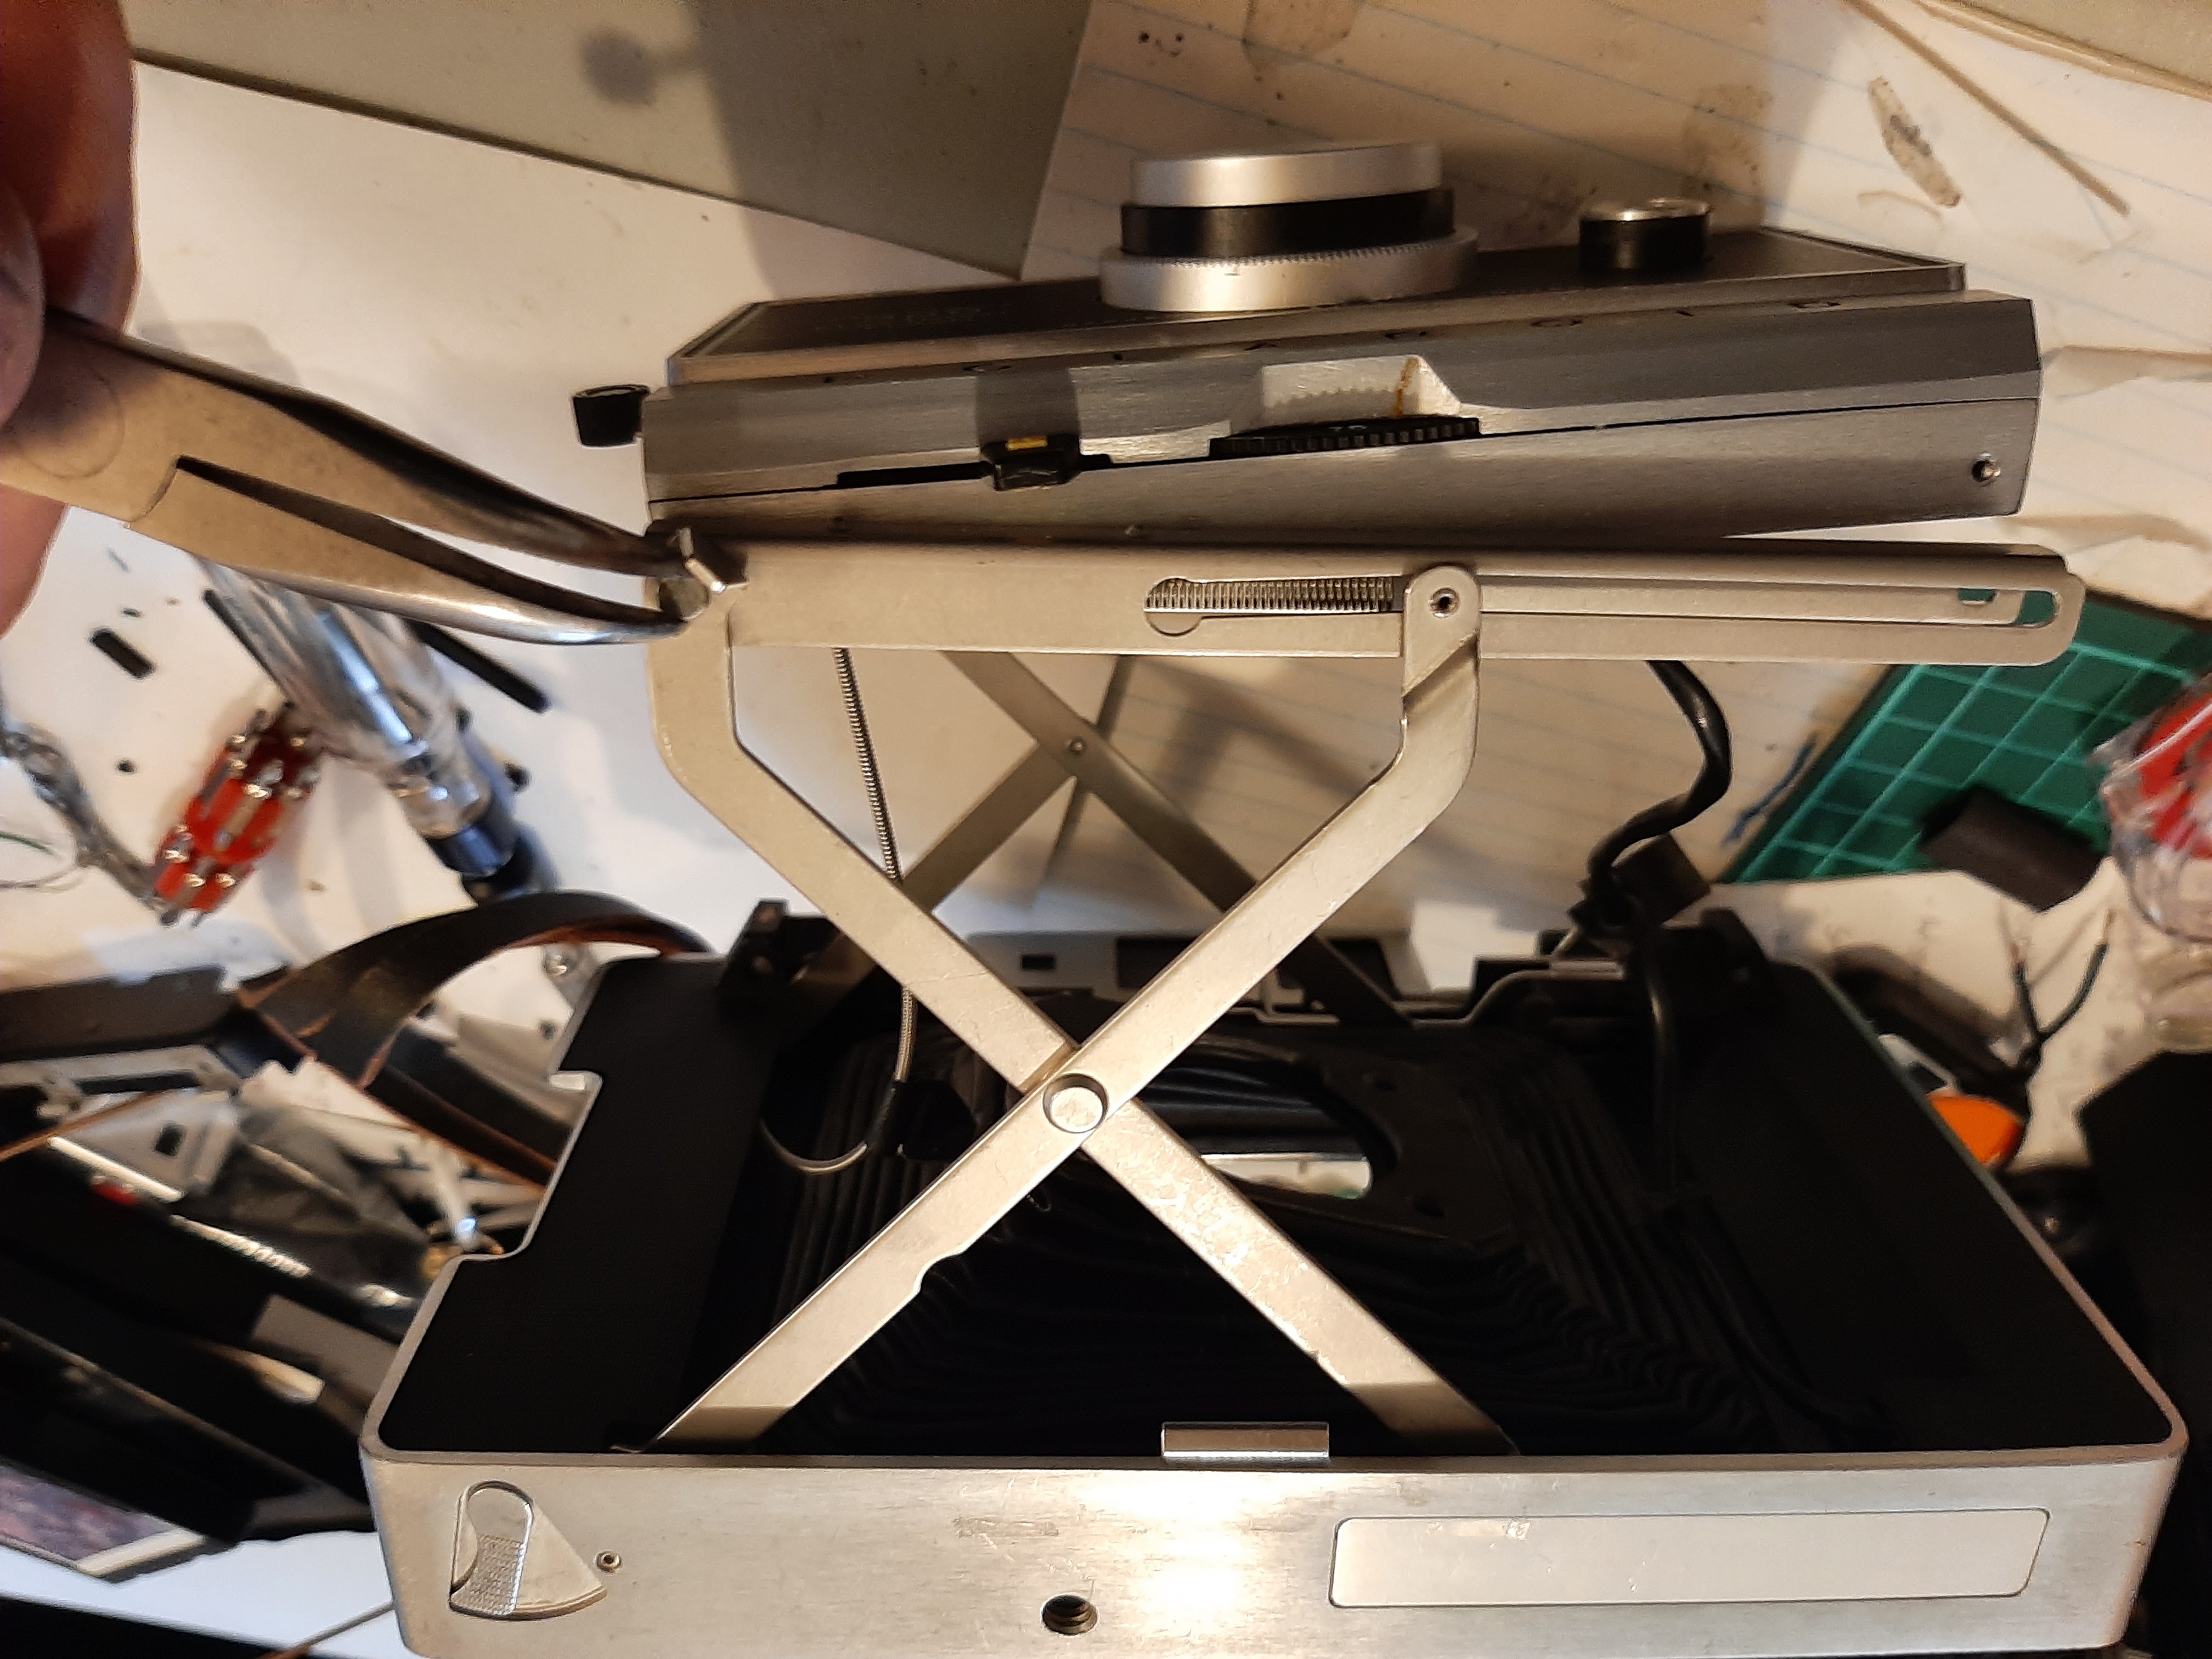
|
| Make 2 spacers with 3/16" holes drilled 18mm apart. You can make these out of metal, or design them out of plastic, or 3D print them. | 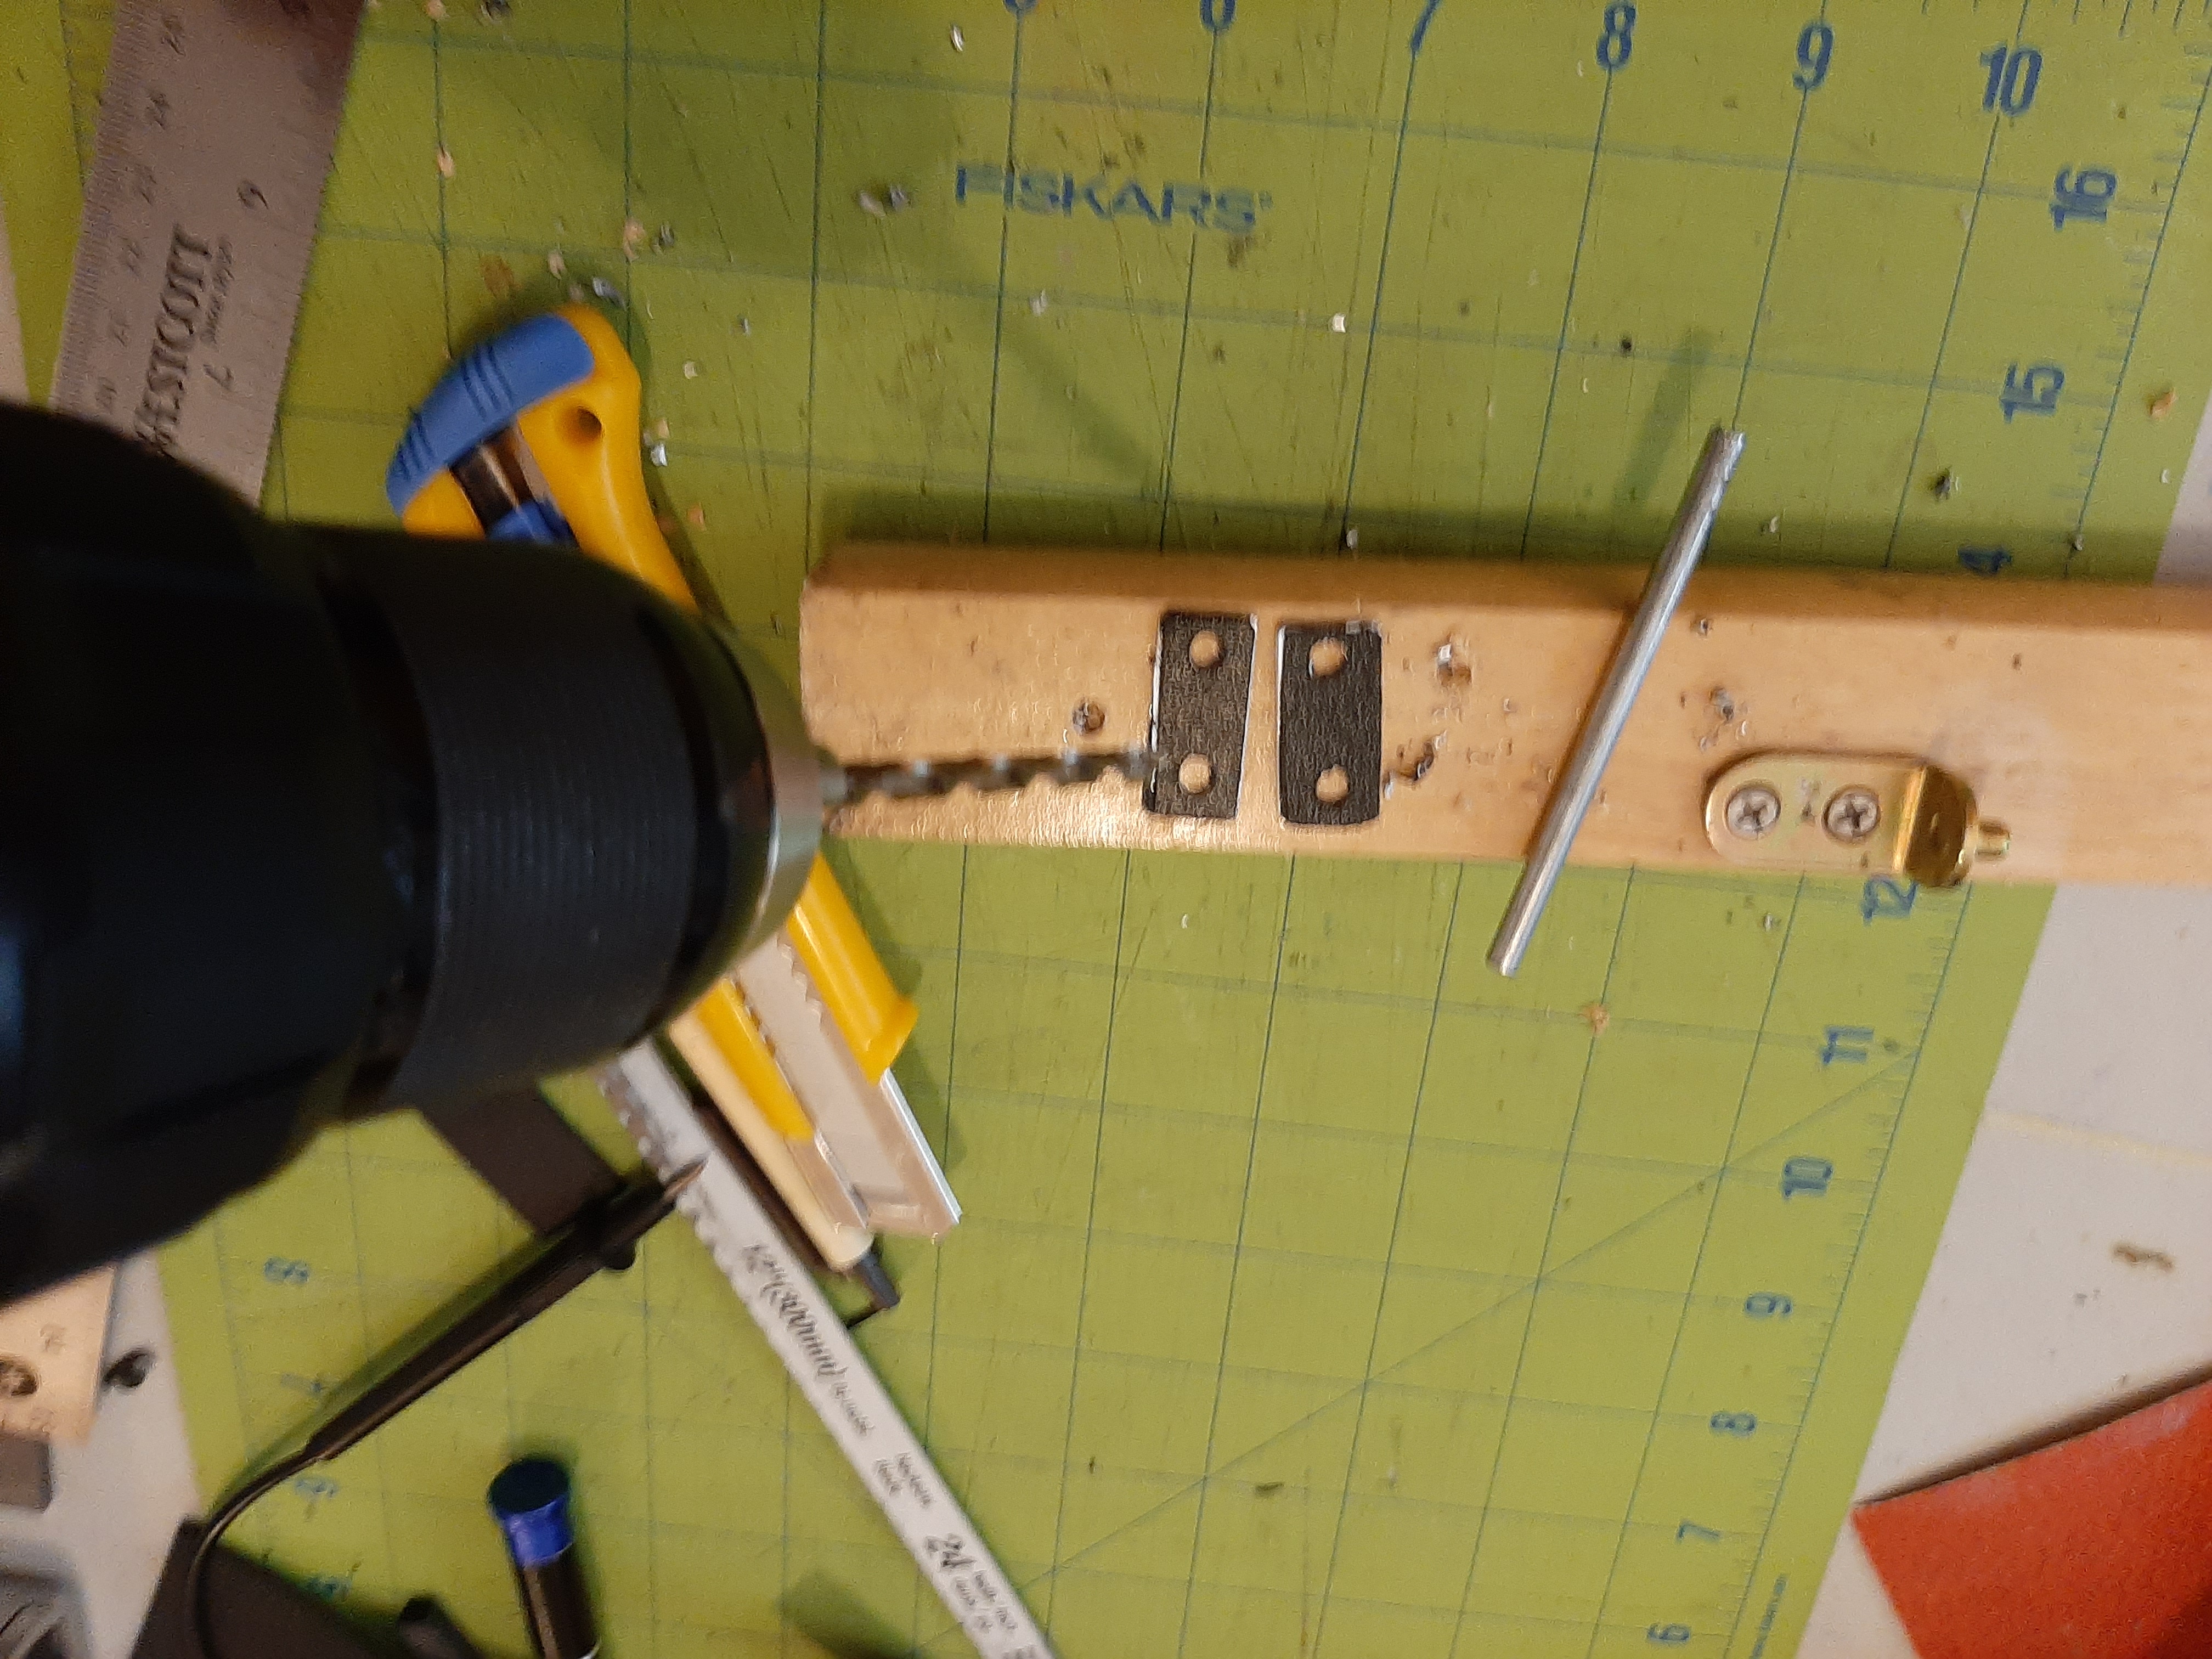
|
| Cut a 3/16" steel rod to length and insert it through the lens body, then install the spacers and insert the vertical strut through the spacers in front of the lens body. | 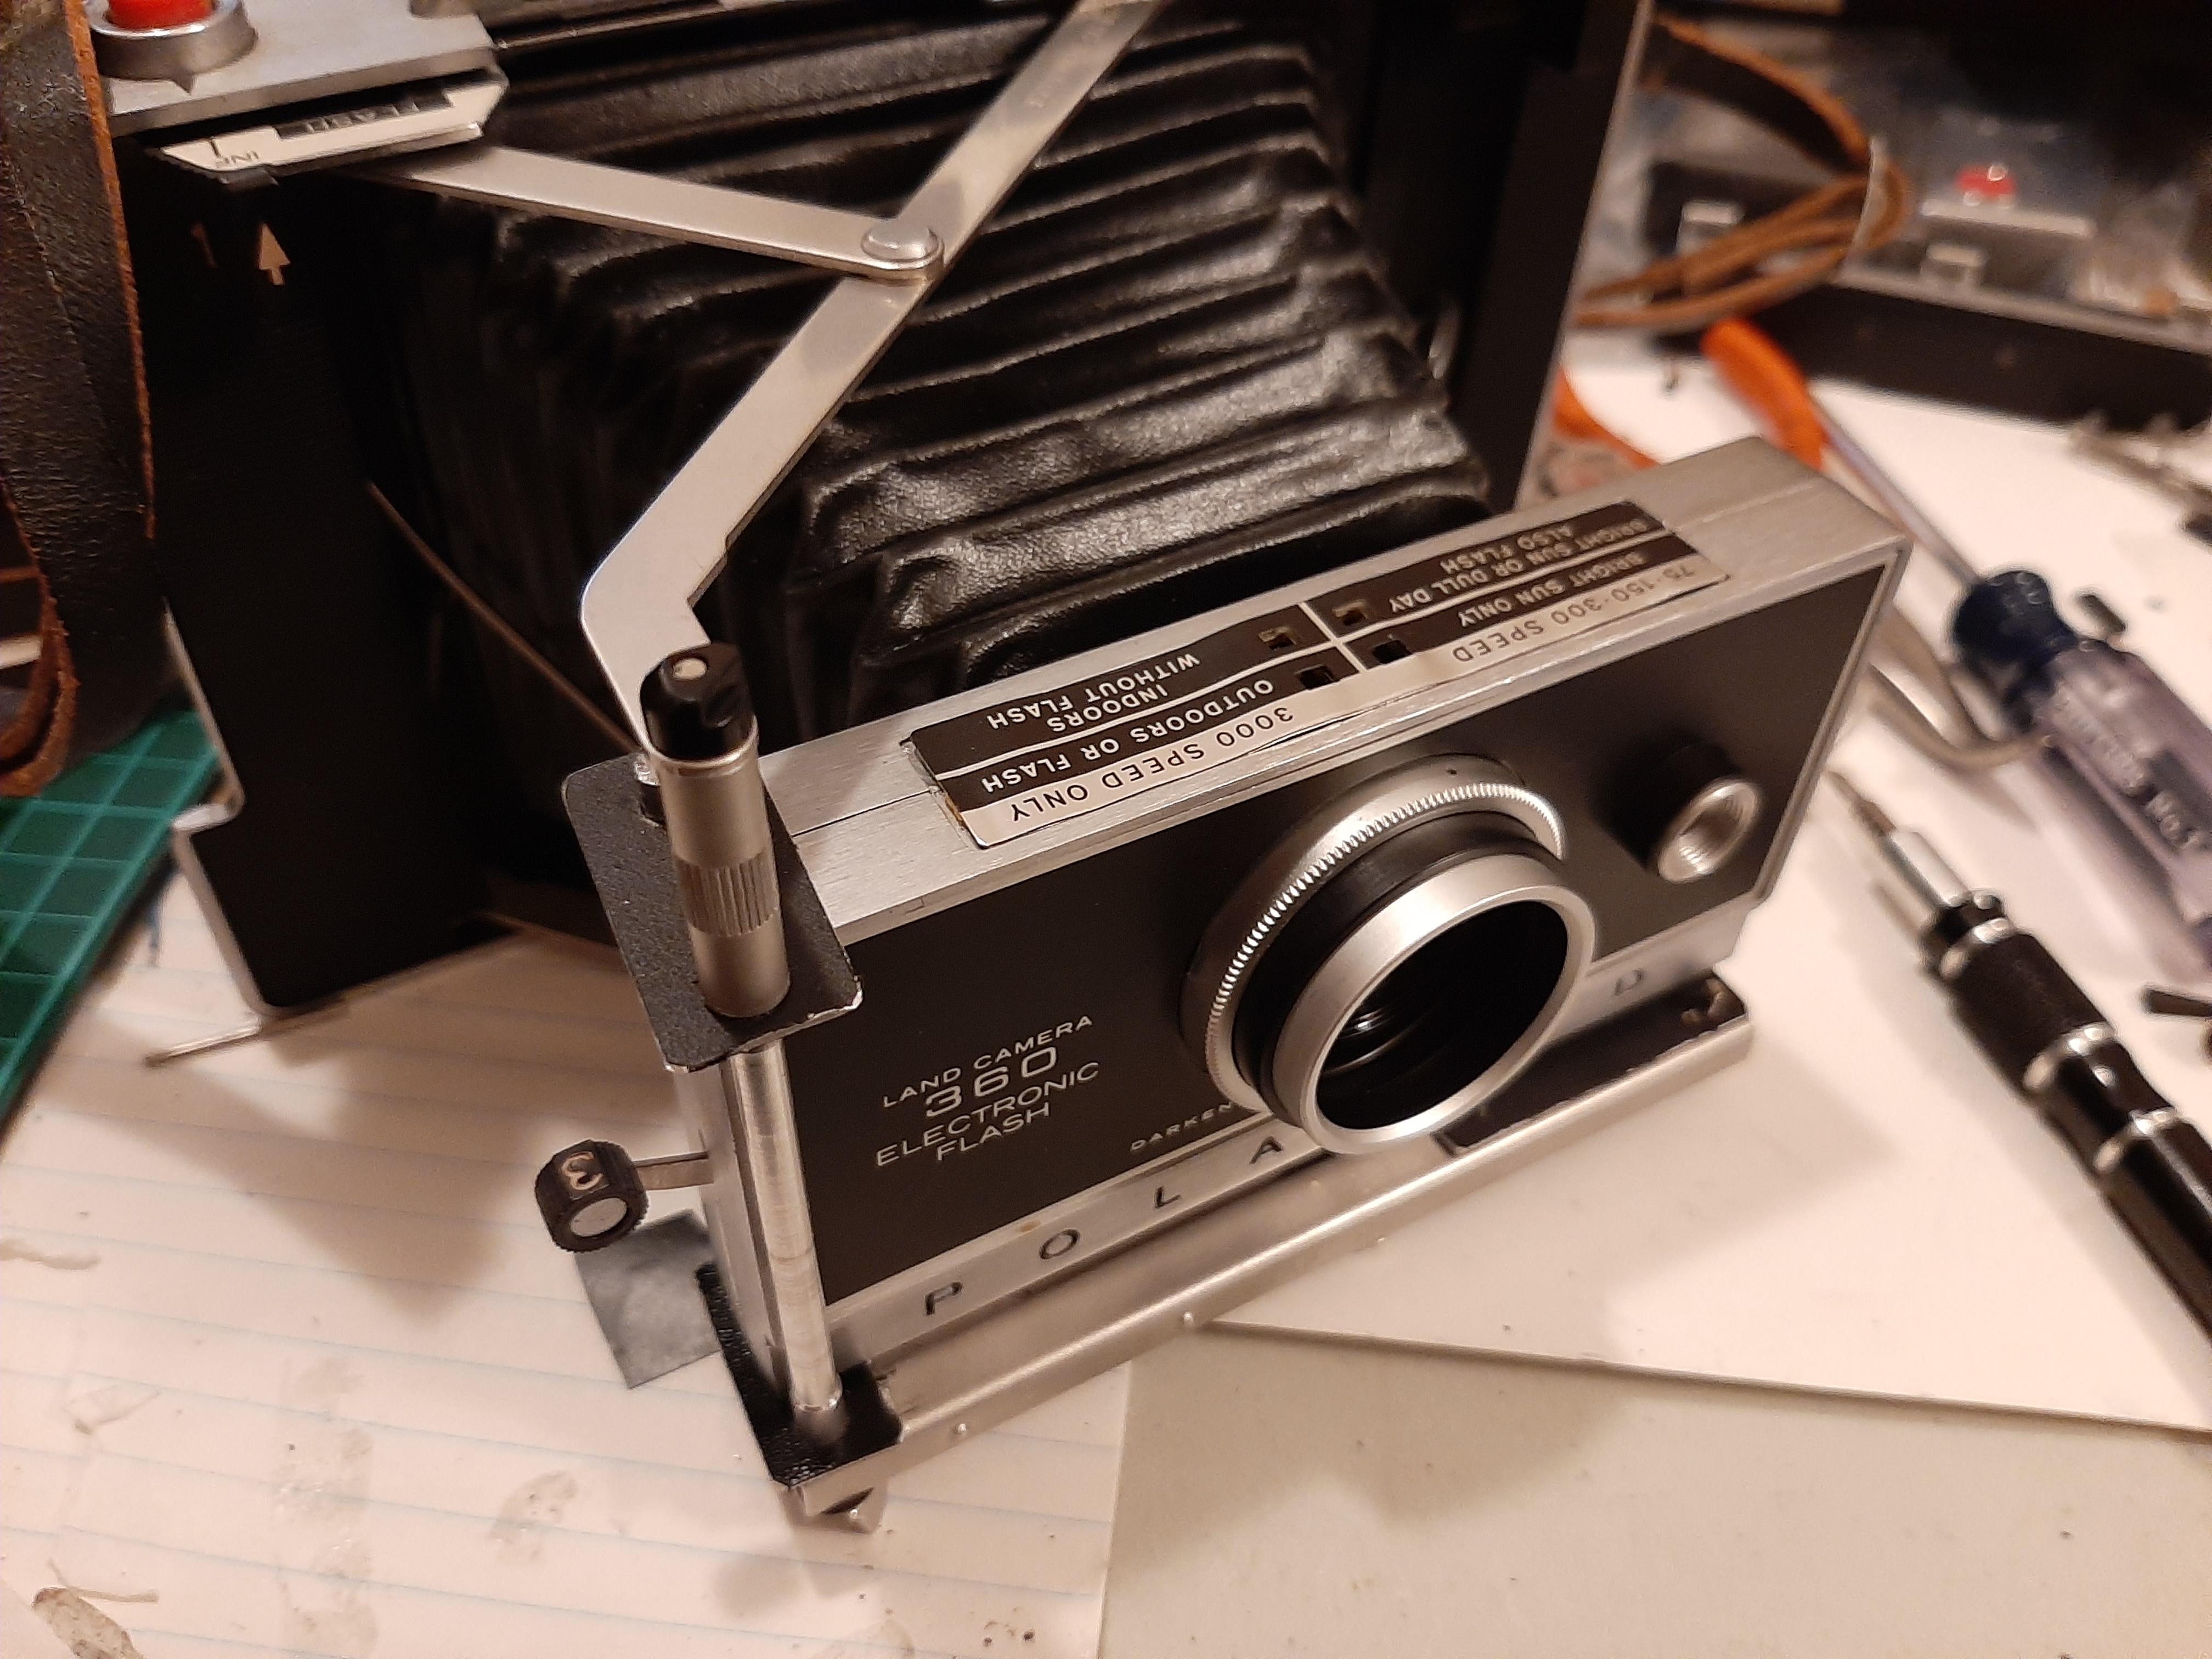
|
| Make another thin spacer for the horizontal strut at the right end of the lens body and screw it into place. | 
|
| Cut a piece of 10mm craft foam as both a light seal and spacer between the film plane and the SX-70 back. Make up any difference by adding layers of 2mm craft foam. I find craft foam provides a firm and light-proof seal between the camera and back. Be sure that the inside edges are the correct size and position for i-type film. |
|
| Cut 4 metal straps out of the film spring in an old SX-70 or 600 film pack and predrill small 1/16" holes through them. Predrill holes into the camera and attach the straps on the bottom, then while pressing down on the back, predrill the holes into the SX-70 back and mount the bottom of the back. Be sure to use screws small enough so they don't penetrate much more than the plastic on the SX-70. | 
|
| Mount the straps onto the top of the camera, press the back onto the camera, then predrill holes into the SX-70 back and mount the top of the back. Be sure the 4 wires coming out of the back are all taut and visible. At this point, it's probably a good idea to test whether everything's working by inserting an old film pack with a battery, shorting the 2 green wires to turn on the back, and briefly touching the red and blue wires together. The motor should run for one film cycle. | 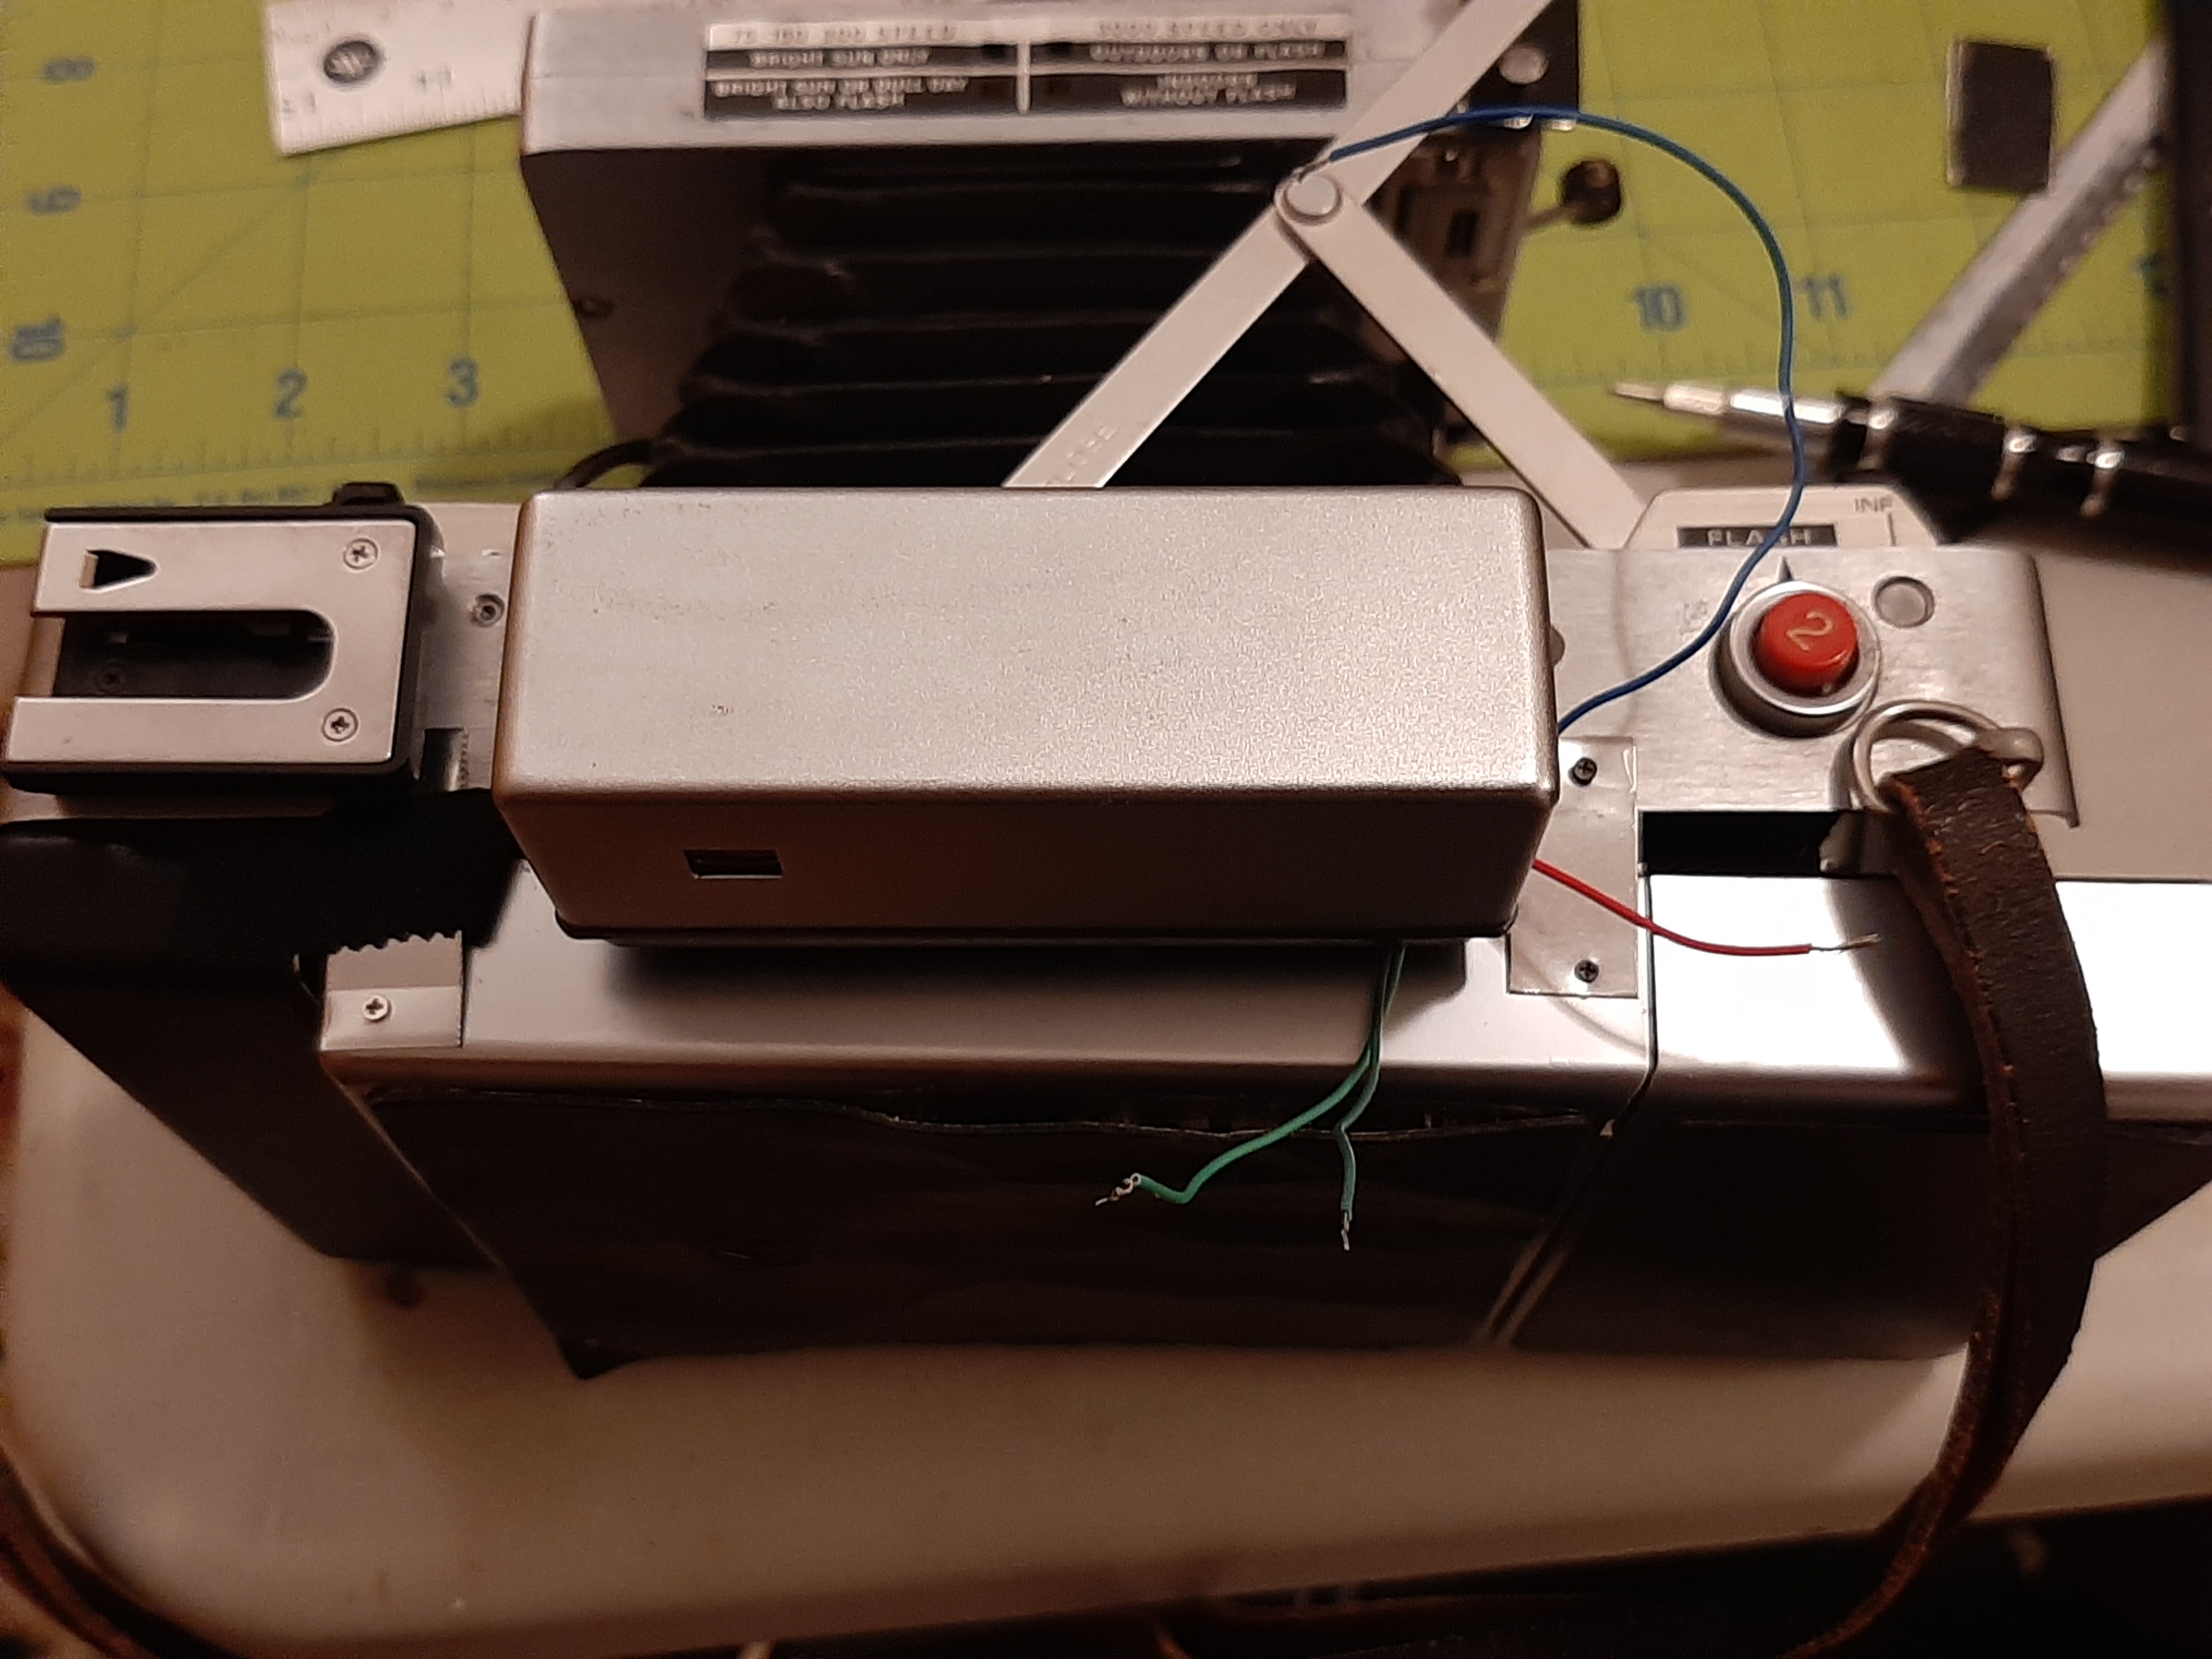
|
| Trim the battery door to fit against the SX-70 back. Currently I just tape this door down with hockey tape. | 
|
| Get a momentary switch, preferably flat and small, attach leads to it, and mount it onto the the top of the camera next to the shutter button. I just used a dab of glue to hold it on. Attach the leads to the blue wire (motor switch), and the red wire (positive battery terminal). | 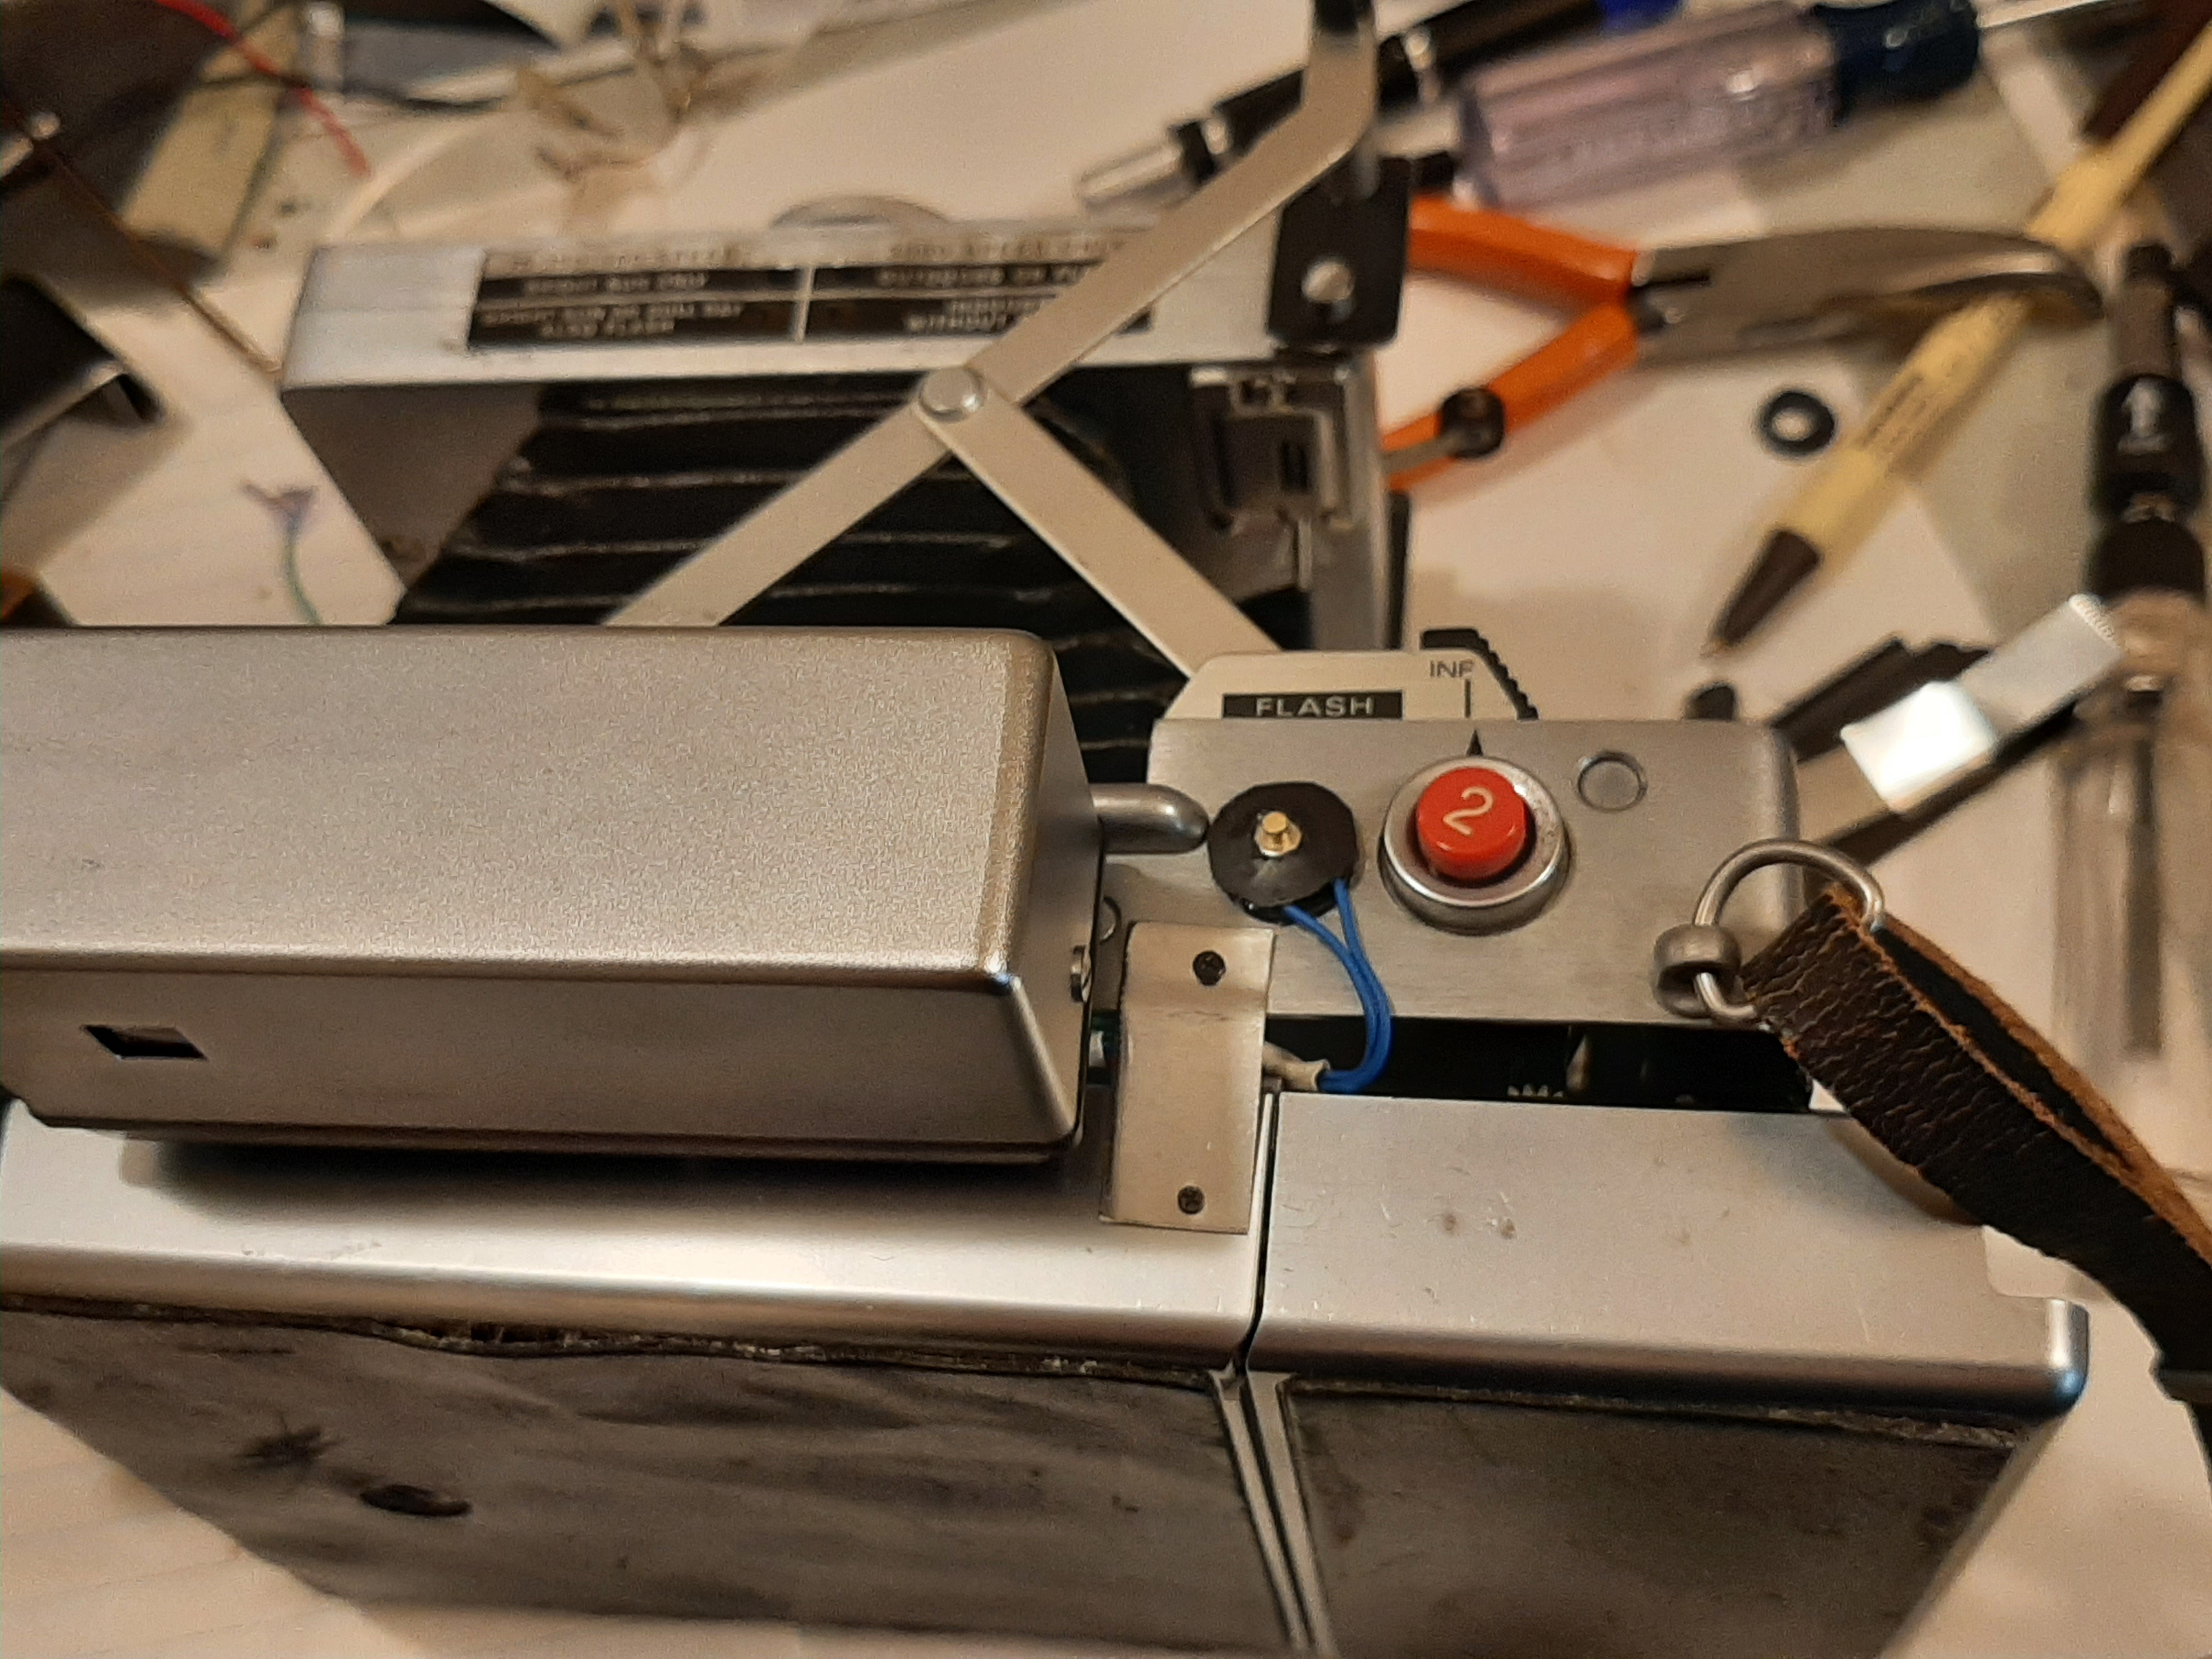
|
| Before taking the next step, it is good to understand the wiring. Study the diagram to see what you are trying to accomplish. Basically, you will want to install 2 switches: one master/kill switch to turn off the back and act as a kill switch (in case the back starts ejecting all your film), and to prevent battery drain, and the other to switch off power to the back if you are using either 600 or SX-70 film, which has its own battery pack. | 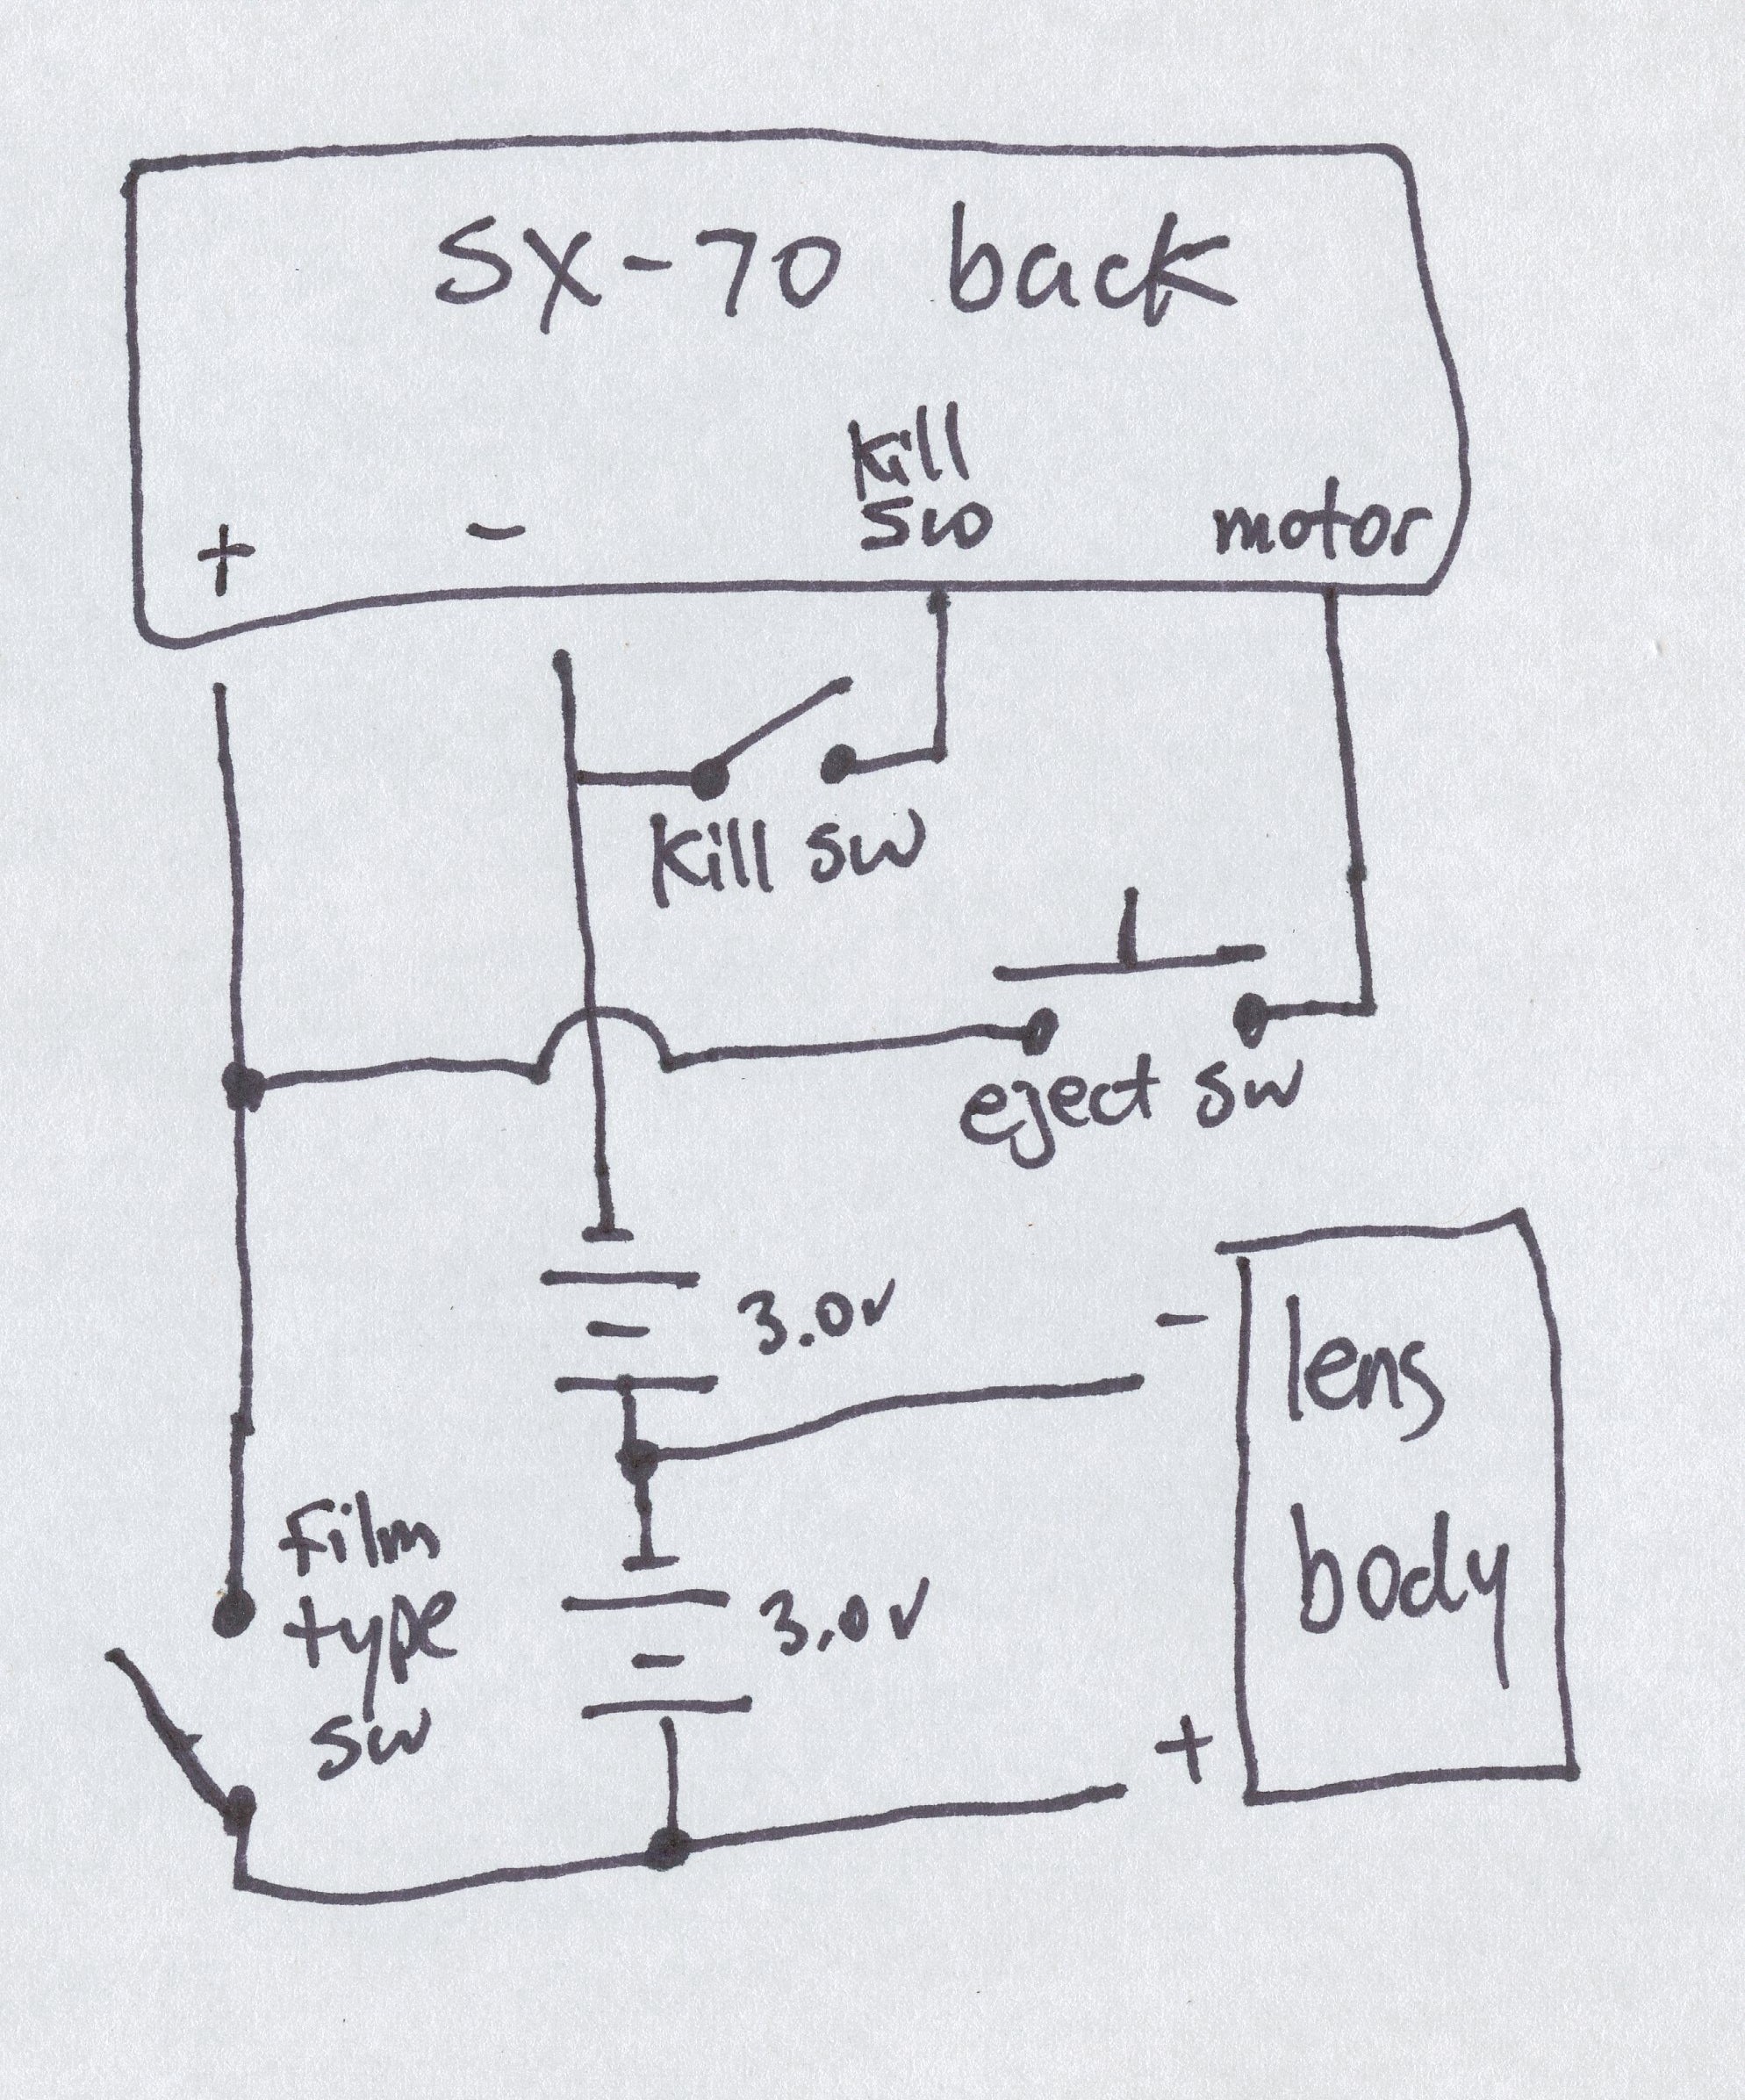
|
| Gut the battery compartment. This will require removing the front plate and cutting off all mounts for the old battery. Run the 3 wires from the back along the top edge to the battery compartment. Then, connect one 3.0 volt AAA battery holder to the lens body. If you can connect this to the original battery leads that would be best, since the leads have a bellows switch which turns off power to the lens when the bellows is closed. | 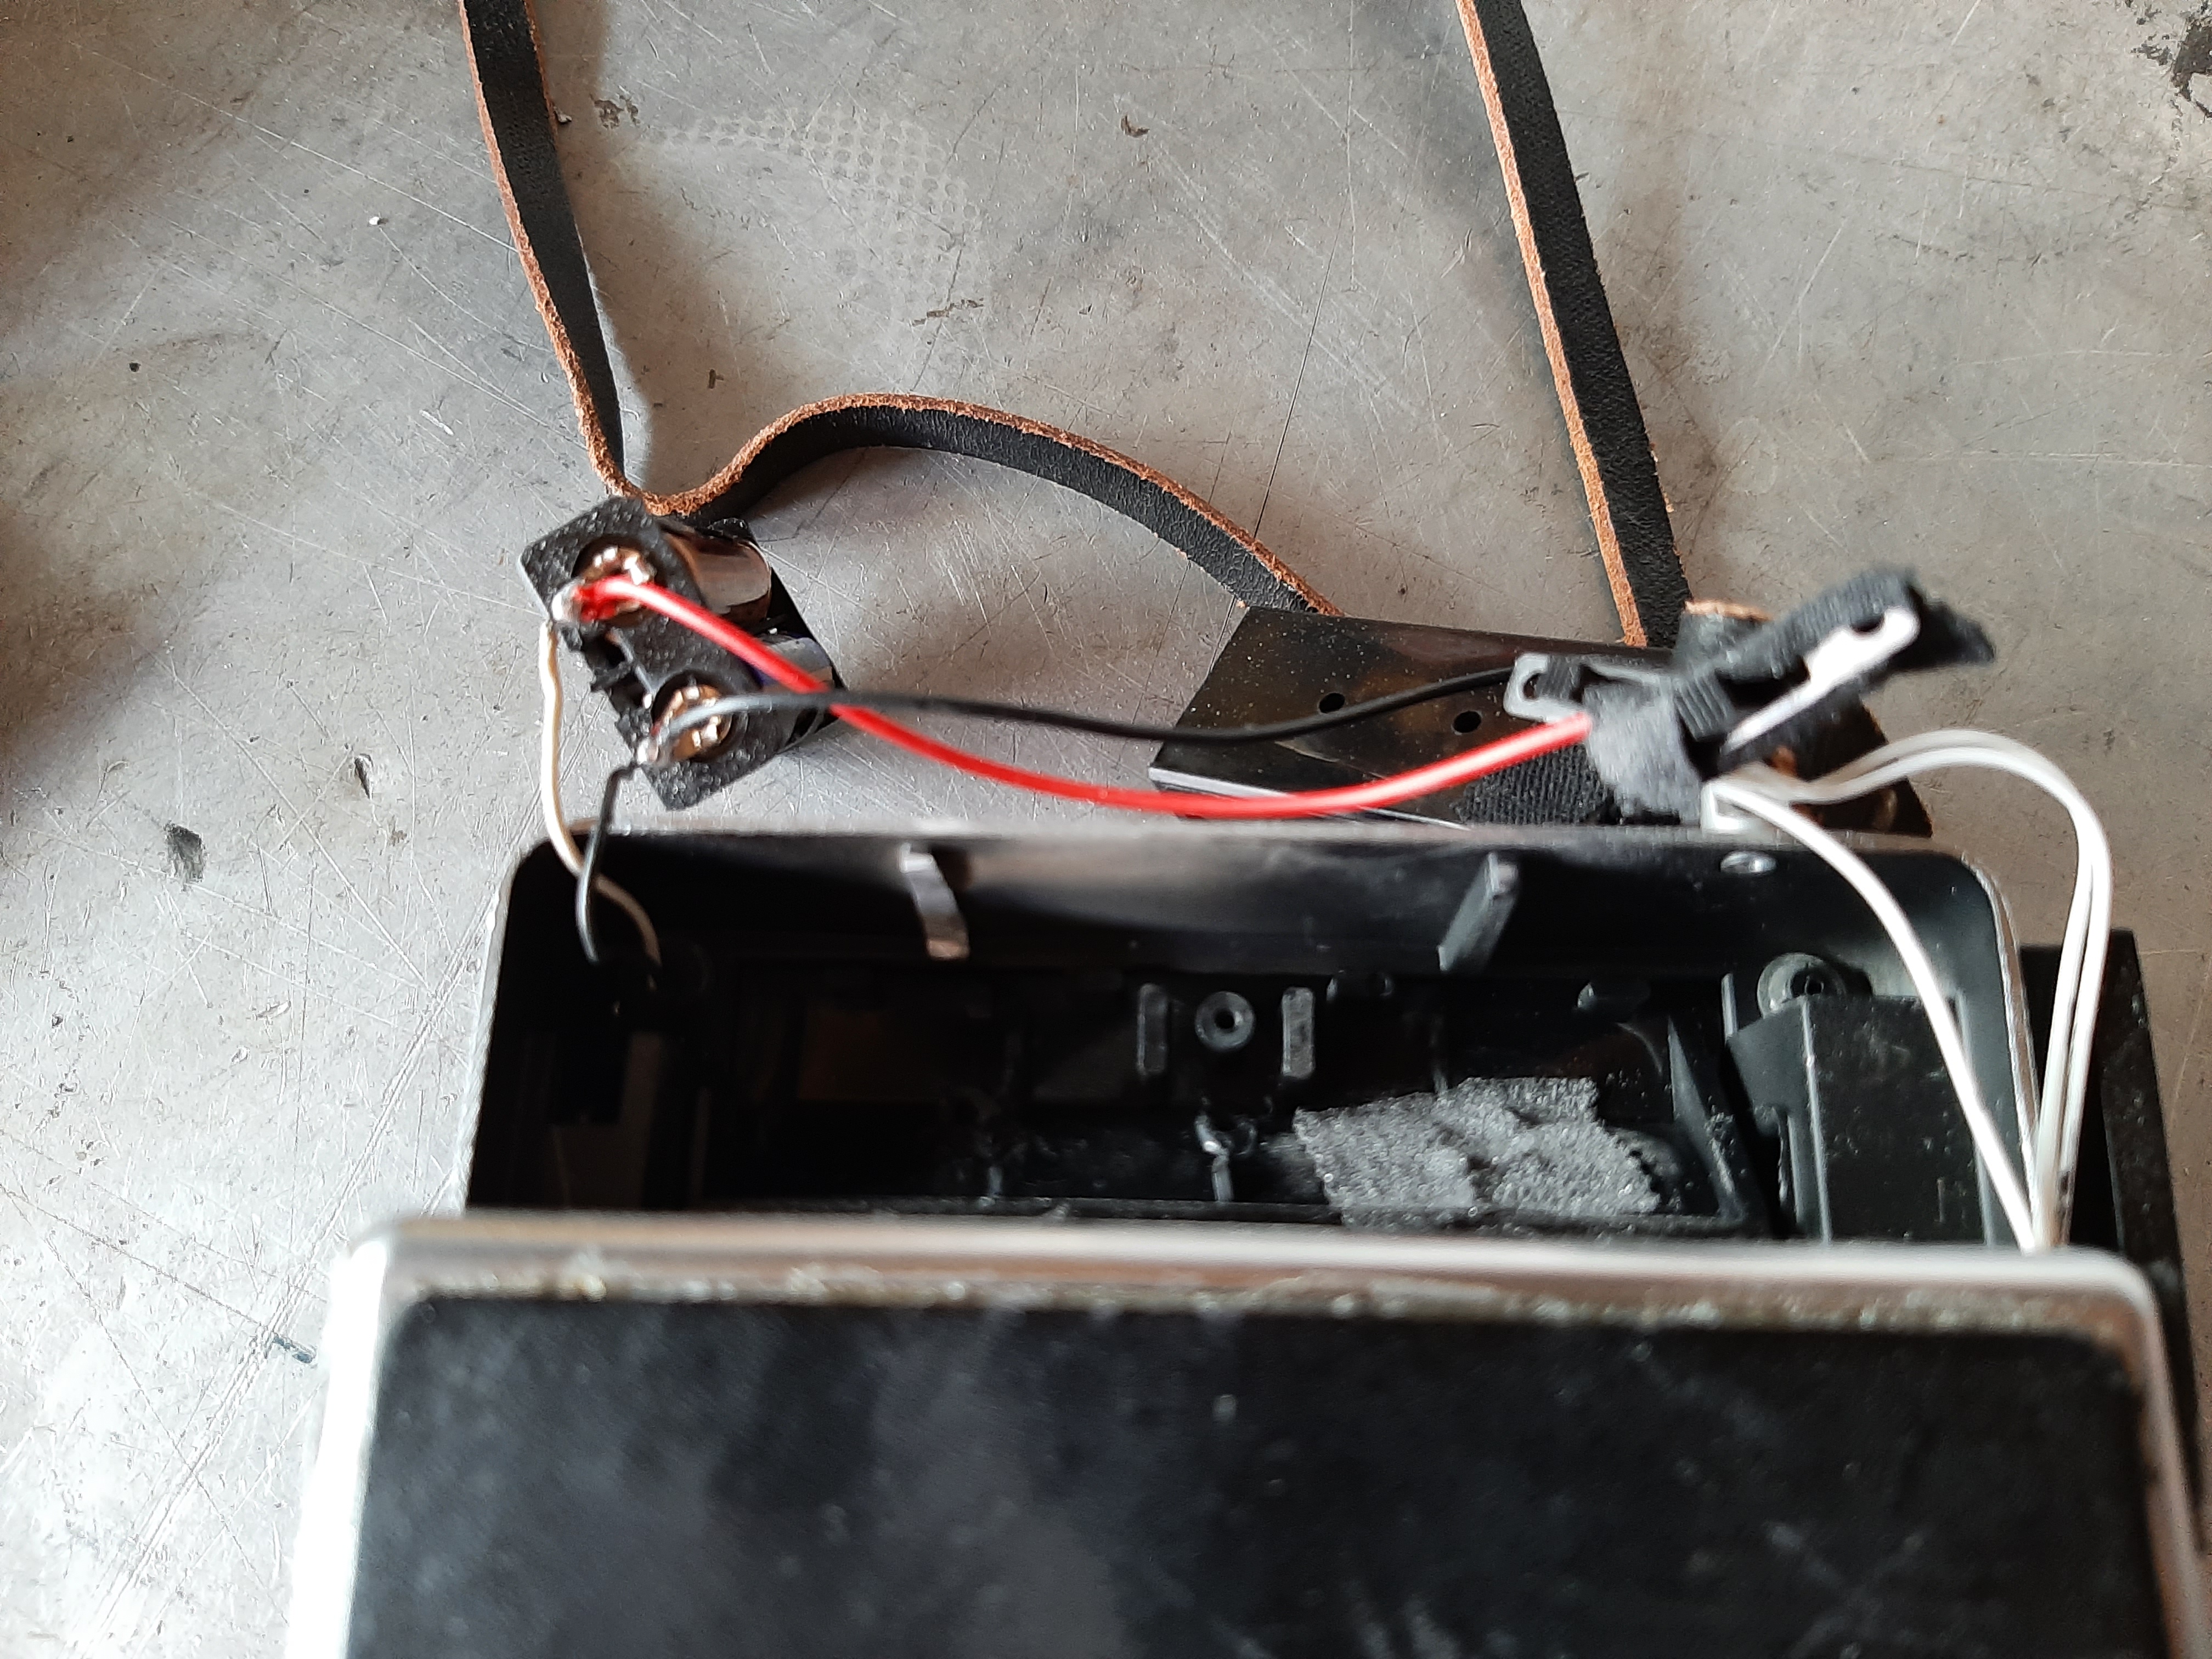
|
| Connect the 3 volt AAA other battery holder in series to the first one to provide 6 volts for the back. Connect both the film type switch and the kill switch to the leads and connect the wires up to the appropriate battery terminals. Tuck the battery holders and switches inside the battery compartment. Drill and file a square hole for the kill switch. | 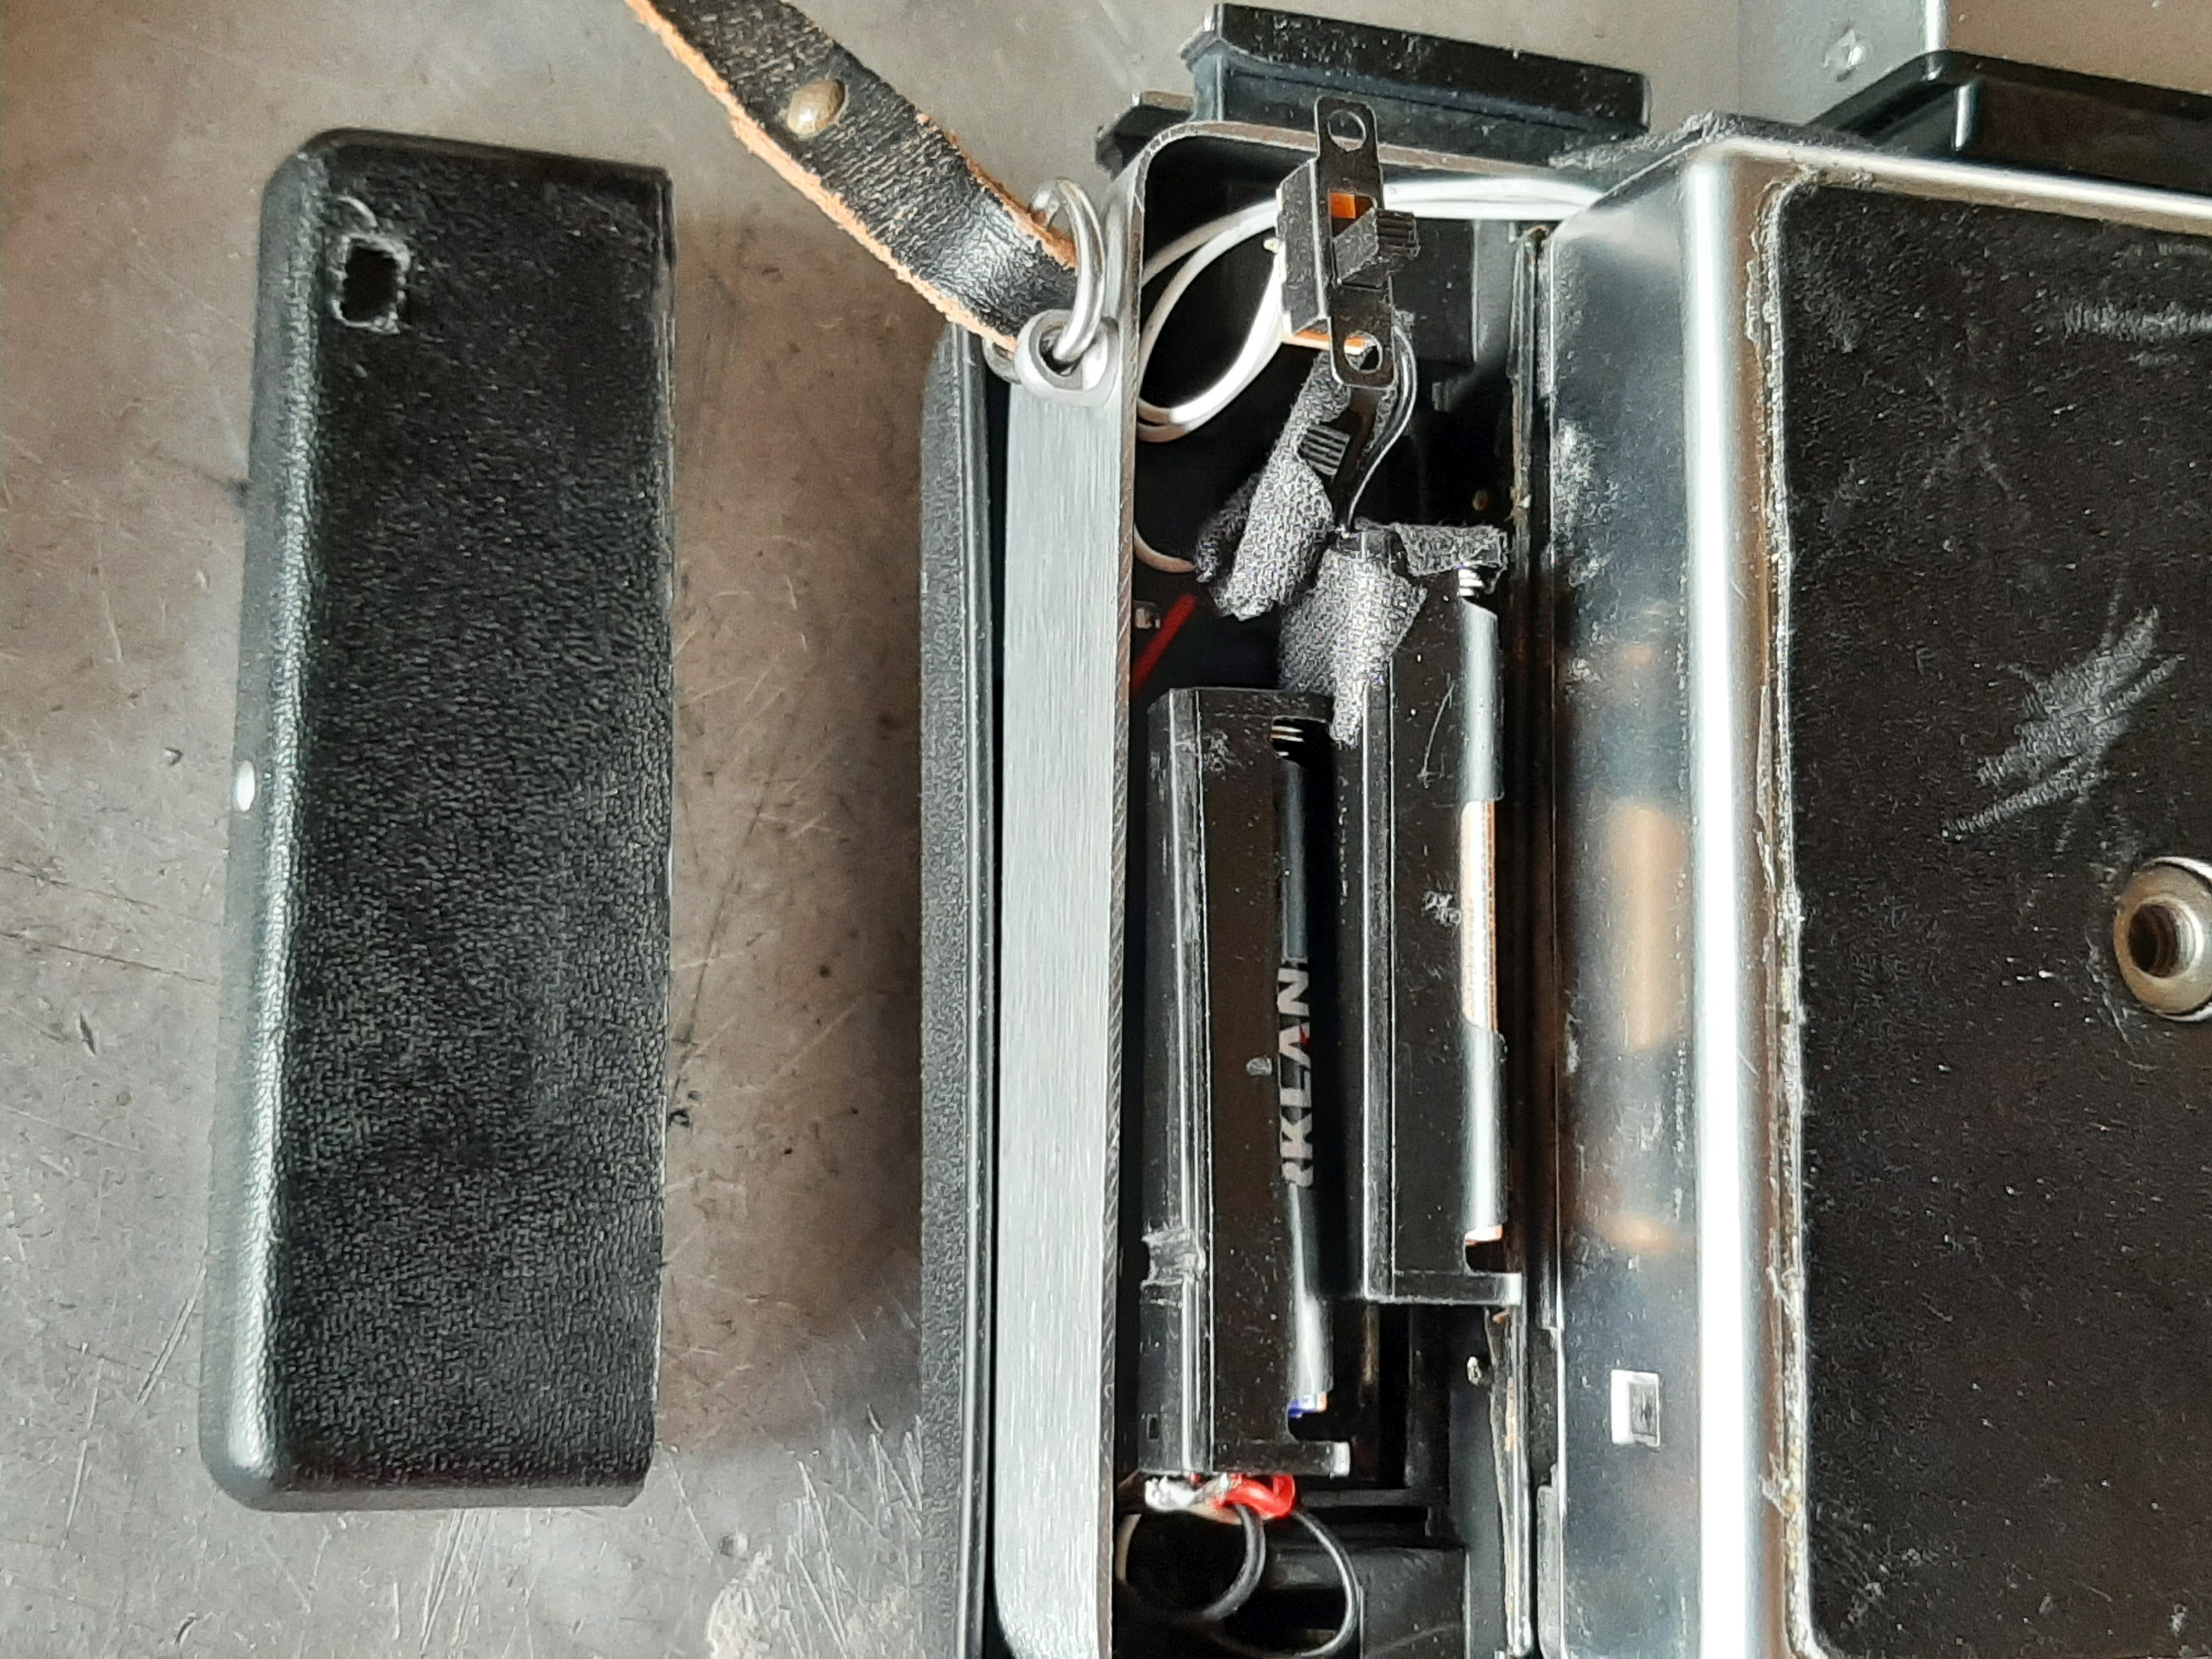
|
| Rivet the kill switch to the battery door. I decided not to mount the film type switch since I'll mainly be using itype film, which requires battery power from the camera. If I decide to use SX-70 film, I'll have to switch the film type switch so the SX-70 back won't get power from the camera. Test the kill switch and eject switch to be sure everything's working OK. I just taped the door to the camera for now. | 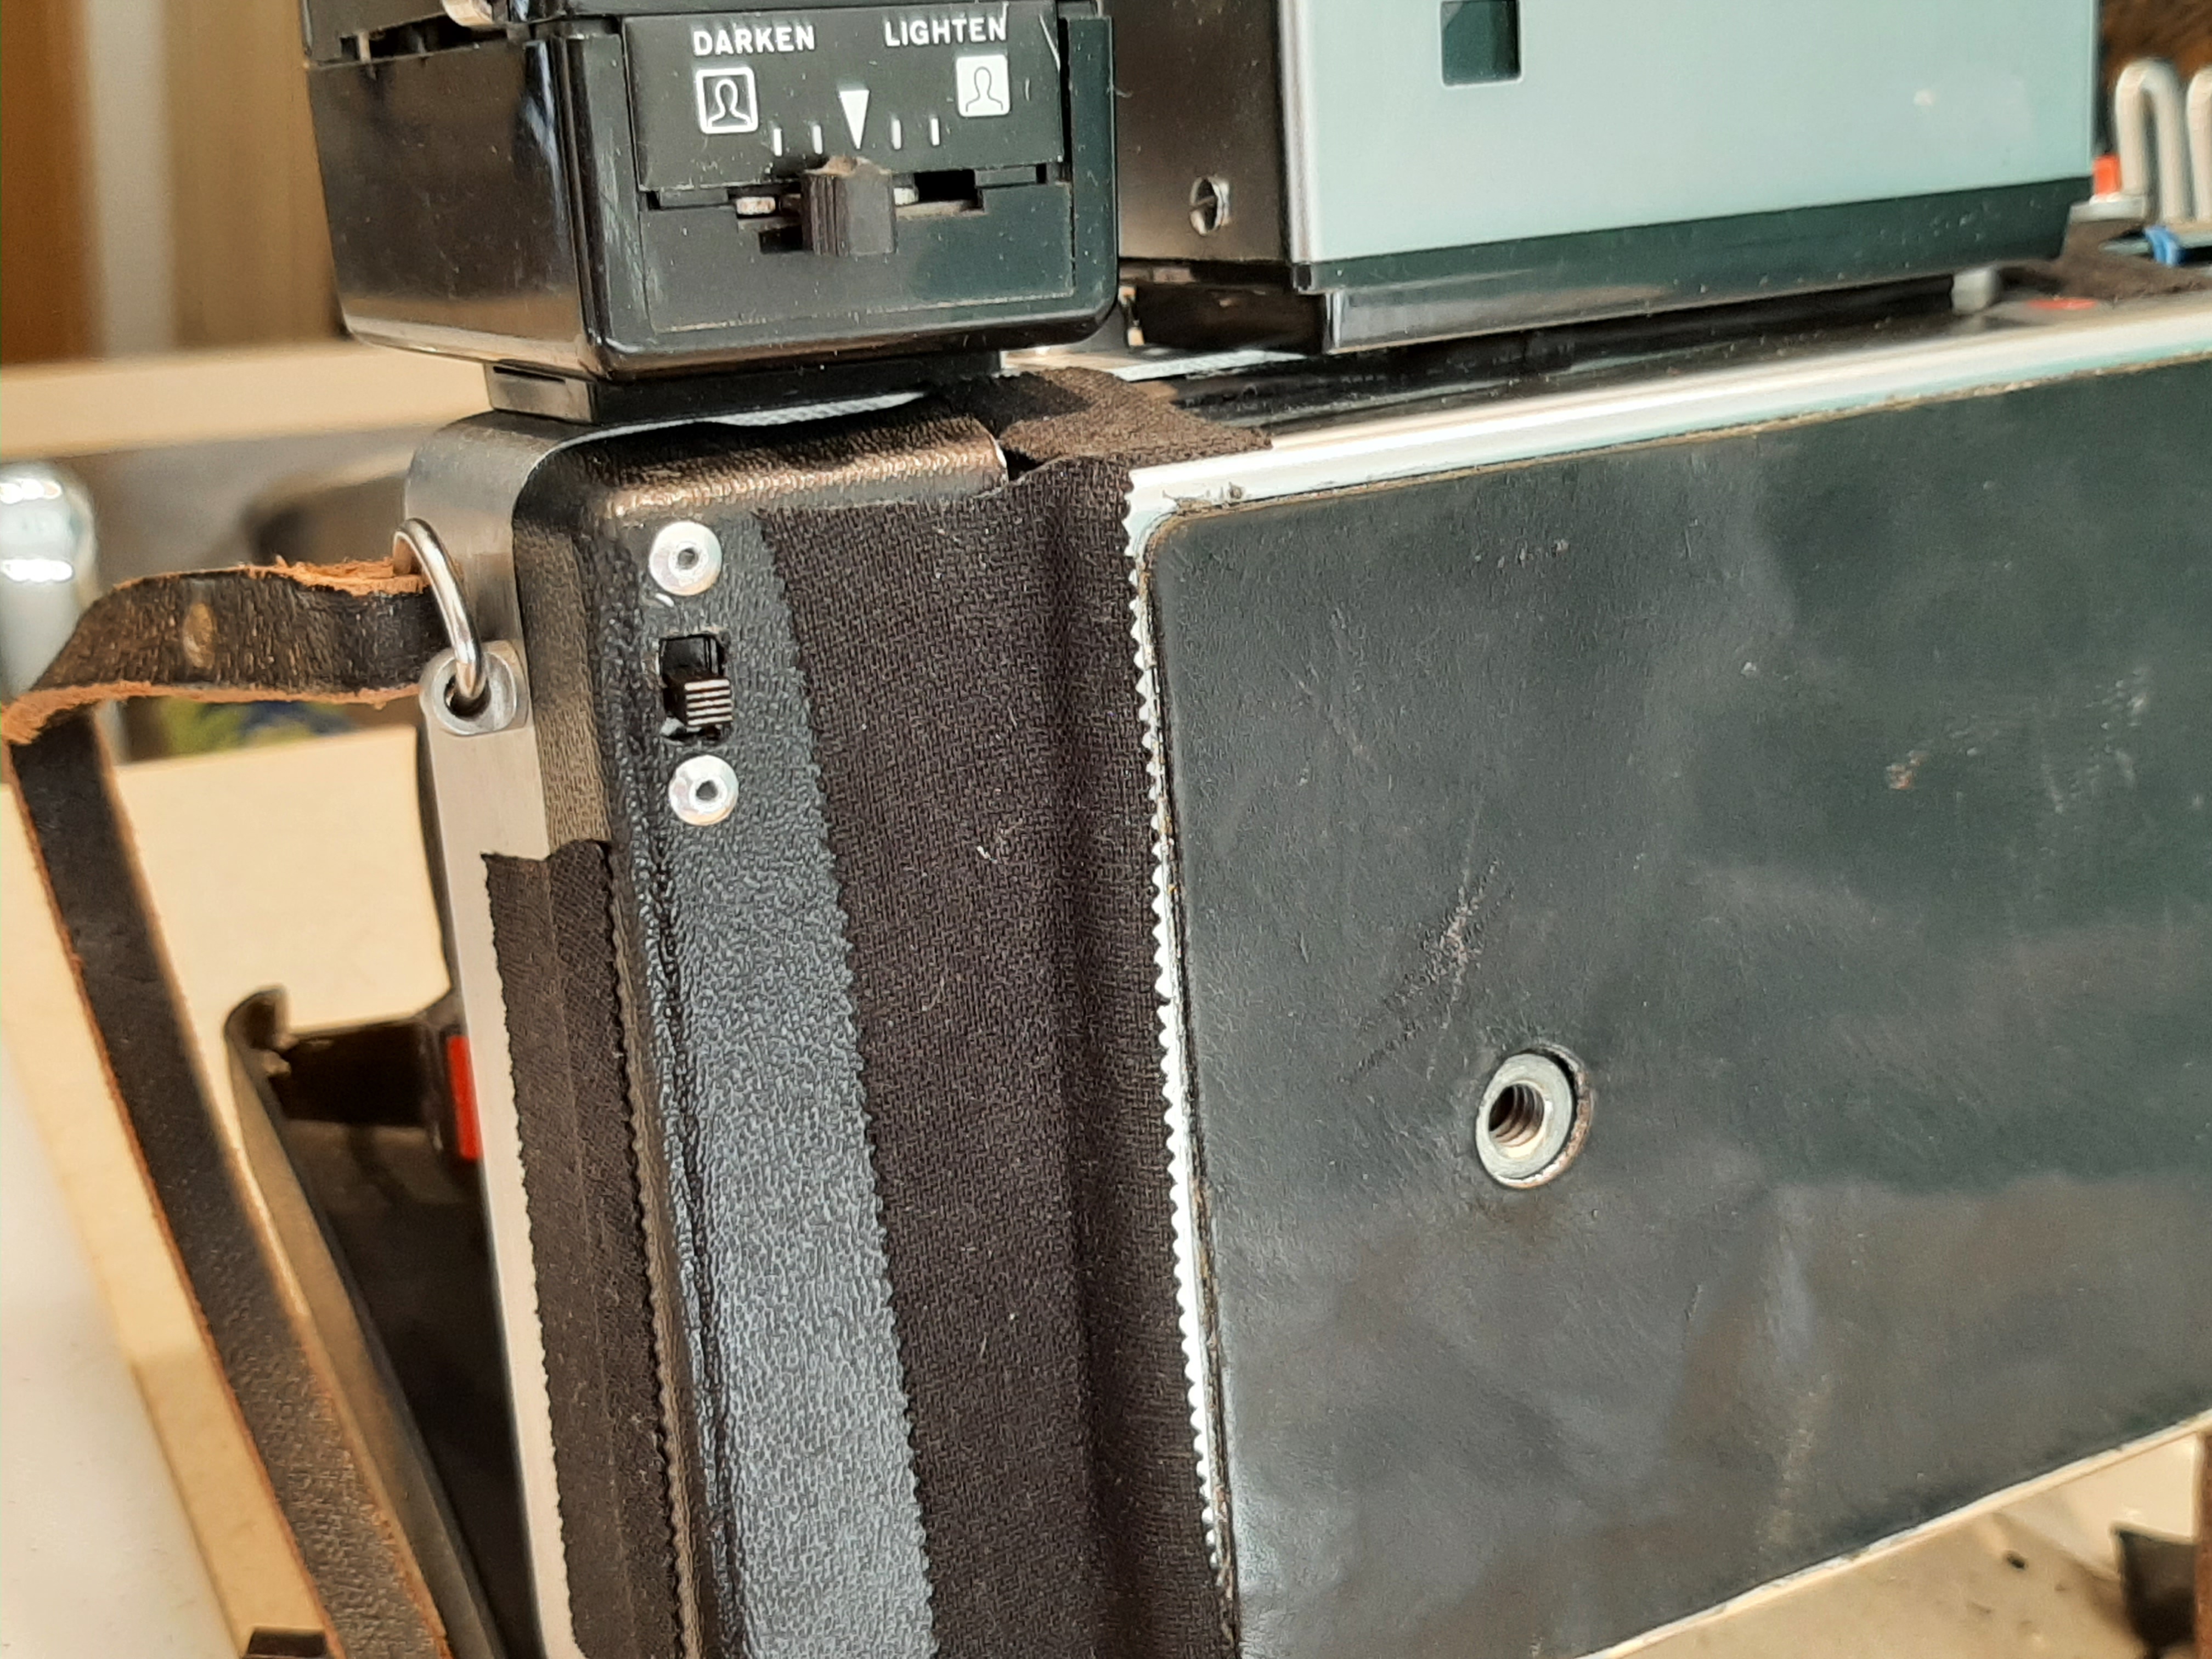
|
| Since the lens body has been moved back, the folding viewfinder won't fold down completely, so the case won't close. I cut the top of the case to fit the camera with the viewfinder up. It requires removing the metal strip and trimming the top so it latches onto the side hinges of the rangefinder. | 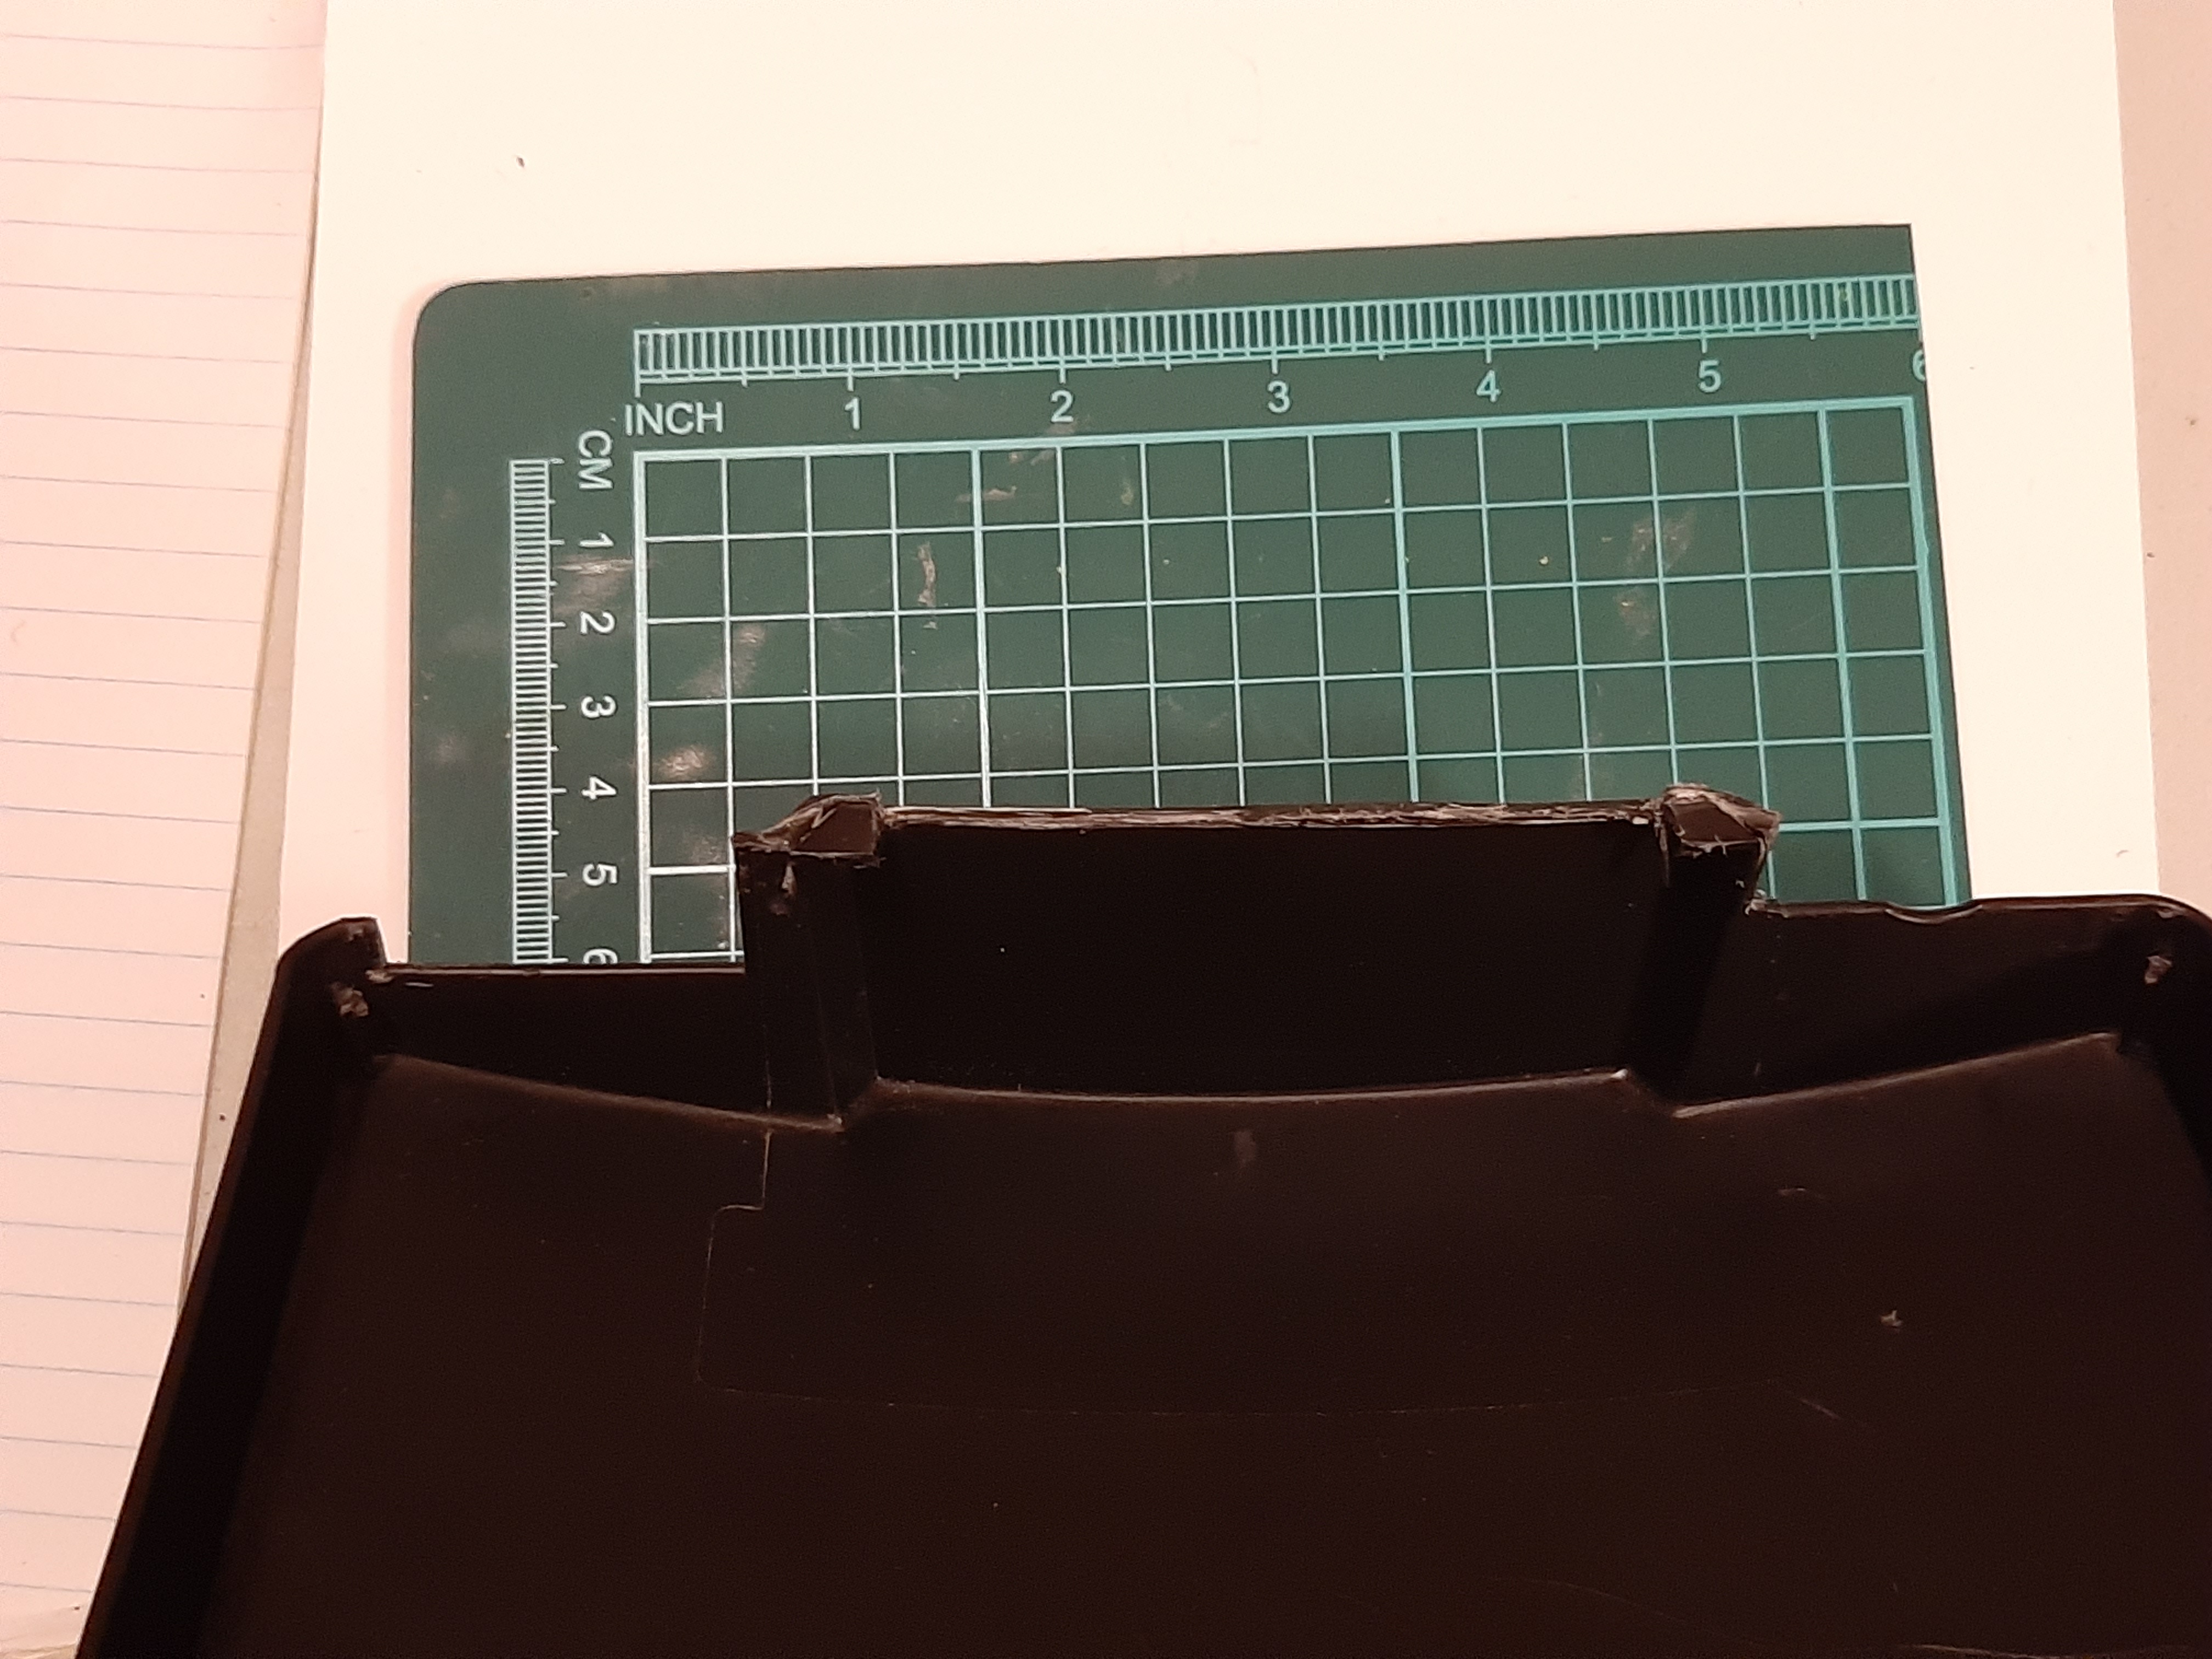
|
| The cover will close most of the way and hook onto the rangefinder hingers. | 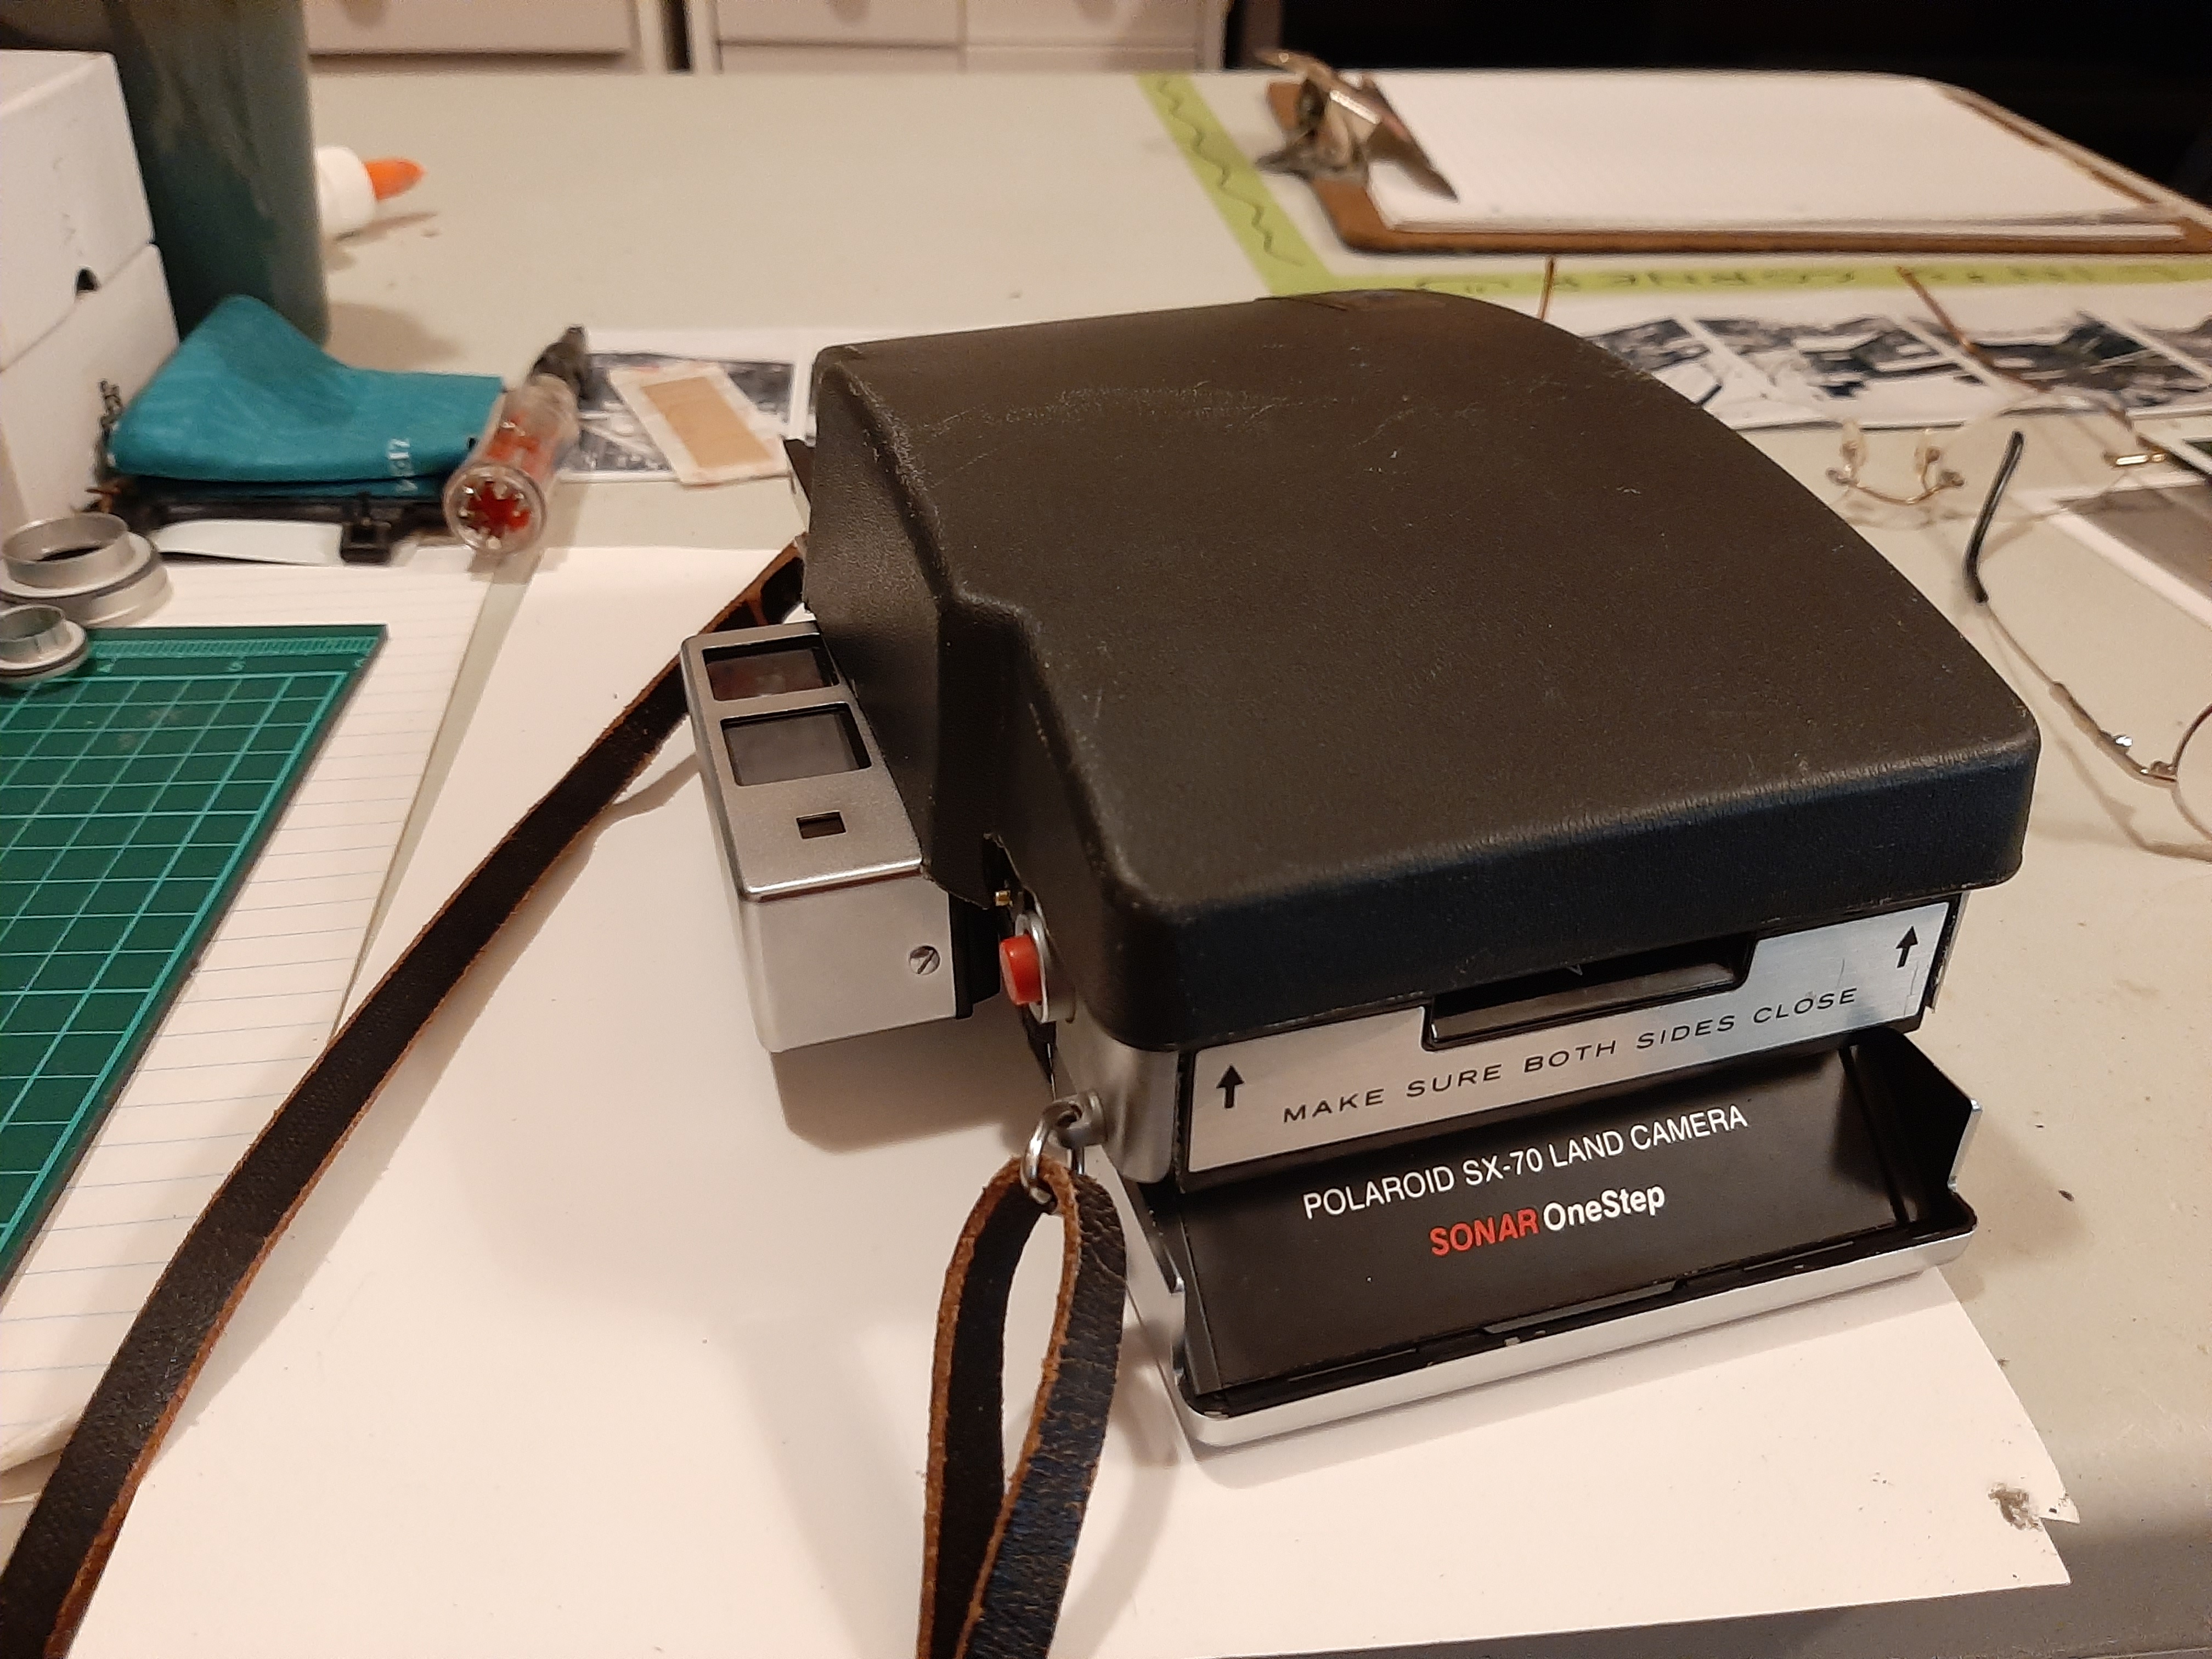
|
| Your SX-450 (or whatever model you used) is complete! I lined the edges with hockey tape and marked the spot where the film door latch sits so I'm not poking around trying to unlatch the door. With the viewfinder down, insert a thin piece of something sturdy and lever it forward to release the door. | 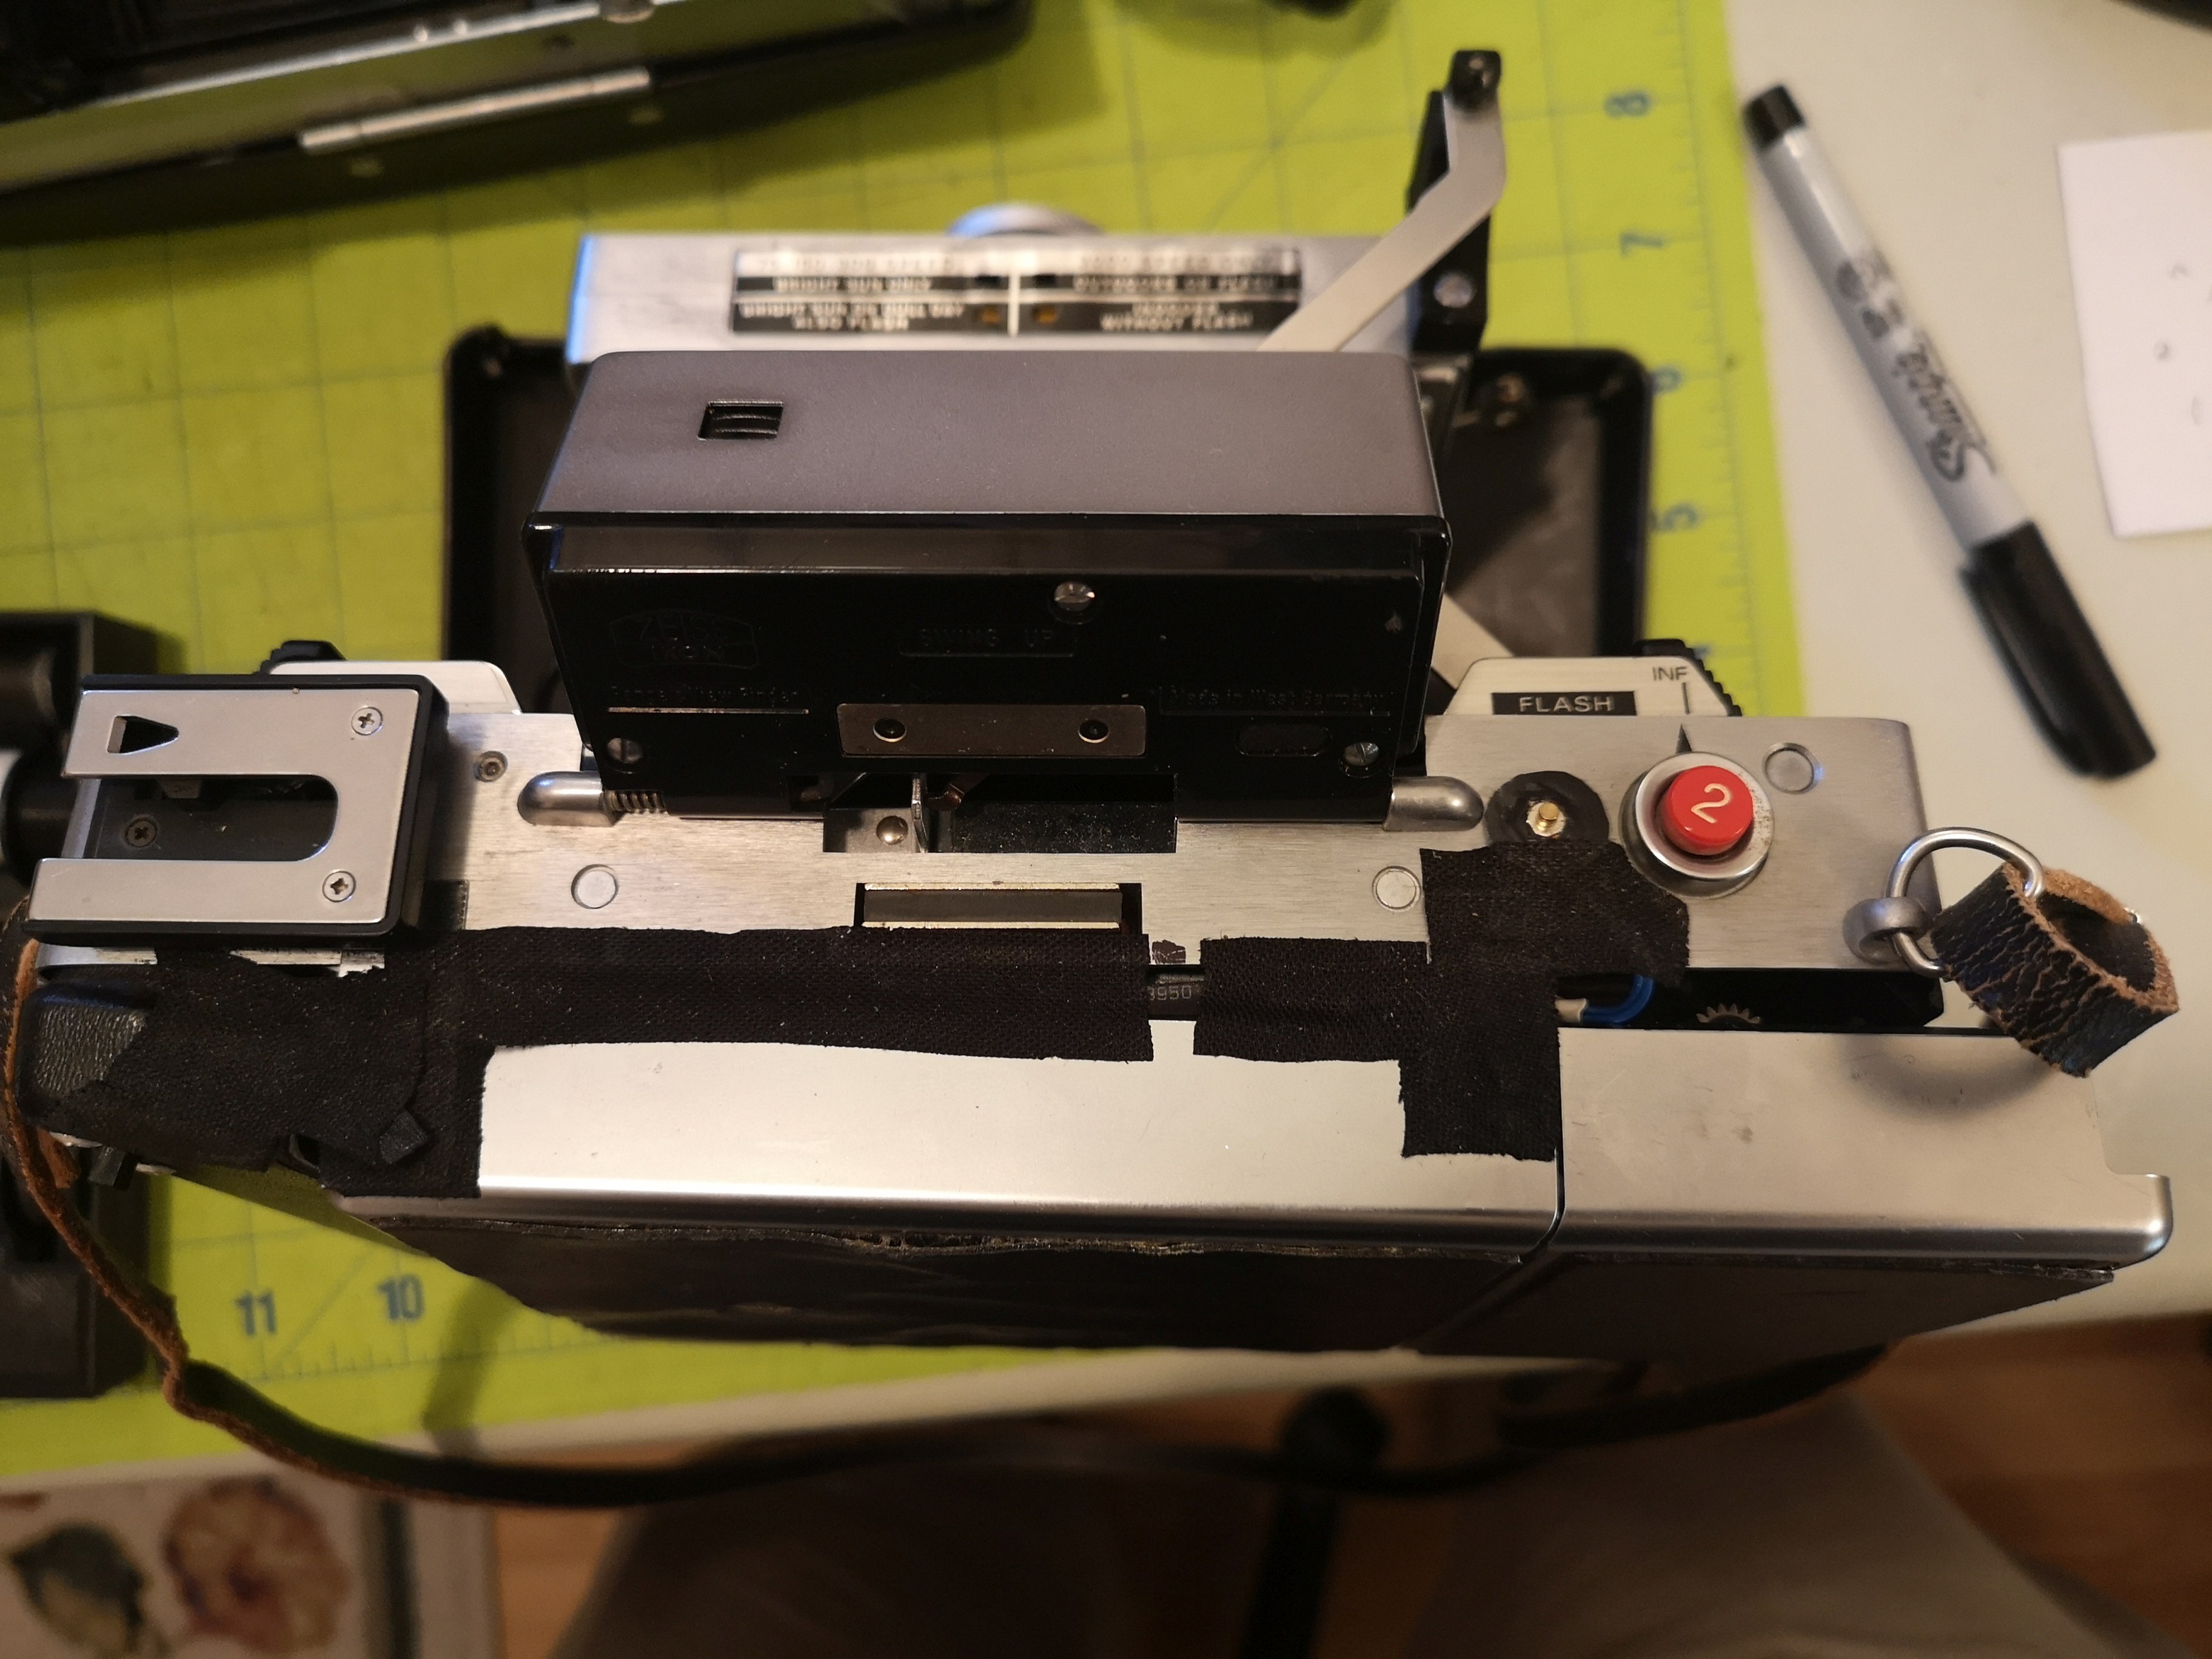
|
| The first test shot I took with this build using the portrait attachment and flash. Notice how the image is reversed. | 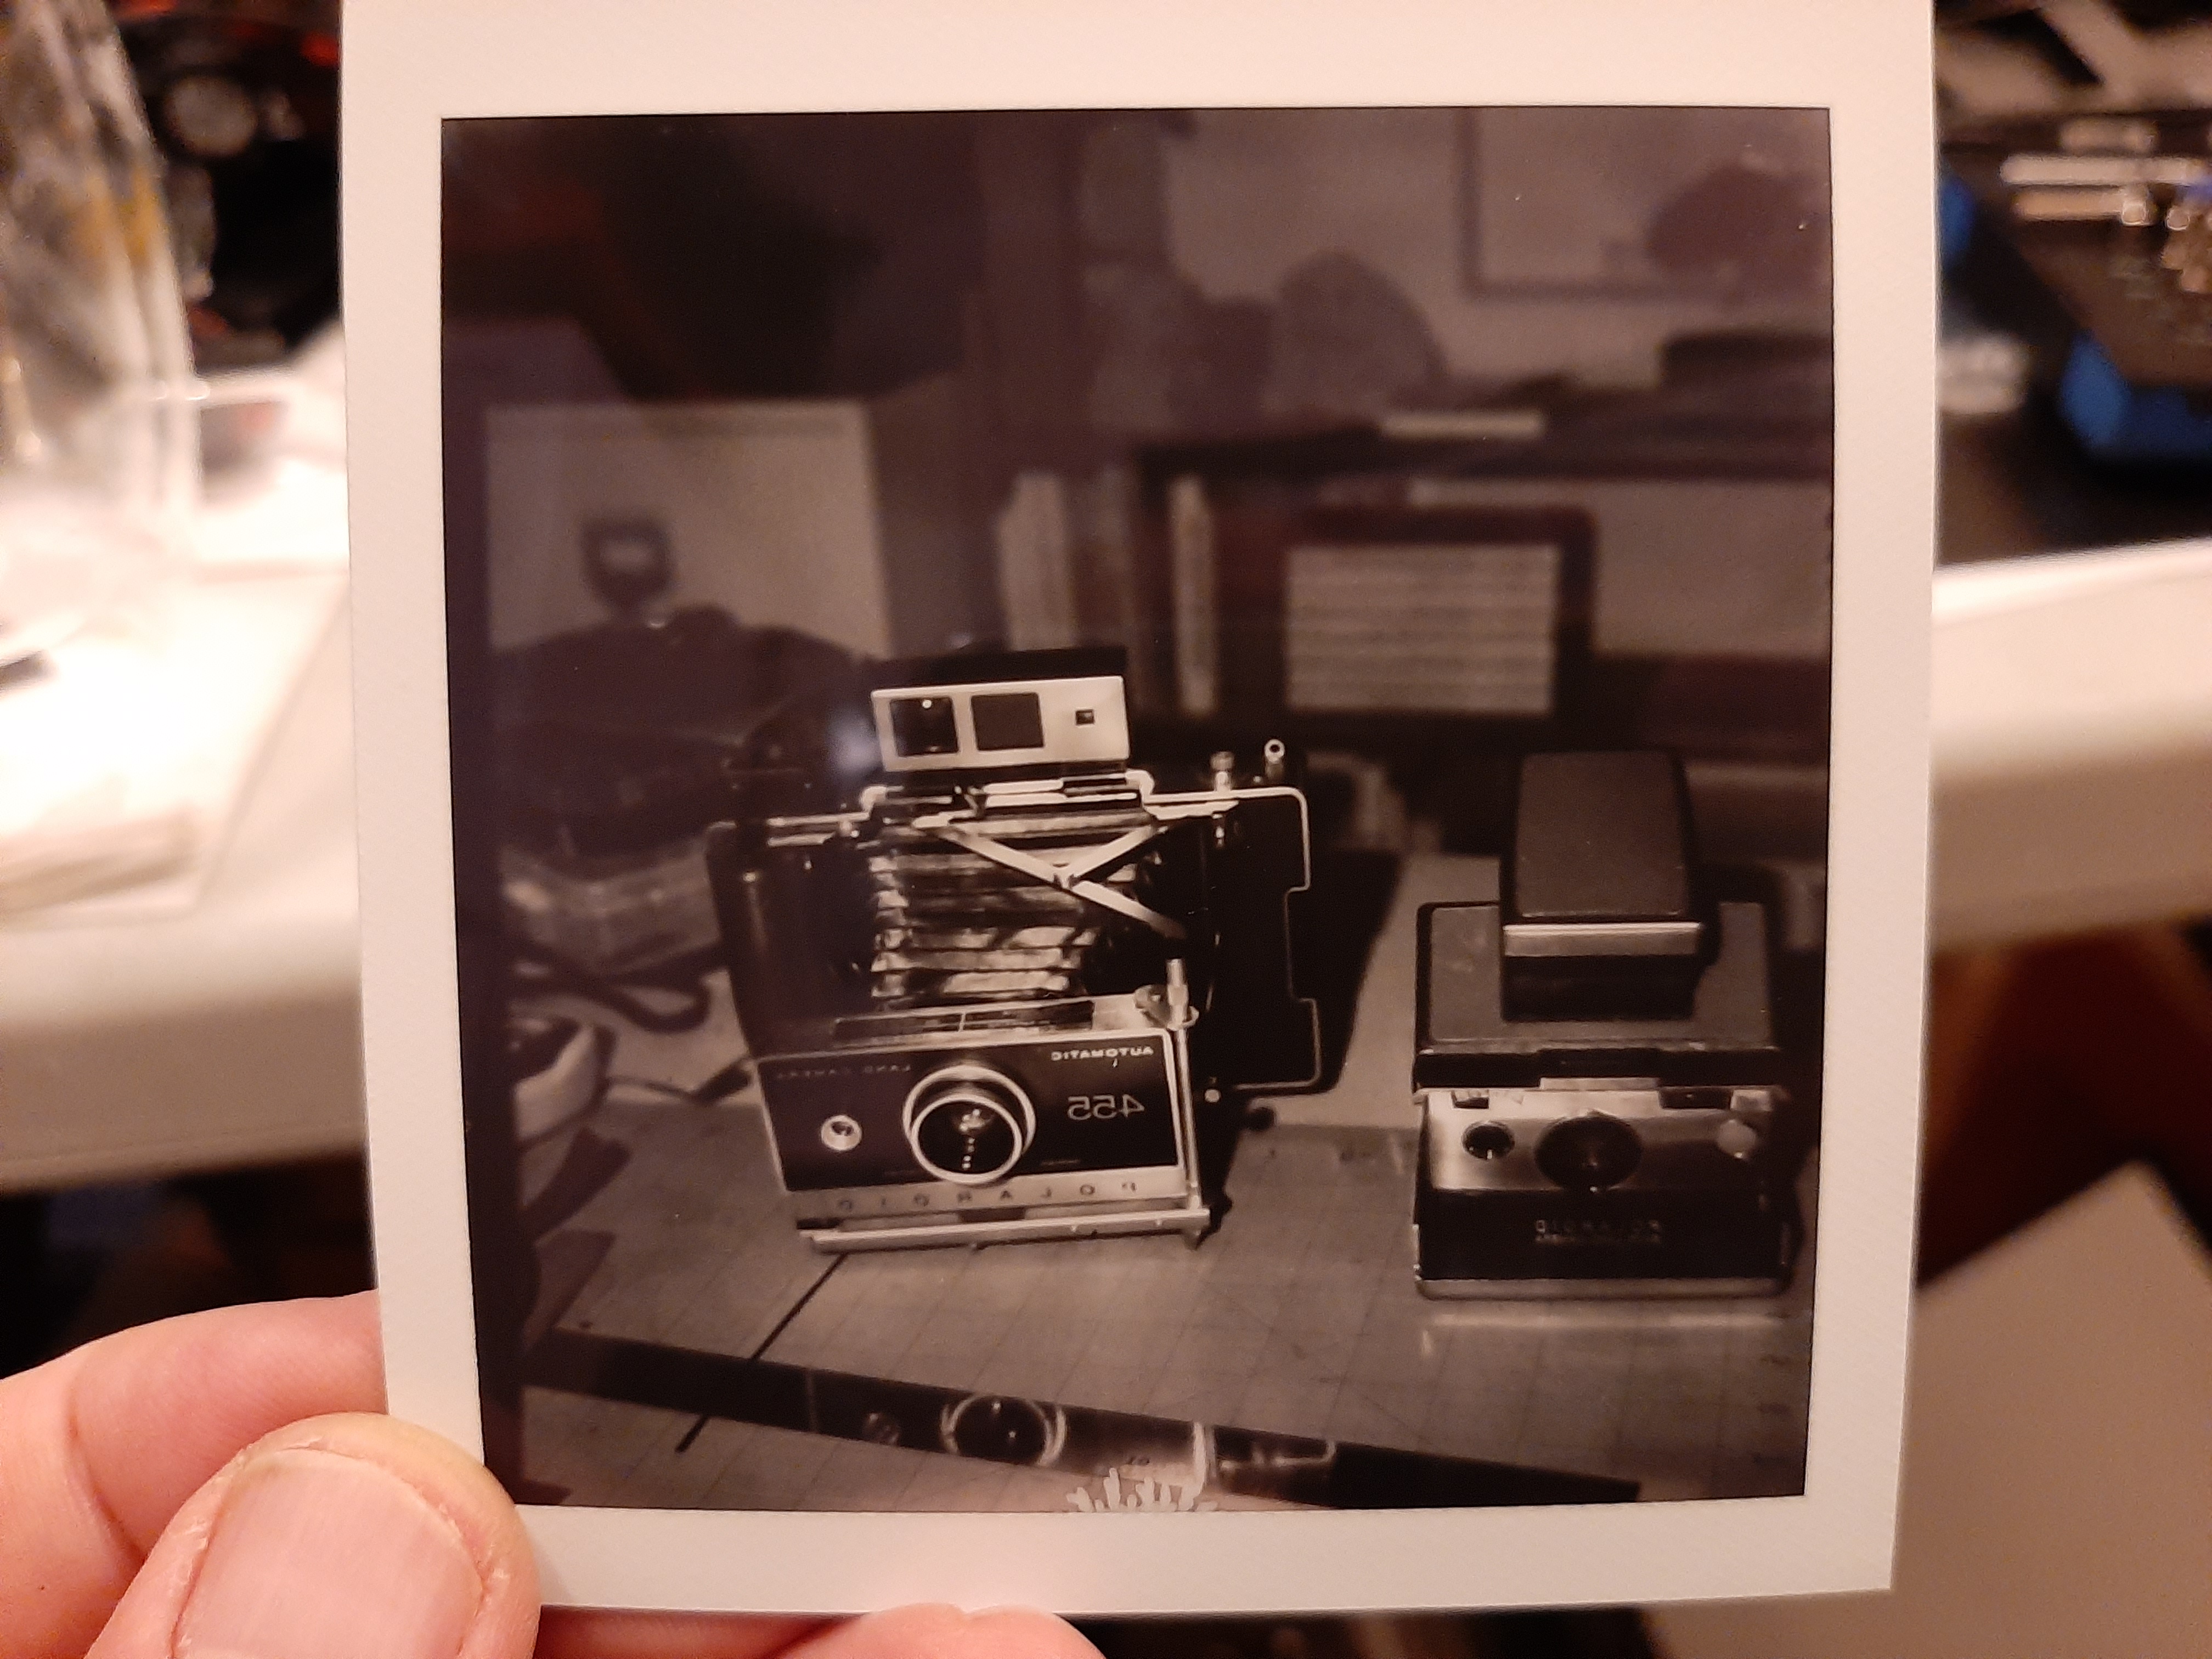
|
Counting the exposures can be done with a piece of paper with 8 tabs cut into it, taped onto the back or inside the cover. One tab is ripped off when a photo is ejected, otherwise, it's not easy remembering when you're on the last picture.
There you have it! An SX-450 that takes backwards square photos!