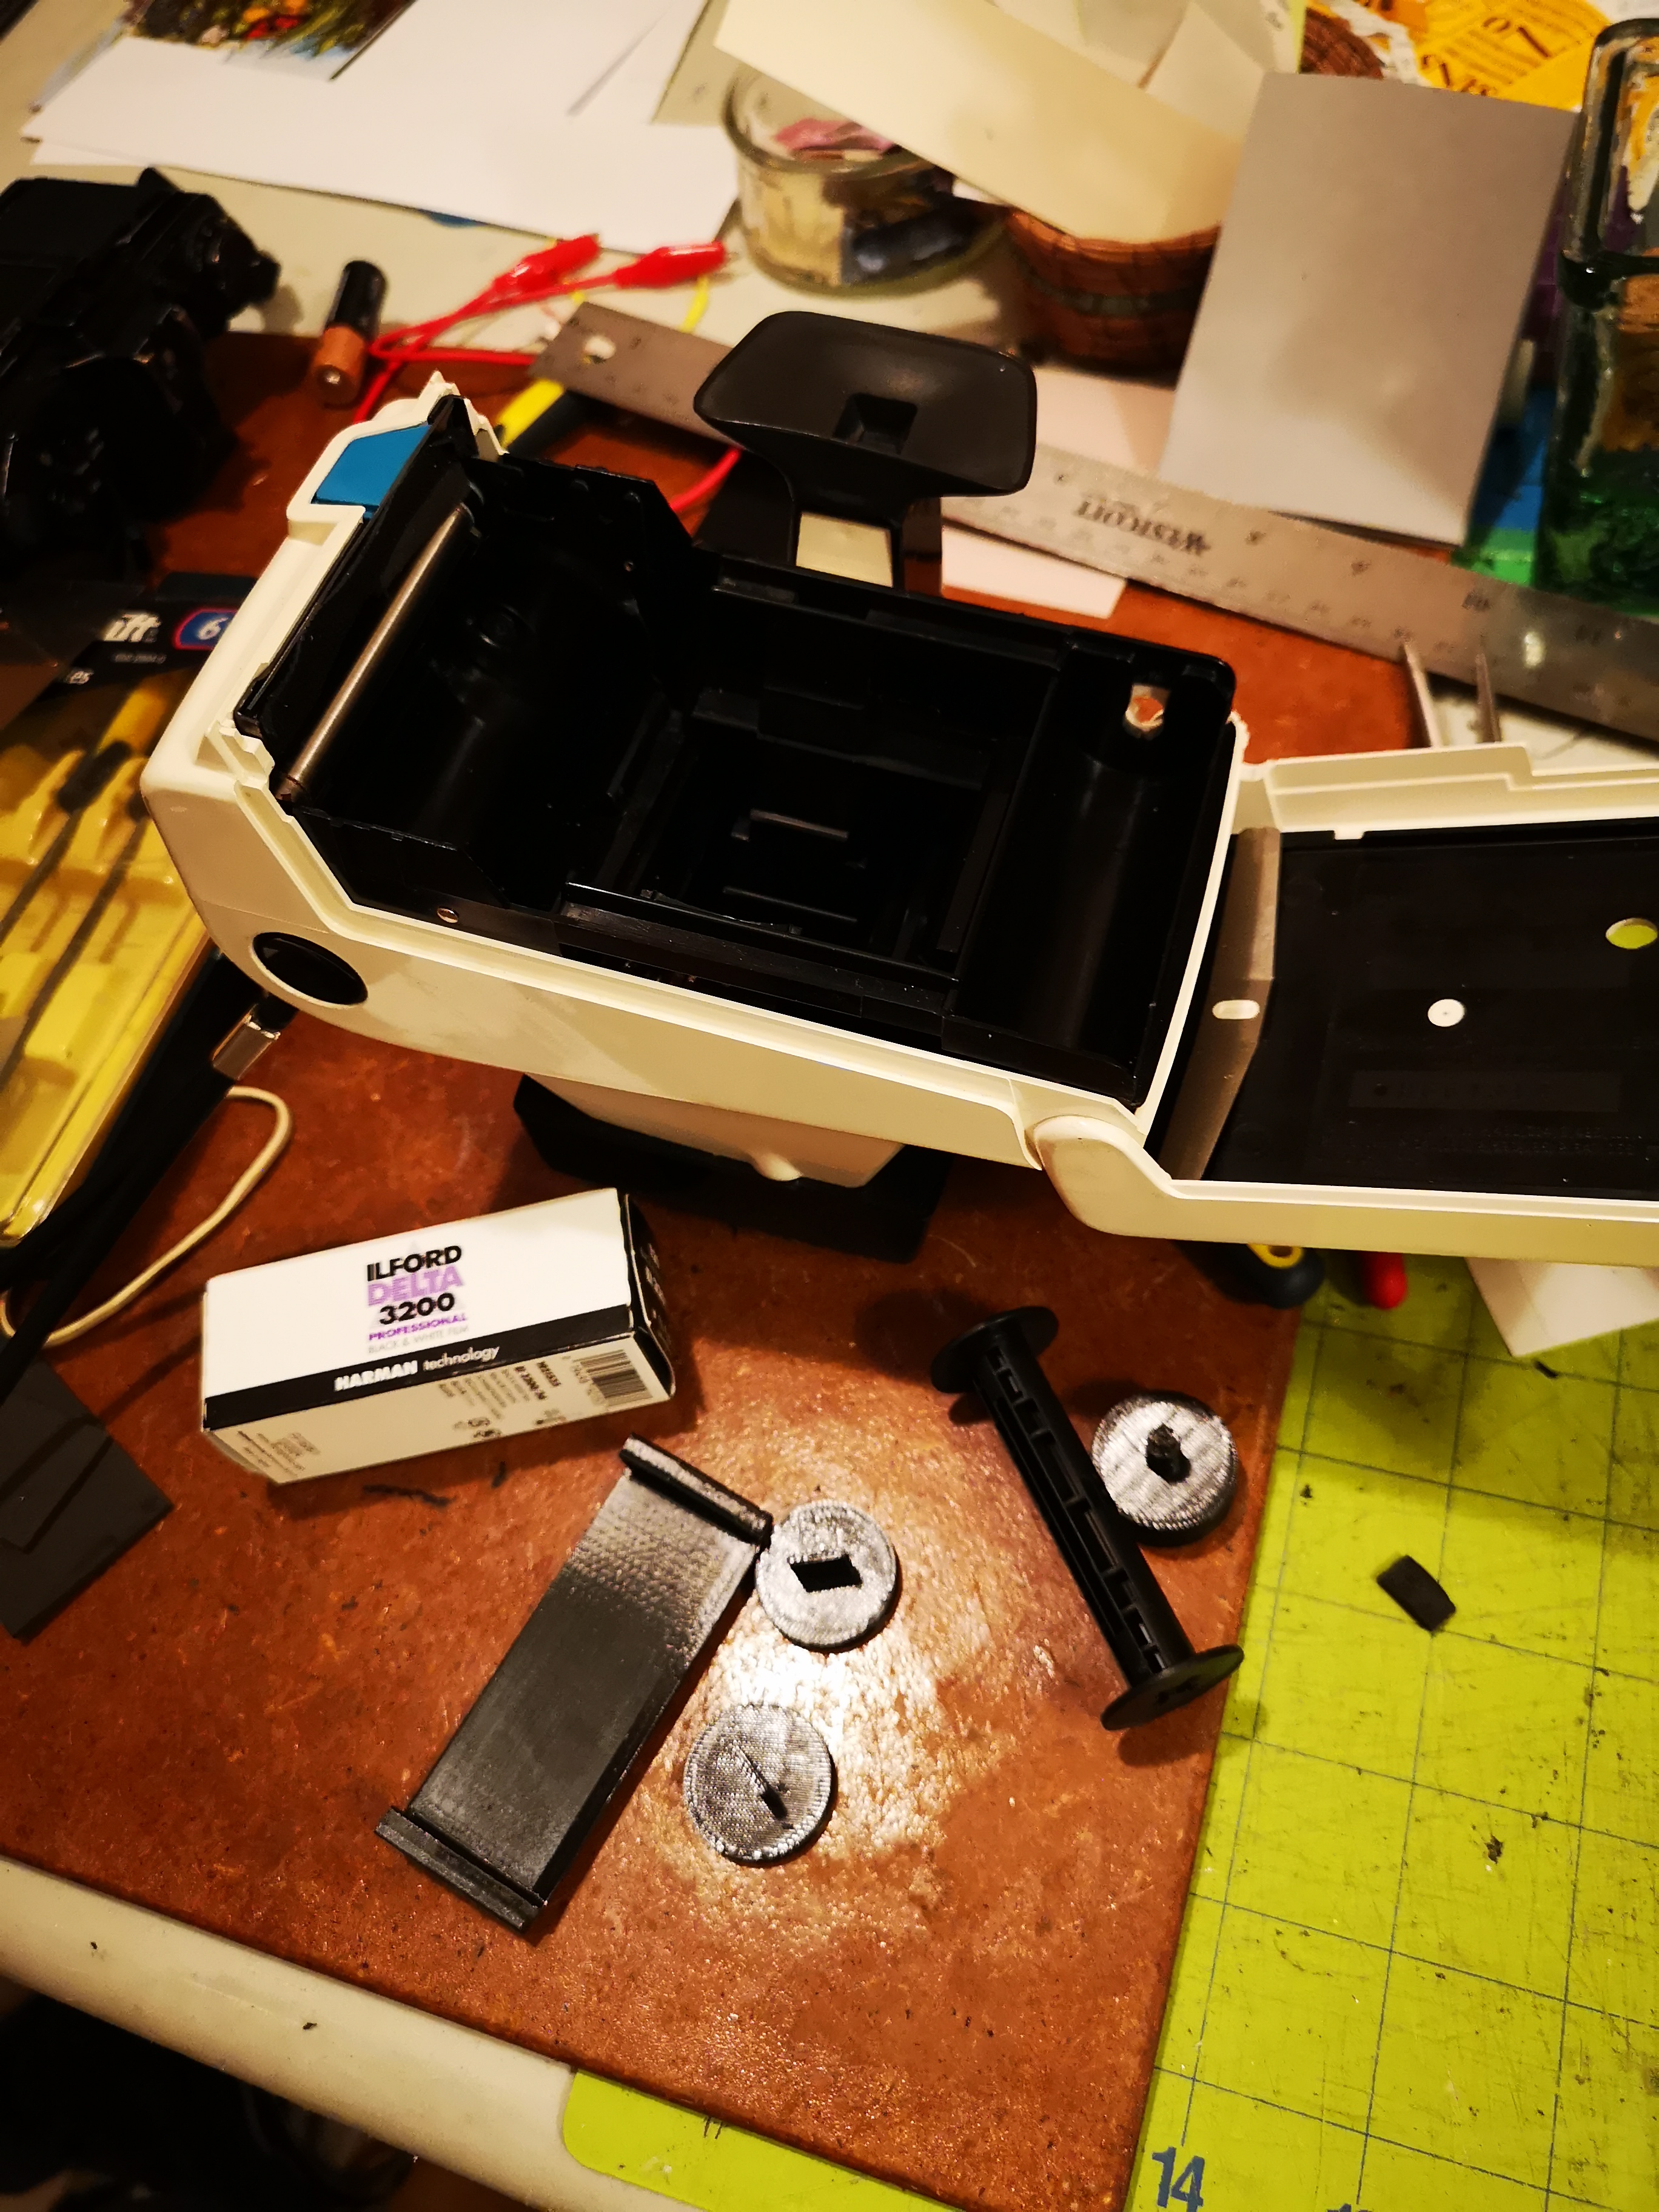
This will require access to a 3D printer to print the cartridge and a replacement back.
Download the 3D files here and print each of the files using supports and 3 top and bottom layers for light tightness. Remove the two black film guides near the rollers by cutting them out. Tape over the space between the roller and pressure plate. Drill a hole in the back for the exposure counter hole. This will use the 6x9 exposure numbers on the 120 film backing paper. Insert the film guide/light baffle on the left side of the camera and make sure it seats down to the bottom. If it doesn't file it until the top film guide is at the same level as the guide on the right side. Glue it in place. Drill a hole in the top right of the camera for the wind knob.
To use, put the spool ends onto an empty 120 spool with the drive spool end facing up. Drop the roll of film into the left chamber and feed the backing paper into the take up spool. Drop the take up spool into place and close the door (which you will want to seal off from light). Insert the wind knob and advance the film to the first exposure. To use the camera, aim at your subject and squeeze the shutter knob while twisting it until it says "YES" in the viewfinder. This will stop the aperture down so the exposure will be correct. This conversion should work with AG-1 bulbs as well, but if you use them, you will need to set the distance by twisting the shutter knob so that the exposure will be correct. Snap the picture and advance the film to the next frame.
You can either find a red filter to cover the film counter hole, and/or you can place a piece of black tape over it so light won't get in between photos. It's best to advance the film in the shade. You may also need to seal the light from the hinge using black tape on the outside or inside of the hinge.